
| Version 17 (modified by , 10 years ago) (diff) |
|---|
How to Create a Multi-Point VLAN On OpenGENI
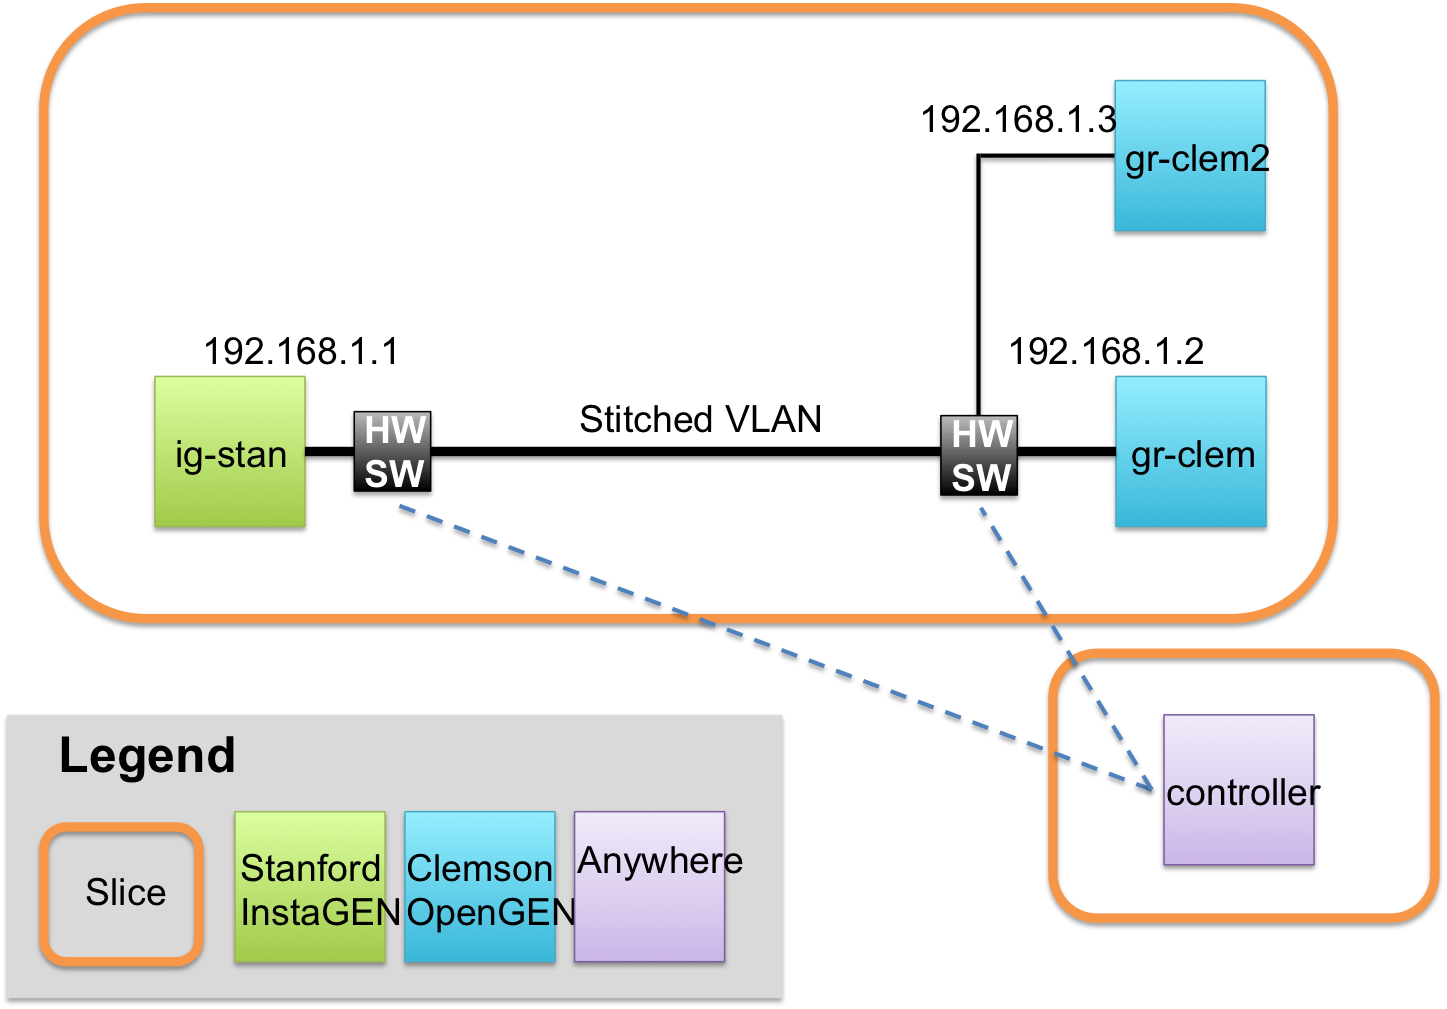
These steps should allow you to create a multi-point VLAN spanning multiple sites using a combination of InstaGENI and OpenGENI nodes as shown in the figure.
You need 2 slices (called MYSLICE and MYSLICE2 below) and 3 RSpecs. If you run the controller outside of GENI on your own machine you only need one slice (MYSLICE2 and 2 RSpecs.)
Steps
Do the steps in the following order:
1) Create a stitched slice between the two AMs, with one VM/bare metal on either side, but use the -o option to stitcher to generate the request RSpecs. It places multiple rspecs in /tmp, one for each aggregate.
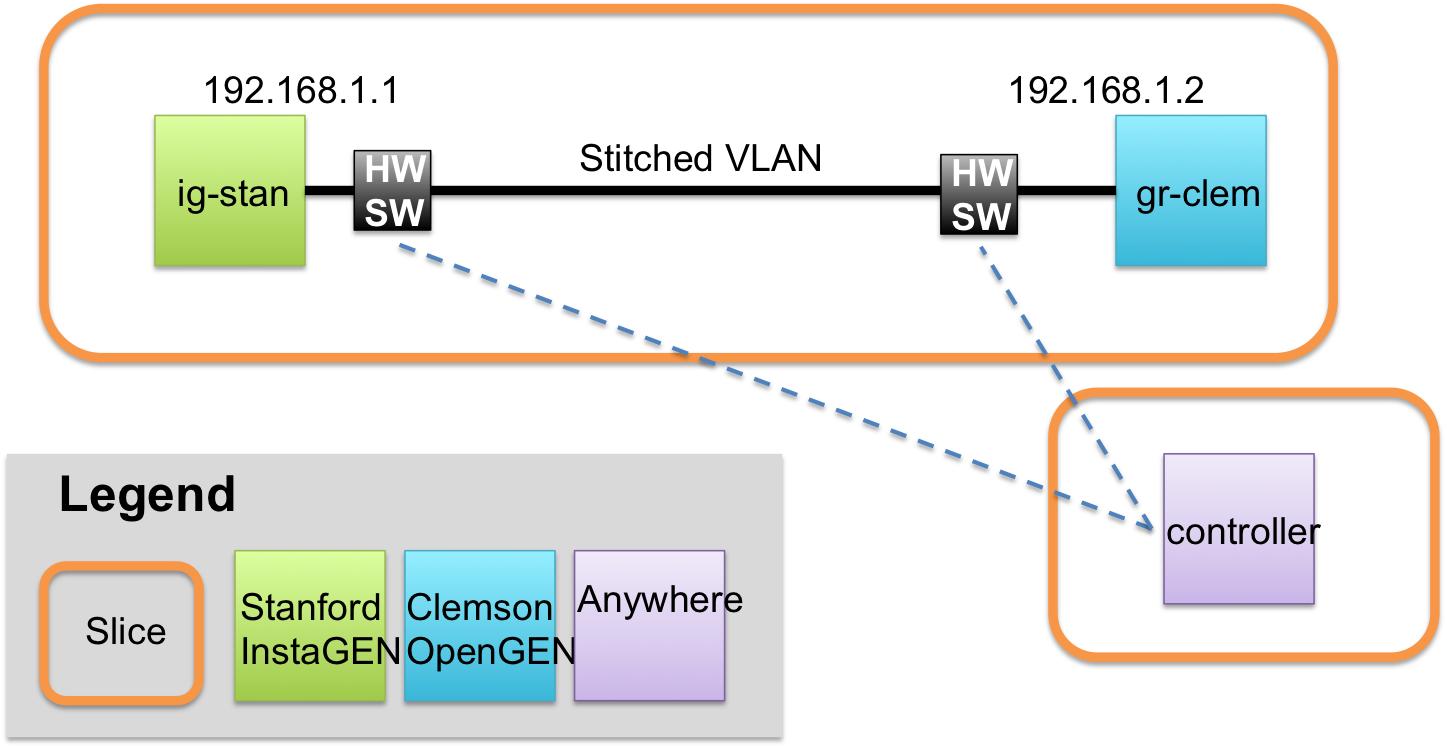
Log in to both VMs and ping across the dataplane to ensure the stitched path was set up properly.
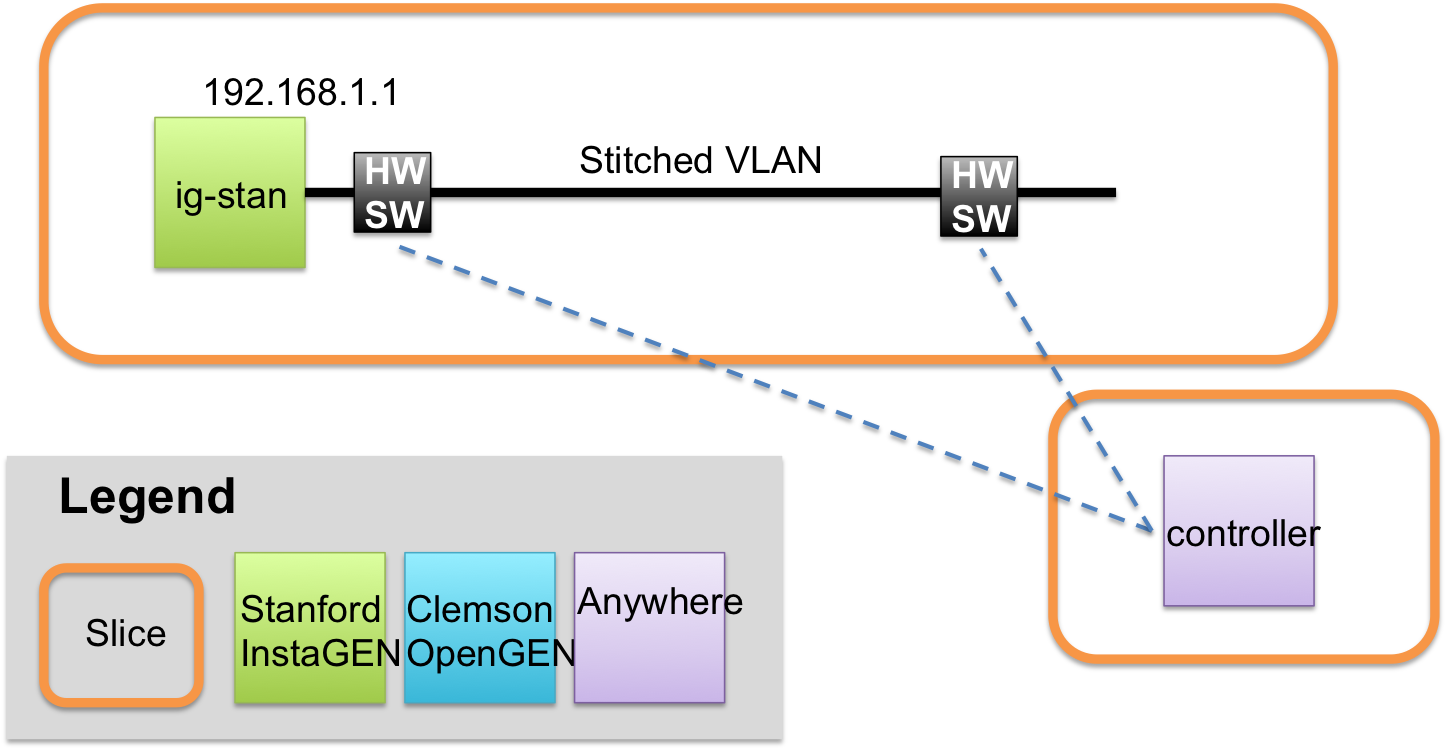
2) Using omni, delete the slice at the OpenGENI aggregate:
omni -V 3 -a http://130.127.88.98:5001 delete MYSLICE2
This will leave the stitched path to the other AM intact. You don’t want to delete the whole slice, just the bits on the Clemson OpenGENI AM, as we will upgrade this part of the slice.
3) Get the OpenGENI RSpec request from /tmp, which stitcher created, and edit it as follows:
a) Add as many VMs as you want, but make sure they have different names and IP addresses and at least one interface.
b) In the link section of the RSpec, add an interface for each VM. This will create a multipoint link. (OpenGENI supports multipoint links, though this might not be true for the rest of GENI).
Compare these request RSpecs to see the change required:
4) Provision this modified VM at the OpenGENI aggregate using omni (not stitcher).
This new slice will be plumbed into the stitched path using the same VLAN as the original stitched slice.
Attachments (6)
- stitchOG_1.png (210.7 KB) - added by 10 years ago.
- stitchOG_2.png (193.6 KB) - added by 10 years ago.
- clemOG-request-original.rspec (4.6 KB) - added by 10 years ago.
- clemOG-request-modified.rspec (4.8 KB) - added by 10 years ago.
- stitchOG_3.png (245.0 KB) - added by 9 years ago.
-
StitchedOpenGENI.pptx (71.5 KB) - added by 9 years ago.
Original of pictures on this page
Download all attachments as: .zip