
| Version 7 (modified by , 10 years ago) (diff) |
|---|
On-Campus WiMAX
In this experiment, we'll explore what you can do with on-campus WiMAX.
More than a dozen campuses are now participating in GENI WiMAX. While anybody can use GENI WiMAX remotely, if you are on or near a WiMAX campus you can also do interactive, mobile, and live experiments.
Experiment Background
In this experiment, we'll run a WebRTC video chat in which one participant is using a commodity laptop equipped with a USB WiMAX dongle. (The other participant is connected to the Internet over WiFi).
WebRTC is a new and evolving video standard for enabling voice, video, and data communications in the browser - without plugins. A diverse and vibrant ecosystem of applications using WebRTC has grown up and around the standard in the last year.
Instrumenting the Experiment
We're using the oml4js library, a JavaScript library for collecting measurements from a website and storing them using OML. While the video chat is active, measurements from the chat will be continuously streamed to a local OML server on the laptop. After the experiment is over, we'll push the results to iRODS and examine them more closely there.
Experiment Procedure
The experiment procedure is as follows:
- The first peer visits the URL for the WebRTC app in Google Chrome. A bar at the top of the screen will ask if you are willing to let the browser access your camera; don't click allow until the second peer has joined the chat!
- The second peer visits the same URL
- Both peers click "Allow" and should now see video streams from each other's webcams
Post-Experiment
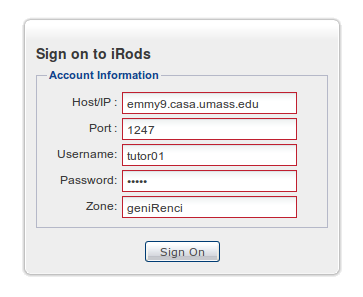
After the experiment, the OML-instrumented peer will send the measurement results to iRODS using the iput command. Inside iRODS, we'll use the iRODS web browser to visualize the results of our experiment.
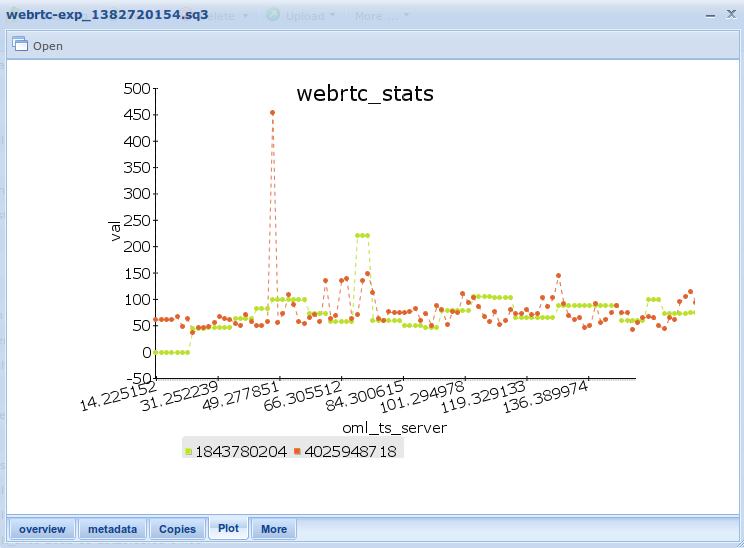
The measurement database is organized as a series of key-value-wrid triples. Each key defines a kind of measurement (e.g., RTT or estimated available bandwidth) and each wrid defines a measurement source (e.g., video sender, audio receiver, bandwidth estimator).
To visualize these measurements, we'll open the sq3 file from our experiment in iRODS and click on the plot tab. From here, we'll be able to set up our visualization.
For example, we can create the following plot, which shows the round trip time in milliseconds measured by WebRTC:
 Setting up plot |  Finished visualization |
There are many other metrics available - try plotting with the following keys:
- googFrameRateSent
- googFrameRateReceived
- googJitterReceived
- packetsLost
- googAvailableReceiveBandwidth
- googAvailableSendBandwidth
- googTransmitBitrate
Reconfiguring the WiMAX BS
A major advantage of on-campus WiMAX (over using a regular cellular carrier) for experimentation, is that you can reconfigure the WiMAX BS. In this experiment, we'll try using WebRTC with and without link-layer retransmission (ARQ) and observe the effect of ARQ on latency, packet loss, and video rate.
To reconfigure a base station, you need to log on to the testbed console using SSH:
ssh tutor01@witestlab.poly.edu
From there, you can change base station settings using a simple HTTP interface. We'll retry our experiment with ARQ turned on:
wget -qO- "http://wimaxrf:5052/wimaxrf/bs/set?arq=1"
Most reconfigurations only take effect after a reboot:
wget -qO- "http://wimaxrf:5052/wimaxrf/bs/restart"
You can see the full list of configurable options:
wget -qO- "http://wimaxrf:5052/wimaxrf/bs/get?all" | xml_pp
Attachments (3)
- googRtt.png (35.8 KB) - added by 10 years ago.
- googRttPlot.png (47.5 KB) - added by 10 years ago.
- irodslogin.png (12.5 KB) - added by 10 years ago.
Download all attachments as: .zip