
| Version 10 (modified by , 12 years ago) (diff) |
|---|
NetServ tutorial: step-by-step instruction
Preparation
- Start the provided VM and login as the geni user.
- Open the tutorial slides found at:
/home/geni/Tutorials/NetServ/gec12/tutorial/NetServTutorialSlides.pdf
Go to slide number 7 and leave it there for reference.
- Open Firefox and point it to the following URL:
Please note that you must replace "50" with your own user number throughout this tutorial.
- You will see the traffic visualization in your browser as follows:

Install NetServ module
- Open a terminal window, update NetServ software, and go to your NetServ user directory.
cd /netserv-root
svn up

cd tutorial/user50
ls -l
- The following files have been prepared for each user:
Makefile
NetServ/Example.java
example.mf

upload.sh
setup.sh
remove.sh

setup-request-1.txt
setup-request-2.txt
setup-request-3.txt
remove-request.txt

request-signer
private-key-50.pem
public-key-50.pem
- Build the Example module and upload it to the NetServ repository.
make
./upload.sh
- Send a SETUP message to the NetServ router to install the module.
While you are watching the browser window type the following command into the terminal window.
./setup.sh 1
The traffic will be redirected to D2 (the node on the lower right) and NetServ.Example will be added to the list of NetServ modules currently installed.
- The SETUP message looks like this:
$ cat setup-request-1.txt
SETUP NetServ.Example_1.0.0 NETSERV/0.1
url: http://pc485.emulab.net/modules/user50/example.jar
user: user50
ttl:  600
filter-ipv4: 10.10.2.2
filter-proto: udp
filter-port: 20050
properties: debug = false, ip = 10.10.3.2
- Send a REMOVE message to the NetServ router to remove the module.
./remove.sh
- The REMOVE message looks like this:
$ cat remove-request.txt
REMOVE NetServ.Example_1.0.0 NETSERV/0.1
user: user50
Develop NetServ module
- Open
Example.javawith gedit or your favorite editor.
gedit NetServ/Example.java &
Example.javais a typical NetServ packet processing module and it extends the NetServ.BuildingBlock.service.PktProcessorActivator class.
- Modify
Example.java.
Comment out processPkt() marked as scenario #1, and uncomment processPkt() scenario #2.
- Compile and upload the new version of the module.
make
./upload.sh
- While you're watching the browser screen, install the module into the NetServ router with the following command.
./setup.sh 2
Note that the "2" argument will make the script send
setup-request-2.txt, which includes two IP addresses in the properties header.
$ cat setup-request-2.txt
SETUP NetServ.Example_1.0.0 NETSERV/0.1
url: http://pc485.emulab.net/modules/user50/example.jar
user: user50
ttl:  600
filter-ipv4: 10.10.2.2
filter-proto: udp
filter-port: 20050
properties: debug = false, ip = 10.10.2.2  10.10.3.2
- Update the module properties by sending another SETUP message.
By sending a SETUP message for a module that is already installed, you can update its properties and refresh its TTL.
Try sending
setup-request-3.txtto the NetServ router:
./setup.sh 3
This SETUP request contains a non-existing IP address as the packet destination, which will make the NetServ node drop the incoming packets.
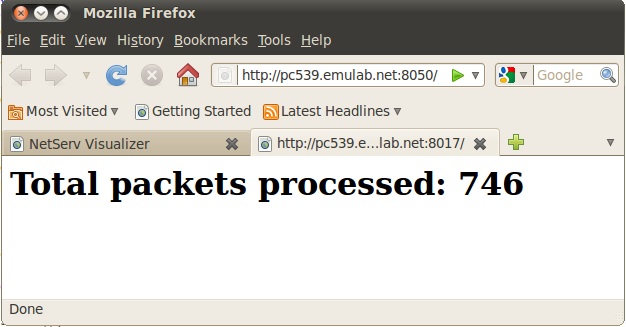
- Example.java also contains an embedded web server. Thus, it is not only a packet processing module but also a server module. The embedded web server is started when the module is installed (in initialize() method) and stopped when the module is removed (in cleanup() method). See the startHttpServer() method for what the web server does.
- Open a new tab on your browser and go to the following URL (replace "XX" with your own user number):
The embedded web server will respond with the current packet count as shown below.

(Optional) Run NetServ node locally
- Open another terminal window and start the NetServ router.
Type the "GENI User" password when asked.
cd /netserv-root/core/linux/
sudo su
.  setenv-i386-ubuntu
./run-controller.sh  conf-default.xml
The
conf-default.xmlfile specifies a sample configuration for a single container.
- Open two more terminal windows (they don't have to be big).
On one window, start Netcat in server mode, listening on UDP port 22222:
nc -u -l 22222
On the other window, start Netcat in client mode, connecting to the UDP port 22222 on the localhost:
nc -u 127.0.0.1 22222
Test the chat-like connection by typing something in the Netcat client window. You should see the same characters appear on the server window.
- Open another terminal window and build the UDPEcho module.
cd /netserv-root/apps/udpecho/modules
make
- Install the UDPEcho module into the local NetServ router.
cd test
./setup.sh
You can switch to the NetServ router window and see the log output of the installation process.
- See UDPEcho in action!
Type something in the Netcat client window and see what happens. See also the debugging output from the UDPEcho module in the NetServ router window.
- Remove the UDPEcho module.
./remove.sh
Type something again in the Netcat client window and see what happens.
Please take a quick survey
A very quick survey. :-)
https://spreadsheets.google.com/spreadsheet/viewform?formkey=dGxxWFA1ckwxdWxaYlR5M3NvdjA2REE6MQ
Further information
NetServ home page:
Mailing list:
https://lists.cs.columbia.edu/cucslists/listinfo/netserv-users
Feedback or questions:
Jae Woo Lee <jae@cs.columbia.edu>
Roberto Francescangeli <francescangeli@diei.unipg.it>
Attachments (2)
- traffic.jpg (80.4 KB) - added by 13 years ago.
-
gec-webserver-screen.jpg (55.1 KB) - added by 12 years ago.
screenshot of the embedded webserver html page
Download all attachments as: .zip