
| Version 24 (modified by , 11 years ago) (diff) |
|---|
Tmix Resources Setup - Portal
This page describes how to reserve the resources for the Tmix Tutorial using GENI Portal.
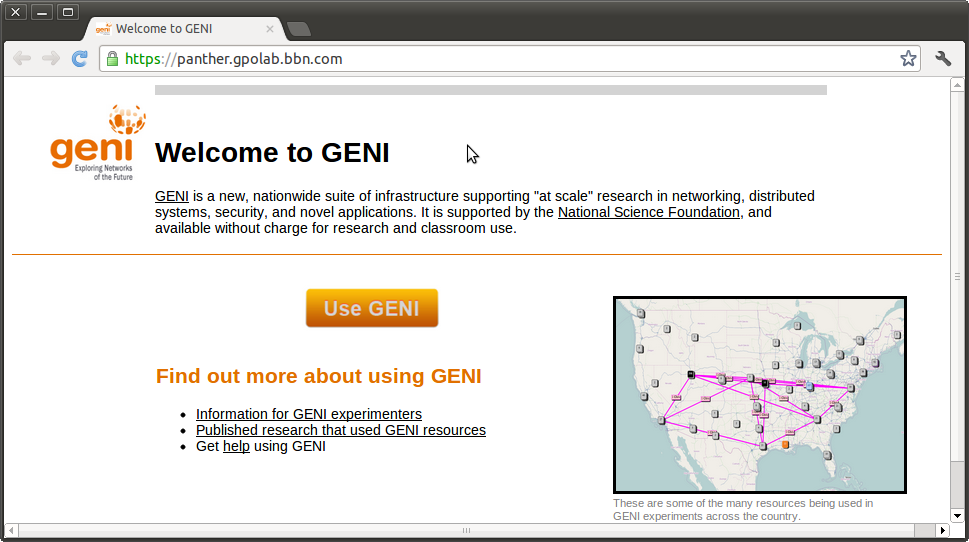
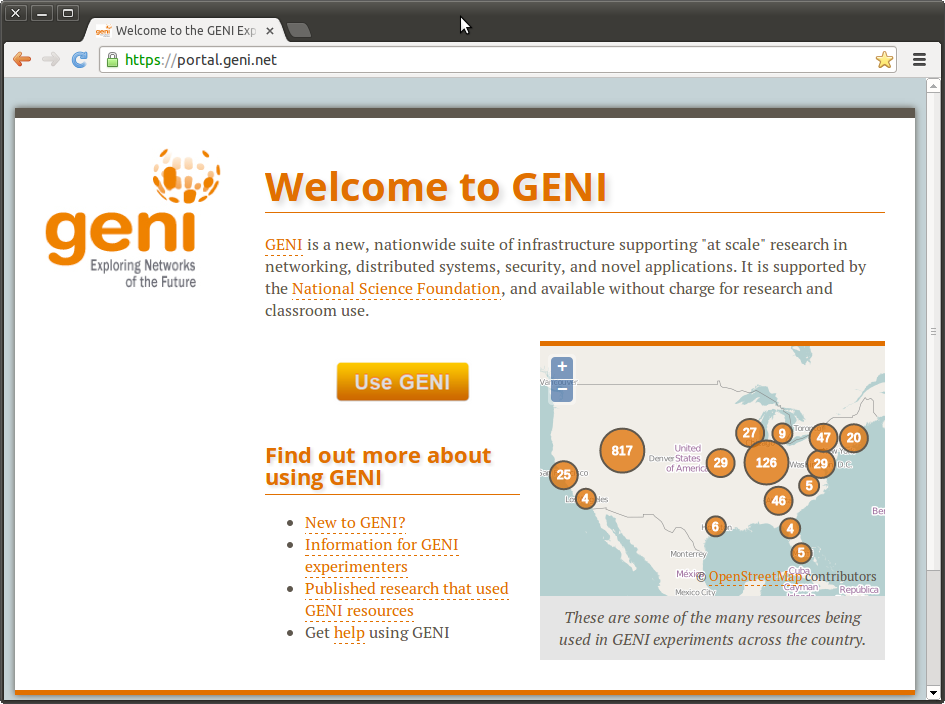
- Open a browser window and go to the GENI Portal: https://panther.gpolab.bbn.com/
- Click on the Use GENI button.

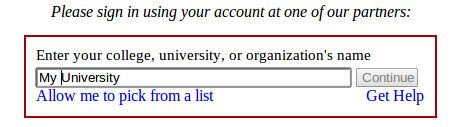
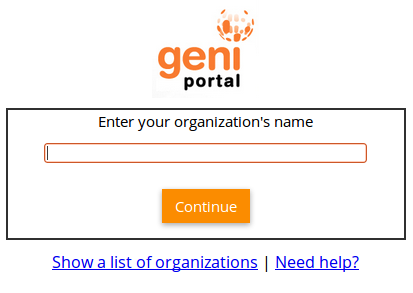
- Next you will be asked which institution or organization you are affiliated with. If your institution is listed as a suggested selection, click on the name of your institution. Otherwise, enter the name of your institution or organization in the text box. As you type, a list of selections will appear. Select your institution or orgainzation, then click continue.

- You will be asked to enter credentials for your institution or organization. This is likely the same username and password that you user for other services at your institution. Enter your credentials and then click to continue.
- If your credentials are accepted, you will be taken to your GENI Portal home page. Under the “My Projects” section you will find a list of projects you are a part of. Click on the name of the project you will create your experiment in. (If you are participating in this tutorial at a conference select the project created for the tutorial.)
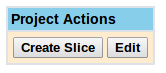
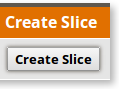
- The GENI Project page has information on the selected project, including project members and active slices. To create a slice of your own click on Create Slice in the Project Actions box at the top of the page.

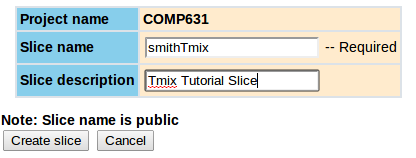
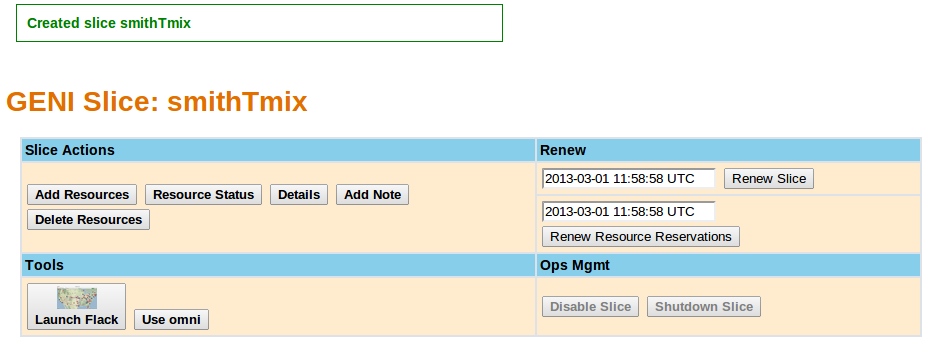
- Choose a name for your slice. This name needs to be unique among all the slices in GENI. To ensure uniqueness it is recommended that the slice name begin with your username and be followed with a descriptive string. For example, if your username was smith, you might choose a slice name of smithTmix. Enter your slice name and a description of the slice (optional) in the text boxes, and then click the Create slice button.

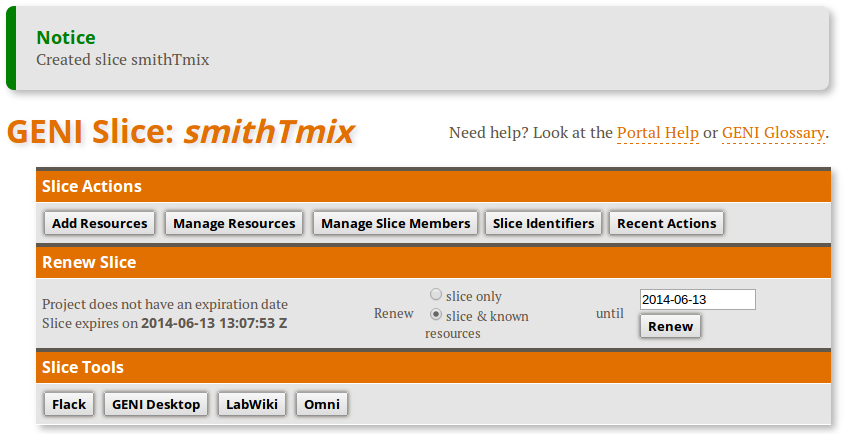
- Assuming the slice was successfully created, you will be taken to the slice page. Here you can add and delete resources, access various tools, and view the status of the slice. Click on the Add Resources button to add resources to your slice.

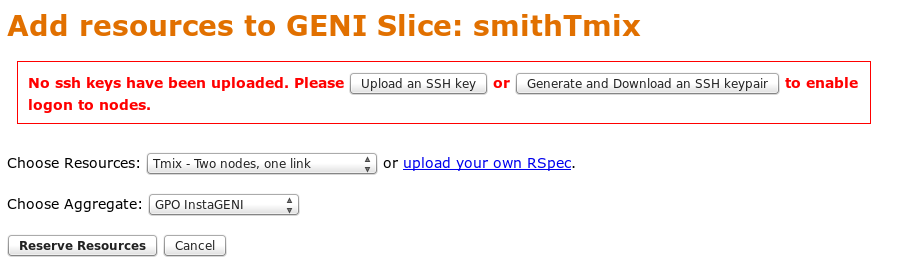
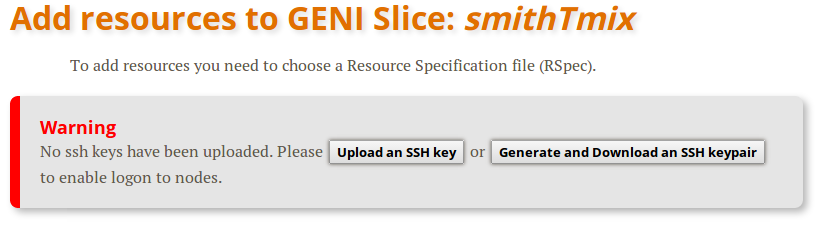
- If you have not already uploaded or generated and downloaded an SSH key for use with GENI you will see a red box with a message to that effect. If you have already set up your SSH key in Portal, skip to step 18.

- If you already have an SSH key you wish to use, click Upload an SSH key, and continue with step 11. Otherwise, click Generate and Download SSH keypair, and skip to step 13.
- Click Choose File, and select the public SSH key file you wish to use for GENI, and click Open. (Your key may be stored at this default location: ~/.ssh/geni_key.pub) Add an optional description, if you like, and then click Upload.
- If the key was uploaded successfully you should now see a message indicating success, and see a key in your SSH Keys list on your Profile page. To return to the add resources page click on Slices in the upper right-hand corner, and click on your slice name in the list. Then skip to step 18.
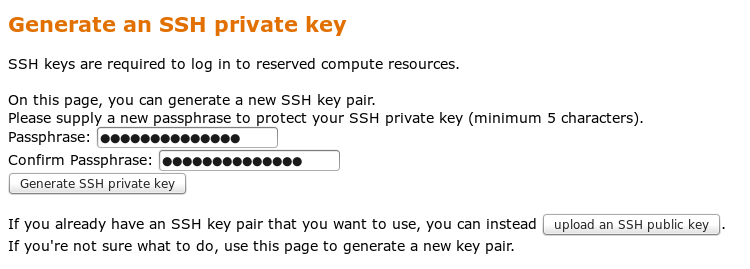
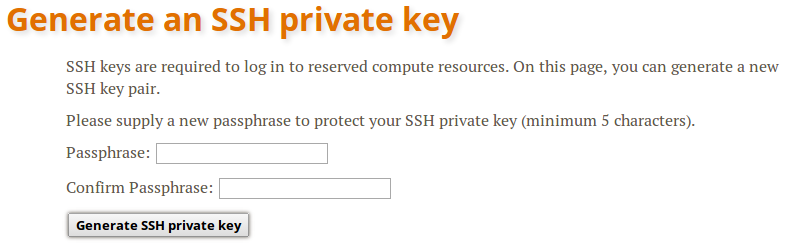
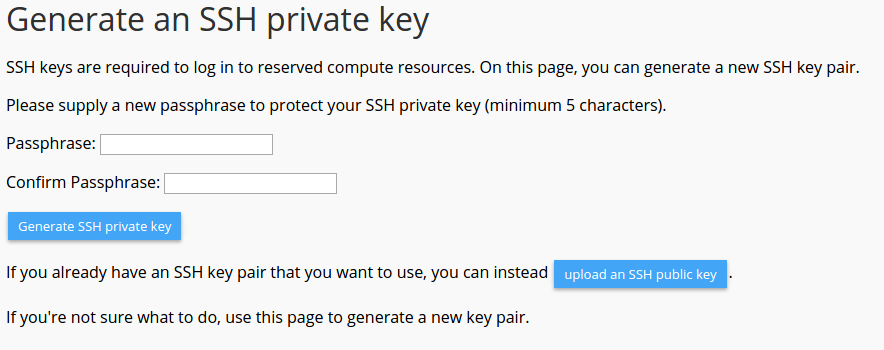
- To generate a new SSH key pair, type a Passphrase in the text box, and re-type it in the Confirm Passphrase text box. Click Generate SSH private key to proceed.

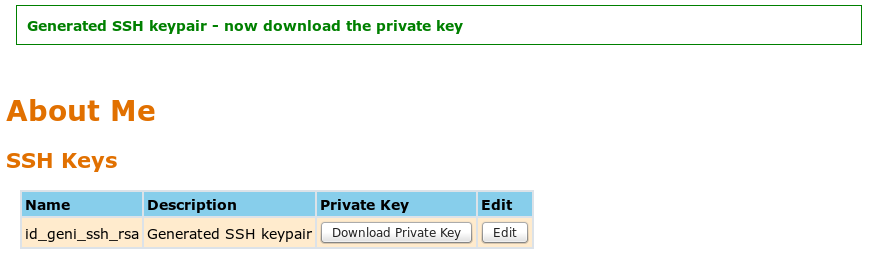
- If the key was generated successfully you should now see a message indicating success, and see the key pair in your SSH Keys list. Click on Download Private Key, and save the key to your machine. It is suggested that you save the key as "~/.ssh/geni_key". If you use a different path or filename, you will need to alter future commands which use the key, to include your chosen path and filename.

- In a terminal set the local permissions on the private key file by issuing the command
chmod 0600 ~/.ssh/geni_key
- To return to the add resources page click on Slices in the upper right-hand corner, and click on your slice name in the list.
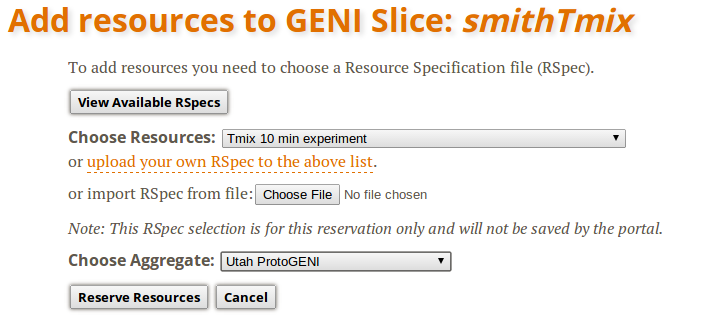
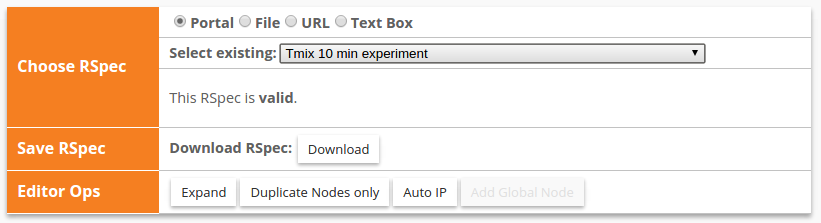
- On the Add resources page you can choose resources to add to your slice from a specific aggregate. For this tutorial select the “Tmix - Two nodes, one link” resource specification and the ProtoGENI Utah aggregate. Click the Reserve Resources button.

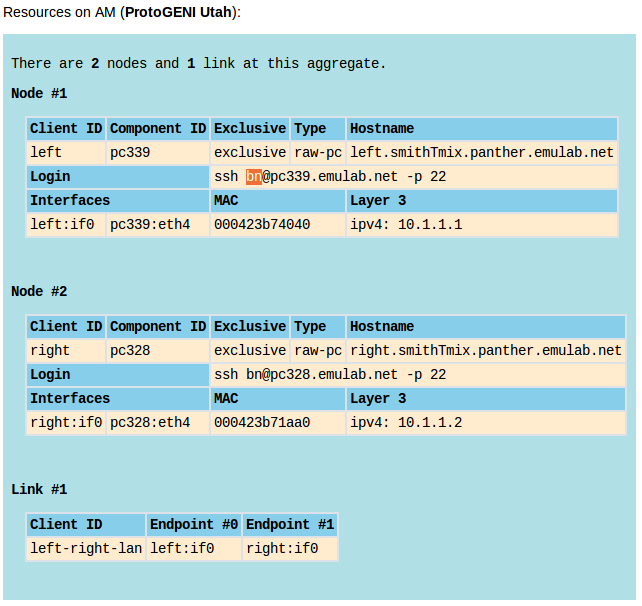
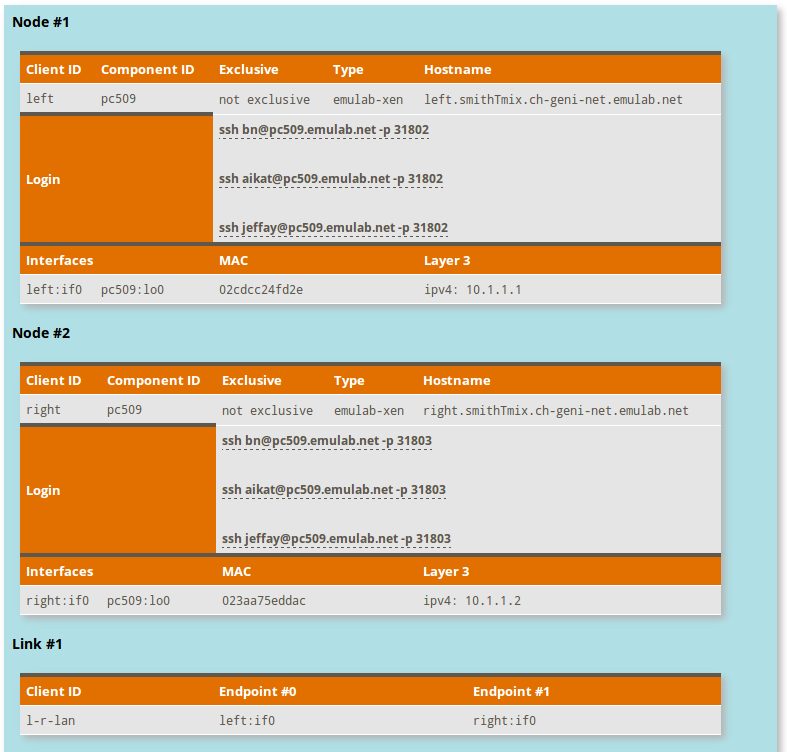
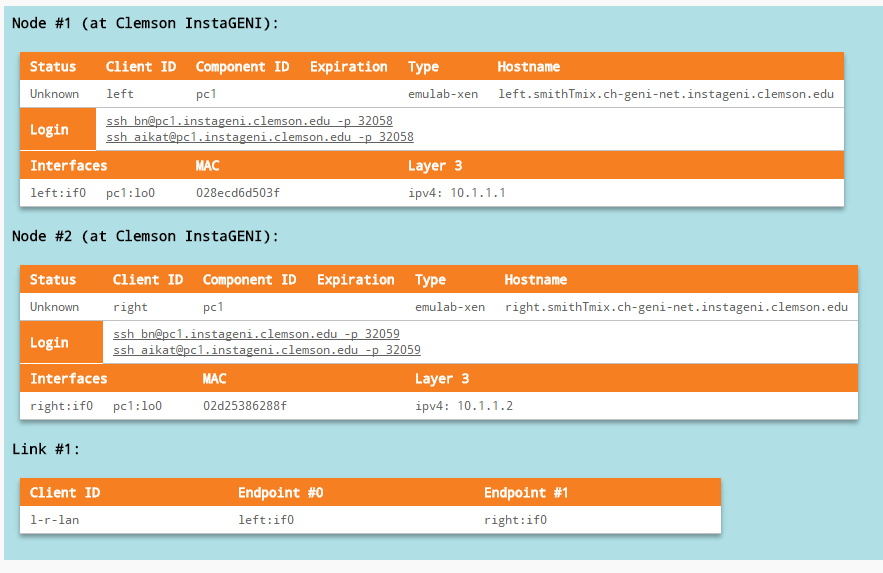
- The next page will indicate that it is reserving the requested resources. It may take a few minutes. Once the resources are allocated you will see a detailed list of the resources.

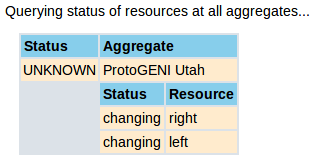
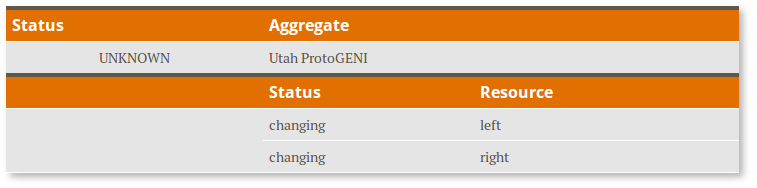
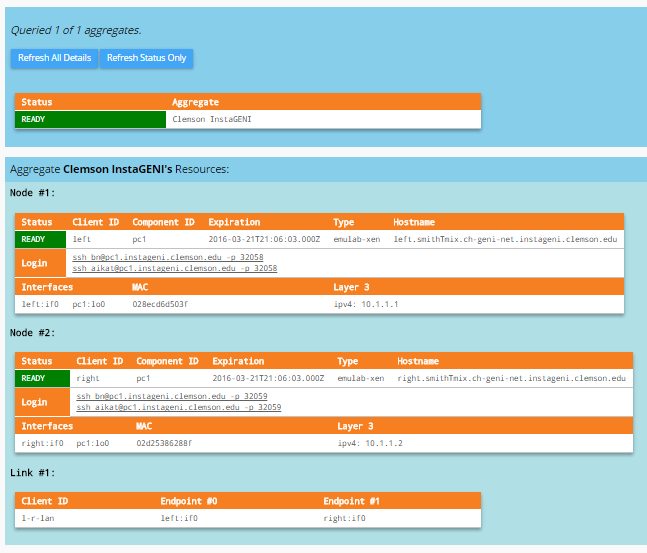
- Before leaving this page, note the Login line of each of the two nodes listed. Each login line will contain the hostname of the node, for example pc339.emulab.net. You will need the hostame of both nodes later in this tutorial. You can write them down, or return to this details page later. Click on the Slice <slicename> link at the top of the page to return to the Slice page. Click on Resource Status to view the detailed status of the resources. Likely the status page will show that the hosts are not yet ready. The resources have been allocated, but the nodes are being imaged, and booted. This process can take up to 10 minutes.

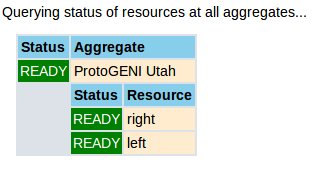
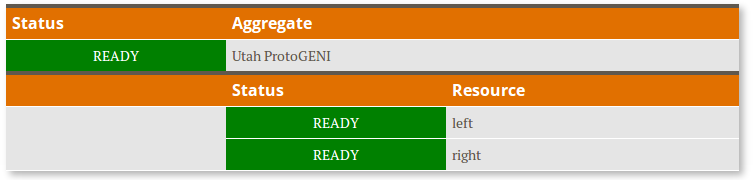
Once the nodes are ready you should see the status change to READY.

You now ready to log in to your nodes and run Tmix. Please continue to the next step back at the main Tutorial page.
Attachments (34)
-
createSlice.png (3.6 KB) - added by 11 years ago.
Create Slice Image
-
createSlice.2.png (3.6 KB) - added by 11 years ago.
Create Slice Image
-
partner.png (9.8 KB) - added by 11 years ago.
Partner Entry Image
-
resource.png (17.0 KB) - added by 11 years ago.
Resource Image
-
resources.png (46.6 KB) - added by 11 years ago.
Resources Image
-
slice.png (12.3 KB) - added by 11 years ago.
Slice Image
-
slicePage.png (30.1 KB) - added by 11 years ago.
Slice Page Image
-
status.png (9.6 KB) - added by 11 years ago.
Unknown Status Image
-
status.2.png (9.6 KB) - added by 11 years ago.
Unknown Status Image
-
status2.png (9.8 KB) - added by 11 years ago.
Status Ready Image
-
welcome.png (144.9 KB) - added by 11 years ago.
Welcome Page Image
-
NoSSH.png (26.7 KB) - added by 11 years ago.
No SSH Keys Message
-
GenerateSSH_Password.png (29.6 KB) - added by 11 years ago.
Generate Passphrase
-
GeneratedSSH.png (17.8 KB) - added by 11 years ago.
Generated SSH Key
-
welcomeGeni.png (151.8 KB) - added by 10 years ago.
Geni Portal Welcome Screen
-
createSlice.3.png (4.1 KB) - added by 10 years ago.
Create Slice button
-
CreateNewSlice.png (8.4 KB) - added by 10 years ago.
Create New Slice Page
-
SliceCreated.png (49.7 KB) - added by 10 years ago.
Slice Created Page
-
NeedKeys.png (30.9 KB) - added by 10 years ago.
Need SSH Key Error Message
-
GenerateKeys.png (27.8 KB) - added by 10 years ago.
Generate Keys Image
- DownloadKeys.png (6.4 KB) - added by 10 years ago.
-
AddResources.png (46.2 KB) - added by 10 years ago.
Add Resources Page
-
Resources.png (57.3 KB) - added by 10 years ago.
Resource Details
-
StatusNegative.png (10.7 KB) - added by 10 years ago.
Status before nodes are ready
-
StatusReady.png (11.0 KB) - added by 10 years ago.
Status ready screen
- UseGENI.png (12.3 KB) - added by 8 years ago.
- orgName.png (19.5 KB) - added by 8 years ago.
- generate.png (41.2 KB) - added by 8 years ago.
- newSlice.png (1.4 KB) - added by 8 years ago.
- slice.2.png (10.2 KB) - added by 8 years ago.
- addResources.png (14.5 KB) - added by 8 years ago.
- resources.2.png (24.1 KB) - added by 8 years ago.
- reserved.png (36.7 KB) - added by 8 years ago.
- ready.png (41.4 KB) - added by 8 years ago.
Download all attachments as: .zip