
| Version 20 (modified by , 9 years ago) (diff) |
|---|
GENI Desktop Tutorial (Summer Camp 2015 UConn)
1. Introduction
This tutorial consists of three parts:
- Basic GENI Desktop Operations
- Brief Introduction to OpenFlow
- Flow Installation and Monitoring in the GENI Desktop
Important URLs
| To use the GENI Desktop, go to | https://genidesktop.netlab.uky.edu |
| A general tutorial for the GENI Desktop | http://groups.geni.net/geni/wiki/GENIExperimenter/Tutorials/GENIDesktop |
| This page is located at | http://groups.geni.net/geni/wiki/GeniDesktop/Summer_Camp_2015 |
2. Basic GENI Desktop Operations
Part I: Setup
- Follow the instructions of the general tutorial for the GENI Desktop to create a topology with three Xen nodes as shown below.

Part II: Execute
- Step 1: Copy a file to selected nodes.
- Download these two files (attachment:runs, attachment:runc) to a local directory.
- Click on "File Upload" module
- Click on "Browse" on the upright part of the window. Select both files you downloaded (runs, runc)
- Click on "Upload Files to GENI Cloud"
- Highlight two nodes (A and B) in the topology window (click, then shift-click)
- Click on "Set Selected Nodes"
- Click on "Distribute" (The process is done when two green bars show up and then disappear)
- Close the window for file upload
- Step 2: Run a command on the selected nodes.
- Click on "Command" module
- Highlight all three nodes (A, B, and C)
- Click on "Set Selection"
- Type "sudo apt-get install iperf" in the text box.
- Click on "Run Command" (The process is finished when green check marks appear)
- Close the window for run command
- Step 3: Monitor the traffic of the selected interface.
- Click on "Passive Graphs" module
- From the drop-down menu for "Nodes", pick "B"
- From the drop-down menu for "Graphs", pick "IP Traffic" and "TCP Graph"
- Click on "LiveUpdate" to make it "LiveUpdate(On)"
- Click on "ApplyConfig"
- Scroll to show the traffic figures (IP and/or TCP)
- Leave the traffic window there (Do not close it)
- Step 4: Login by ssh to the selected nodes.
- Highlight node B
- Click on "SSH" module
- Click on "Open Browser SSH"
- Make sure file "runs" is there. Then type "sh runs".
- Go back to GENI Desktop Tab/Window
- Make sure the information window is open.
- Mouse over the link connecting nodes A and B, and write down the IP address of B.
- Highlight node A
- Click on "SSH" module
- Click on "Open Browser SSH"
- Edit file "runc" and replace "IPaddr" with the IP address of B.
- Type "sh runc" to run the script
- Go back to GENI Desktop Tab/Window. Observe the traffic window.
- You can go to the tab/window for A and type "sh runc" multiple times. See what happens in the traffic window.
Part III: Finish
- Tear down experiment
3. Introduction to OpenFlow
A brief introduction to OpenFlow can be found here. Note that this is adapted from GENI OpenFlow tutorial at http://groups.geni.net/geni/attachment/wiki/GENIExperimenter/Tutorials/OpenFlowOVS/IntroToOpenFlow_140123.pptx.
4. Flow Installation and Monitoring
To use these functions, go to the new URL at http://genidesktop.netlab.uky.edu/wild
Part I: Setup
Create two slices, one for the controller and one for an experiment using OVS nodes.
- Step 1: Create the controller slice
- Drag one "AAG Ctrl" node to the canvas.
- Click on the node
- Check "Publicly Routable IP" box for the controller node.
- You may change the name of the node.
- Click on "Site X" where X is a number. Choose any InstaGENI rack from the drop-down menu for Aggregate.
- Click on "Allocate resources using this RSPEC"
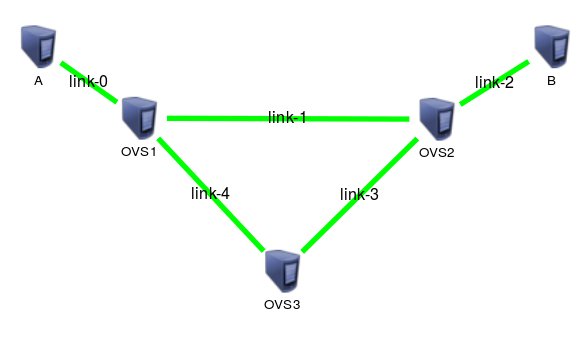
- Step 2: Create the experiment slice with a topology consisting of of three OVS nodes and two Xen nodes as shown below.
- Drag "GD OVS" icon node to the canvas for the three OVS nodes.
- Drag "Xen VM" node to the canvas for the two hosts.
- Click on "Site X" to select an aggregate as above.
- Allocate the resources.

Part II: Execute
- Step 1: Figure out the public IP address of the controller after the controller slice is created. You can do "nslookup full_name_of_the_node" on a Linux terminal. Or you can follow these steps.
- Highlight the controller node.
- Click on "Command" module.
- Click on "set selection"
- Type "ifconfig eth0" in the text box and click on "Run Command"
- Write down the IP address of the controller.
- You may test the controller's web GUI by going to http://IP_address:8080/ (use admin and admin)
- Step 2: Run an initialization script on all OVS nodes in the experiment.
- Open up the slice containing the topology.
- Click on the "Command" module.
- Highlight all OVS nodes and click on the "Set Selection" button.
- Type the following command in the text box "sudo python /local/ovscmd.py -i IP_address", where IP_address is the controller's IP address you found in Step 1.
- Login to the controller's web GUI by going to http://IP_address:8080/ and check all OVS nodes were added.
- Step 3: Install, list, and delete flows on the experiment
- Click on "Flow Install" Module. Fill in the IP address of the controller.
- Check "Add ARP processing", "Add Subnet Gateways", and "No routing rules", then click on "Initialize".
- Select a path in the topology and highlight both nodes and links on the path.
- Fill in the form to set the flow. You can choose between TCP and UDP, between one-way or two-way paths, and the port numbers at the nodes. The selection between "Src" and "Dst" is only effective for one-way path.
- Click on "Install Flow".
- You can also try "Refresh List" to list the current flows or "Delete Flow" to delete a flow from the list.
- Step 4: Monitor per-flow performance
- Click on "Flow Monitor" module. Fill in the IP address of the controller.
- Check "All Nodes" and click on "Query Statistics".
- Choose a flow to monitor at a selected node by going to a node and finding the flow you want to monitor. Then click on "Packets" or "Bytes". A graph of live measurement will show.
- Send traffic (ping, iperf, nc, etc) from end host A to end host B in the experiment.
Part III: Finish
- Tear down experiment
Attachments (5)
-
runs (32 bytes) - added by 9 years ago.
run iperf server
-
runc (37 bytes) - added by 9 years ago.
run iperf client
- basic_topo3.png (8.7 KB) - added by 9 years ago.
- aag_topo3.png (25.8 KB) - added by 9 years ago.
-
OpenFlow.pdf (334.1 KB) - added by 9 years ago.
A Brief Introduction to OpenFlow
Download all attachments as: .zip