
Scalable Monitoring Evaluation
A first version of the Scalable Monitoring Demo was made available on July 13,2010. Software for sensor pod not available at the time. Scalable Sensing Service (S3)information provided included:
- Scalable Sending Service (S3) page detailing project overview, ProtoGENI details, tools, papers, etc.
- README page outlining the manual use of the tools.
- SensorPod Demonstration page which automates the manual procedure above,
This initial version was deemed not complete and evaluation stopped.
A second version of Scalable Monitoring Demo page was made available on July 27, 2010. This version is the the demo given at GEC8. Pointers given for this version:
- SensorPod Demonstration page.
- Basic "Help" associated with the Scalable Monitoring Demo
A third version of the Scalable Sensing Services code was made available on August 10, 2010. The software is available at Scalable Sensing Service web page from the References link, which point to a page including a link download S3 Code. This version still has all the issues with various pages not being available for review. After several days of evaluation this download version was placed on hold and no longer being evaluated.
Scalable Monitoring Findings
July 13th version findings
- Most of the link in the S3 web page point to an internal web server and are not available. This is to be addressed once outstanding legal approval takes place.
- Some link point to non-existing paths and some items that should be links are listed as text only.
July 27th version findings
- Step 10 in Demo Help page may take up to 10 minutes as S3 periodically fetches the data. Need to add the Step 10 delay to the "Help" pages.
- The Scalable Sending Service (S3) page is still being revised and not available.
- The README is still unchanged and requires clarifications.
August 10th version findings
- Extensive issues with Readme including:
- Incorrect instruction for path, file names, command syntax, etc.
- No context for operations.
- No clear distinction between demo steps and user installed setup.
- Significant amount of hard-coded values in package made it difficult to configure.
- Large amount of files included in the release package that were not intended to be part of the package.
After several exchanges about this source download, instructed to stop using the package and go back to demo page.
Scalable Monitoring How-to
Scalable Monitoring Demo How-to (July 27th version)
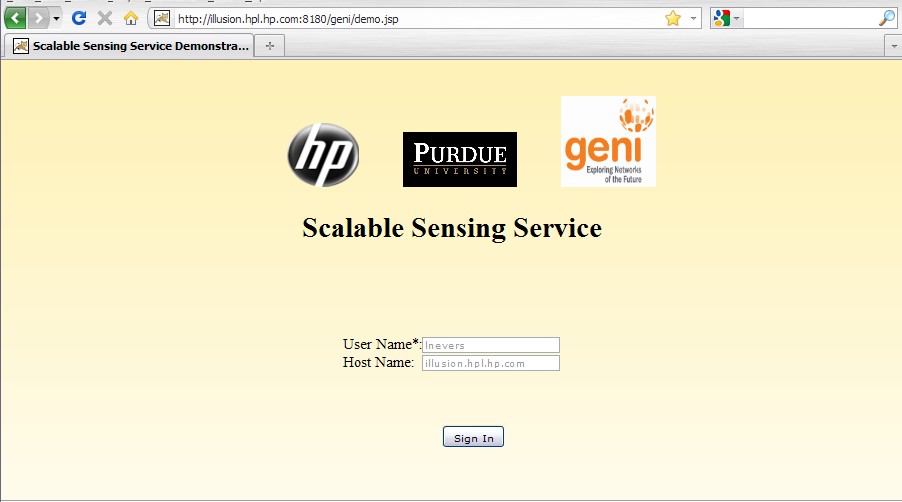
- Access to the Scalable Monitoring Demonstration page, user is prompted to enter any user name to sign in, no registration is required:

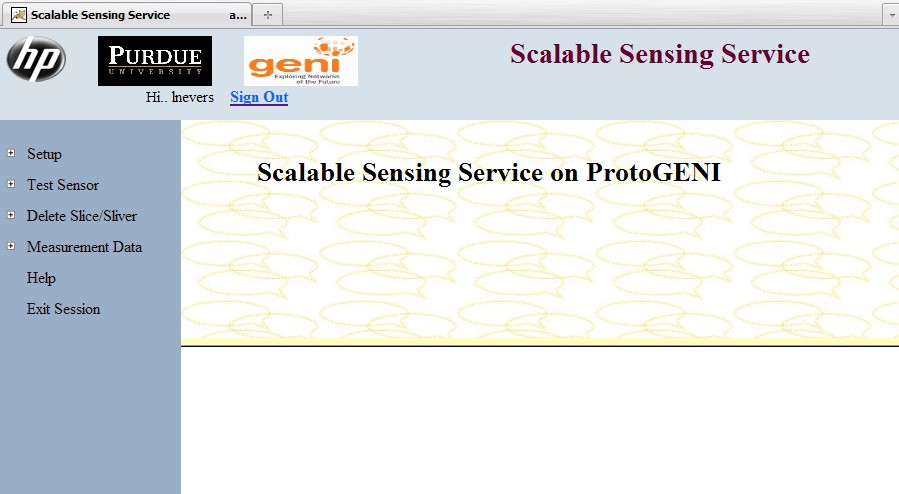
- After login, the user is presented with the following page:

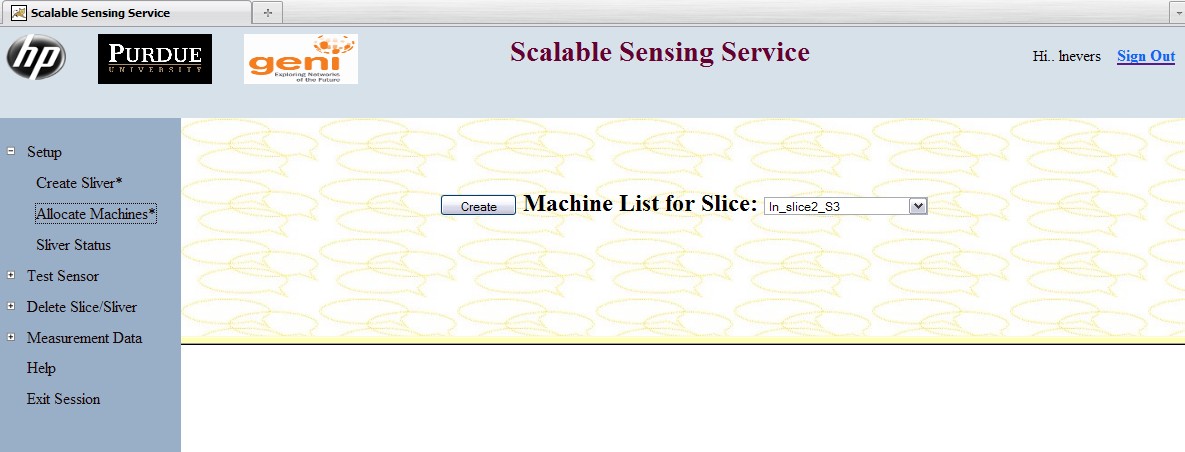
- At this point the user can create a sliver and choose the number of nodes by selecting "Setup->Create Sliver":

The sliver creation will generate this type of output:
COMMAND = SLIVER
SLICENAME = ln_slice2_S3
NODES = 3
USER = lnevers
SERVER = illusion.hpl.hp.com
Executing command -- mkdir -p /var/lib/tomcat5.5/webapps/geni/lnevers/ln_slice2_S3
Executing command -- echo ln_slice2_S3 >> /var/lib/tomcat5.5/webapps/geni/lnevers/sliceList.txt
Executing command -- echo 3 >> /var/lib/tomcat5.5/webapps/geni/lnevers/ln_slice2_S3/Nodes.txt
Executing command -- echo ln_slice2_S3 > /var/lib/tomcat5.5/webapps/geni/lnevers/ln_slice2_S3/SliceNameFile.txt
Executing command -- /home/genis3monitor/testscripts/registerslice.py -n ln_slice2_S3
No such slice registered here:Got my SA credential
Creating new slice called ln_slice2_S3
New slice created
Executing command -- /home/genis3monitor/testscripts/createsliver.py -n ln_slice2_S3  /home/genis3monitor/testscripts/threenode.rspec
Got my SA credential
<?xml version="1.0" encoding="UTF-8"?>
<rspec xmlns="http://www.protogeni.net/resources/rspec/0.1"
       xmlns:xsi="http://www.w3.org/2001/XMLSchema-instance"
       xsi:schemaLocation="http://www.protogeni.net/resources/rspec/0.1 http://www.protogeni.net/resources/rspec/0.1/request.xsd"
       type="request" >
<node virtual_id="node1"
	component_manager_uuid="urn:publicid:IDN+emulab.net+authority+cm"
       virtualization_type="emulab-vnode"

	tarfiles="/tmp  http://illusion.hpl.hp.com/csi.tar.gz"
	startup_command="/bin/sh /tmp/deploy_initialize.sh">

        <disk_image
        name="urn:publicid:IDN+emulab.net+image+emulab-ops//RHL90-STD" />
   <interface virtual_id="virt0"/>
   <interface virtual_id="virt1"/>
</node>

<node virtual_id="node2"
	component_manager_uuid="urn:publicid:IDN+emulab.net+authority+cm"
       virtualization_type="emulab-vnode"

	tarfiles="/tmp  http://illusion.hpl.hp.com/csi.tar.gz"
	startup_command="/bin/sh /tmp/deploy_initialize.sh">

       <disk_image
	name="urn:publicid:IDN+emulab.net+image+emulab-ops//RHL90-STD" />
   <interface virtual_id="virt0"/>
   <interface virtual_id="virt1"/>
</node>
<node virtual_id="node3"

	component_manager_uuid="urn:publicid:IDN+emulab.net+authority+cm"
       virtualization_type="emulab-vnode"

	tarfiles="/tmp  http://illusion.hpl.hp.com/csi.tar.gz"
	startup_command="/bin/sh /tmp/deploy_initialize.sh">

      <disk_image
	  name="urn:publicid:IDN+emulab.net+image+emulab-ops//RHL90-STD" />
   <interface virtual_id="virt0"/>
   <interface virtual_id="virt1"/>
</node>

<link virtual_id="link0">
<interface_ref virtual_interface_id="virt0"
                 virtual_node_id="node1"/>

  <interface_ref virtual_interface_id="virt0"
                 virtual_node_id="node2"/>
 </link>

<link virtual_id="link1">
<interface_ref virtual_interface_id="virt1"
                 virtual_node_id="node2"/>
  <interface_ref virtual_interface_id="virt0"
                 virtual_node_id="node3"/>
 </link>

<link virtual_id="link2">
<interface_ref virtual_interface_id="virt1"
                 virtual_node_id="node3"/>
  <interface_ref virtual_interface_id="virt1"
                 virtual_node_id="node1"/>
 </link>

</rspec>

Asking for slice credential for ln_slice2_S3
Got the slice credential
Creating the Sliver ...
Created the sliver
<rspec xmlns="http://www.protogeni.net/resources/rspec/0.1" xmlns:xsi="http://www.w3.org/2001/XMLSchema-instance" xsi:schemaLocation="http://www.protogeni.net/resources/rspec/0.1 http://www.protogeni.net/resources/rspec/0.1/request.xsd" type="request" valid_until="2010-07-30T01:23:53">
- The user can then "Allocate Machines":

Which results in the following:
COMMAND = MACHINELIST
SLICENAME = ln_slice2_S3
USER = lnevers
SERVER = illusion.hpl.hp.com
Executing command -- ssh-keyscan -f /var/lib/tomcat5.5/webapps/geni/lnevers/ln_slice2_S3/MachineList.txt -t rsa >> /home/genis3monitor.ssh/known_hosts
# pc155.emulab.net SSH-1.99-OpenSSH_3.5p1
# pc104.emulab.net SSH-1.99-OpenSSH_3.5p1
# pc120.emulab.net SSH-1.99-OpenSSH_3.5p1
Executing command -- ssh-keyscan -f /var/lib/tomcat5.5/webapps/geni/lnevers/ln_slice2_S3/MachineList.txt  -t rsa > /var/www .ssh/known_hosts
# pc155.emulab.net SSH-1.99-OpenSSH_3.5p1
# pc104.emulab.net SSH-1.99-OpenSSH_3.5p1
# pc120.emulab.net SSH-1.99-OpenSSH_3.5p1
Executing command -- echo /var/lib/tomcat5.5/webapps/geni/lnevers/ln_slice2_S3   >> /var/lib/tomcat5.5/webapps/geni/MasterList.txt
Executing command -- sort -u -o /var/lib/tomcat5.5/webapps/geni/MasterList.txt /var/lib/tomcat5.5/webapps/geni/MasterList.txt
- User can view the "Sliver Status":

The following status is returned:
COMMAND = STATUS
SLICENAME = ln_slice2_S3
USER = lnevers
SERVER = illusion.hpl.hp.com
Executing command -- /home/genis3monitor/testscripts/sliverstatus.py  -n ln_slice2_S3 2>&1 |tee /var/lib/tomcat5.5/webapps/geni/lneversln_slice2_S3/status.txt
Got my SA credential. Looking for slice ...
Found the slice, asking for a credential ...
Got the slice credential, asking for a sliver credential ...
Got the sliver credential, asking for sliver status
{'status': 'ready', 'state': 'started', 'details': {'urn:publicid:IDN+emulab.net+sliver+15163': {'status': 'ready', 'state': 'started', 'component_urn': 'urn:publicid:IDN+emulab.net+node+pc155', 'error': ''}, 'urn:publicid:IDN+emulab.net+sliver+15164': {'status': 'ready', 'state': 'started', 'component_urn': 'urn:publicid:IDN+emulab.net+node+pc104', 'error': ''}, 'urn:publicid:IDN+emulab.net+sliver+15165': {'status': 'ready', 'state': 'started', 'component_urn': 'urn:publicid:IDN+emulab.net+node+pc120', 'error': ''}}}
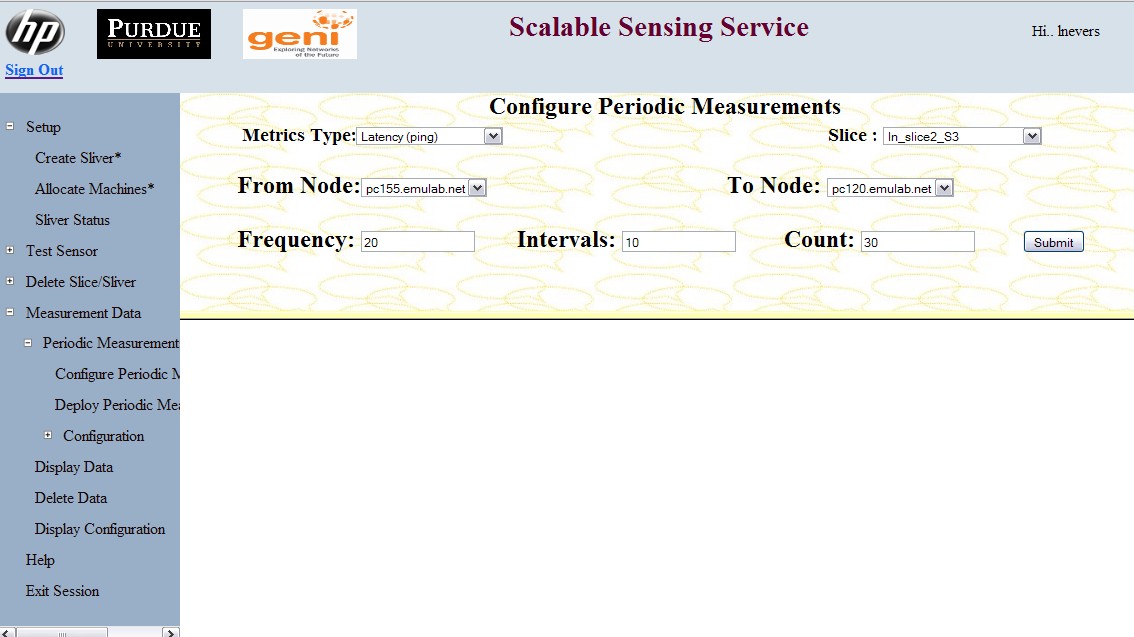
- Measurements can now be run. First example is Measurement Data->Periodic Measurement-> Configure Periodic Measurement:

Which shows the following results after submitting request:
COMMAND = FREQUENCYWRAPPER
TODOCMD = PING
SRC = pc155.emulab.net
DEST = pc120.emulab.net
FREQ = 20
COUNT = 30
INTERVAL = 10
SERVER = pc155.emulab.net
Known Command.. will operate on it
Assigned ID for this task: 0
- Measuraments must be deployed to the slice:

Submitting requirest reports the following in the status pane:
COMMAND = DEPLOYFW
USER = lnevers
SLICENAME = ln_slice2_S3
SERVER = illusion.hpl.hp.com
Executing command -- /usr/lib/cgi-bin/cronDeploy4Nodes.sh  /var/lib/tomcat5.5/webapps/geni/lnevers/ln_slice2_S3
www-data
Agent pid 15982
Identity added: /var/www/.ssh/id_rsa (/var/www/.ssh/id_rsa)
1/3:ssh mprakash@pc155.emulab.net /usr/bin/crontab  /home/genis3monitor/csi/CronTab
2/3:ssh mprakash@pc104.emulab.net /usr/bin/crontab  /home/genis3monitor/csi/CronTab
3/3:ssh mprakash@pc120.emulab.net /usr/bin/crontab  /home/genis3monitor/csi/CronTab
Agent pid 15982 killed
- Periodic measurement settings can be viewed from "Measurement Data->Periodic Measurements->Configuration->List". Following
is the output of the listing for pc155:
COMMAND = FWMAINT
TODO = LIST
SERVER = pc155.emulab.net
ID		COMMAND			        	 OUTPUT FILES DIRECTORY		FREQUENCY
---------------------------------------------------------------------------------------------------
Executing command -- cat /home/genis3monitor/csi/FreqTaskList
0 COMMAND=PING&SRC=pc155.emulab.net&DEST=pc120.emulab.net&COUNT=30 /home/genis3monitor/csi/local/measurements 1
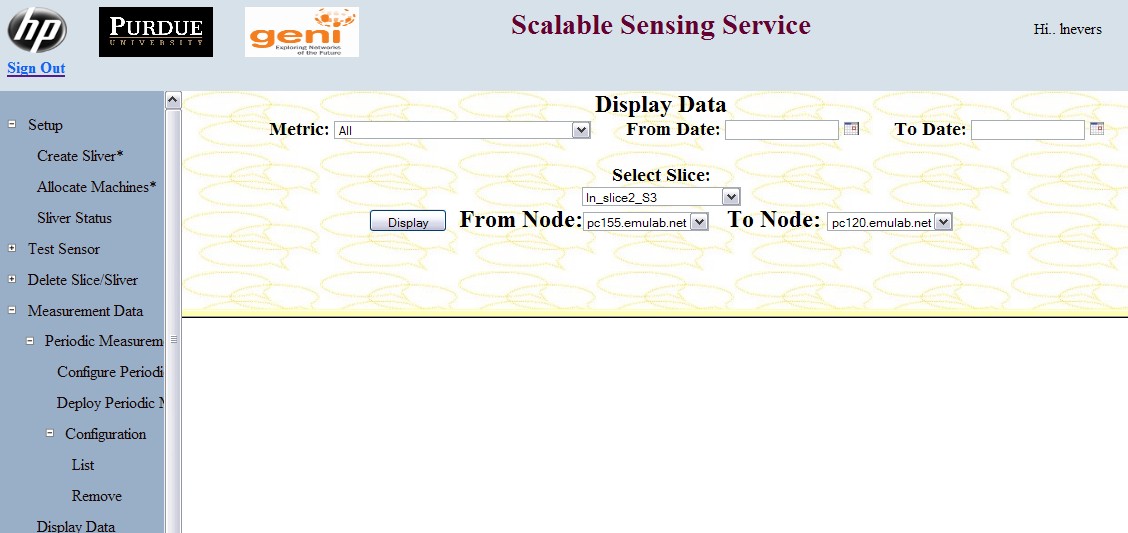
- Measurements can be displayed with the "Display Data" page:

Requesting result from the source to the destination defined in the above steps reports the following:

- User can also request individual Test Sensors. Available options include:
- Latency (ping) - determines delay between selected nodes
- Path (traceroute) - determines routes between selected nodes
- Pathchirp - estimates available bandwidth between selected nodes
- Pathrate - estimates capacity between selected nodes
- Spruce - estimate available bandwidth between selected nodes
- Tulip (loss) - Under development.
- SRSprobe - Under development.
All available Test Sensor results are shown in the result pane. Following is sample output from each of the Test Sensors:
- Latency Results:
COMMAND = PING
DEST = pc104.emulab.net
SERVER = pc158.emulab.net
Executing command -- ping -c 5 -i 1 pc104.emulab.net
PING pc104.emulab.net (155.98.36.104) 56(84) bytes of data.
64 bytes from pc104.emulab.net (155.98.36.104): icmp_seq=1 ttl=64 time=0.209 ms
64 bytes from pc104.emulab.net (155.98.36.104): icmp_seq=2 ttl=64 time=0.221 ms
64 bytes from pc104.emulab.net (155.98.36.104): icmp_seq=3 ttl=64 time=0.163 ms
64 bytes from pc104.emulab.net (155.98.36.104): icmp_seq=4 ttl=64 time=0.156 ms
64 bytes from pc104.emulab.net (155.98.36.104): icmp_seq=5 ttl=64 time=0.200 ms
--- pc104.emulab.net ping statistics ---
5 packets transmitted, 5 received, 0% packet loss, time 4041ms
rtt min/avg/max/mdev = 0.156/0.189/0.221/0.031 ms
- Path Results:
COMMAND = TRACEROUTE
DEST = pc104.emulab.net
SRC = pc158.emulab.net
SERVER = pc158.emulab.net
Executing command -- /usr/sbin/traceroute pc104.emulab.net
traceroute to pc104.emulab.net (155.98.36.104), 30 hops max, 38 byte packets
 1  pc104.emulab.net (155.98.36.104)  0.260 ms  0.170 ms  0.158 ms
- Pathchirp Results:
COMMAND = PATHCHIRP DEST = pc104.emulab.net SRC = pc158.emulab.net SERVER = pc158.emulab.net Trying to grab port number 8365 Succedded in grabbing port 8365 Executing command -- wget -O - -o /tmp/rand162634.146706299 "http://pc158.emulab.net:46000/cgi-bin/csi.cgi?COMMAND=PATHCHIRPSND&PORT=8365" Executing command -- wget -O - -o /tmp/rand800032.298852788 "http://pc104.emulab.net:46000/cgi-bin/csi.cgi?COMMAND=PATHCHIRPRCV&DEST=pc158.emulab.net&PORT=8365" COMMAND = PATHCHIRPRCV DEST = pc158.emulab.net PORT = 8365 SERVER = pc104.emulab.net Executing command -- /home/genis3monitor/csi/common/pathchirp/pathchirp_rcv -S pc158.emulab.net -t 30 -U 8365 Waiting for remote host Updating probing range:low=10.000000,high=200.000000Mbps Updating probing range:low=28.571429,high=1400.000000Mbps 1280433107.148686 200.000000 1280433107.628694 200.000000 1280433108.137510 200.000000 1280433109.094366 198.947562 1280433109.166255 201.321000 1280433109.235515 200.268561 1280433109.306276 202.641999 1280433109.375514 201.589561 1280433109.446258 203.962999 <<<<hundreds of lines deleted>>> 1280433130.316560 208.978436 1280433130.385818 205.552560 --13:51:33-- http://pc104.emulab.net:46000/cgi-bin/csi.cgi?COMMAND=PATHCHIRPRCV&DEST=pc158.emulab.net&PORT=8365 => `-' Resolving pc104.emulab.net... done. Connecting to pc104.emulab.net[155.98.36.104]:46000... connected. HTTP request sent, awaiting response... 200 OK Length: unspecified [text/plain] 0K ......... 799.81 B/s 13:52:10 (799.81 B/s) - `-' saved [9489] COMMAND = PATHCHIRPSND PORT = 8365 SERVER = pc158.emulab.net Executing command -- /home/genis3monitor/csi/common/pathchirp/pathchirp_snd -U 8365 Waiting for receiver to setup connection Connected to 155.98.36.104 Chirp Numer: 10 Chirp Numer: 20 Chirp Numer: 30 <<< 20 lines deleted>>> Chirp Numer: 250 Chirp Numer: 260 Chirp Numer: 270 Chirp Numer: 280 Chirp Numer: 290 Chirp Numer: 300 Chirp Numer: 310 Chirp Numer: 320 Finished sending chirps to client Done measuring --13:51:23-- http://pc158.emulab.net:46000/cgi-bin/csi.cgi?COMMAND=PATHCHIRPSND&PORT=8365 => `-' Resolving pc158.emulab.net... done. Connecting to pc158.emulab.net[155.98.36.158]:46000... connected. HTTP request sent, awaiting response... 200 OK Length: unspecified [text/plain] 0K 780.27 KB/s 13:52:10 (780.27 KB/s) - `-' saved [799] - Pathrate Results:
COMMAND = PATHRATE DEST = pc104.emulab.net SRC = pc158.emulab.net QT = 1 SERVER = pc158.emulab.net Trying to grab port number 48698 Succedded in grabbing port 48699 Executing command -- wget -O - -o /tmp/rand89503.6196607215 "http://pc158.emulab.net:46000/cgi-bin/csi.cgi?COMMAND=PATHRATESND& PORT=48699" Executing command -- wget -O - -o /tmp/rand432959.733371721 "http://pc104.emulab.net:46000/cgi-bin/csi.cgi?COMMAND=PATHRATERCV&DEST=pc158.emulab.net&QT=1&PORT=48699" COMMAND = PATHRATESND PORT = 48699 SERVER = pc158.emulab.net Executing command -- /home/genis3monitor/csi/common/pathrate/pathrate_snd -v -p 48699 Waiting for receiver to establish control stream => OK Receiver pc104.emulab.net starts measurements on Thu Jul 29 14:00:29 2010 Measurements are in progress. Please wait.. --> UDP port number: 48699 Time period between packet pairs/trains: 500 msec --> Maximum packet size: 1488 bytes --> Packet size: 1488 bytes --> New train length: 2 --> New round number: 2 Train-1: => ACKed <<<<many similar lines deleted>>> DEST = pc158.emulab.net QT = 1 PORT = 48699 SERVER = pc104.emulab.net Executing command -- /home/genis3monitor/csi/common/pathrate/pathrate_rcv -v -s pc158.emulab.net -Q -p 48699 pathrate run from pc158.emulab.net to node3.slice2432.genislices.emulab.net on Thu Jul 29 14:00:29 2010 --> Average round-trip time: 0.2ms --> Minimum acceptable packet pair dispersion: 12 usec Train length: 2 -> 10.4 Mbps Train length: 3 -> 20 Mbps Train length: 4 -> 93 Mbps Train length: 5 -> 42 Mbps Train length: 6 -> 50 Mbps Train length: 8 -> 126 Mbps Train length: 10 -> 89 Mbps Train length: 12 -> 70 Mbps Train length: 16 -> 119 Mbps Train length: 20 -> 87 Mbps Train length: 24 -> 82 Mbps Train length: 28 -> 108 Mbps Train length: 32 -> 91 Mbps Train length: 36 -> 87 Mbps Train length: 40 -> 105 Mbps Train length: 44 -> 92 Mbps Train length: 48 -> 89 Mbps --> Maximum train length: 48 packets --Preliminary measurements with increasing packet train lengths-- Train length: 2 -> 1190 Mbps 1190 Mbps 1082 Mbps 1190 Mbps 1082 Mbps 1082 Mbps 1323 Mbps Train length: 3 -> 1134 Mbps 1190 Mbps 1190 Mbps 1134 Mbps 1082 Mbps 1082 Mbps 1134 Mbps Train length: 4 -> 1190 Mbps 1152 Mbps 1116 Mbps 1152 Mbps 1050 Mbps 1190 Mbps 1116 Mbps Train length: 5 -> 1107 Mbps 1161 Mbps 1134 Mbps 1190 Mbps 1190 Mbps 1134 Mbps 1134 Mbps Train length: 6 -> 55 Mbps 52 Mbps 52 Mbps 53 Mbps 52 Mbps 52 Mbps 54 Mbps Train length: 7 -> 61 Mbps 61 Mbps 61 Mbps 61 Mbps 61 Mbps 61 Mbps 62 Mbps Train length: 8 -> 69 Mbps 69 Mbps 72 Mbps 71 Mbps 69 Mbps 69 Mbps 69 Mbps Train length: 9 -> 77 Mbps 77 Mbps 78 Mbps 77 Mbps 77 Mbps 80 Mbps 77 Mbps Train length: 10 -> 137 Mbps 87 Mbps 138 Mbps 88 Mbps 137 Mbps 89 Mbps 137 Mbps --> Capacity Resolution: 7.0 Mbps - Requested Quick Termination --> Coefficient of variation: 0.198 ------------------------------------------------- Final capacity estimate : 71 Mbps to 78 Mbps ------------------------------------------------- --14:00:24-- http://pc104.emulab.net:46000/cgi-bin/csi.cgi?COMMAND=PATHRATERCV&DEST=pc158.emulab.net&QT=1&PORT=48699 => `-' Resolving pc104.emulab.net... done. Connecting to pc104.emulab.net[155.98.36.104]:46000... connected. HTTP request sent, awaiting response... 200 OK Length: unspecified [text/plain] 0K .. 2.02 MB/s 14:01:09 (2.02 MB/s) - `-' saved [2118] d --> Continue with next round of measurements --> New train length: 8 --> New round number: 62 Train-1: => ACKed --> New round number: 63 Train-1: => ACKed <<<many similar lines deleted>>> Train-1: => ACKed --> Continue with next round of measurements --> Continue with next round of measurements Receiver terminates measurements on Thu Jul 29 14:01:09 2010 --14:00:13-- http://pc158.emulab.net:46000/cgi-bin/csi.cgi?COMMAND=PATHRATESND&PORT=48699 => `-' Resolving pc158.emulab.net... done. Connecting to pc158.emulab.net[155.98.36.158]:46000... connected. HTTP request sent, awaiting response... 200 OK Length: unspecified [text/plain] 0K ..... 624.88 B/s 14:01:10 (624.88 B/s) - `-' saved [5359] - Spruce Results with CAP Value=10M
COMMAND = SPRUCE
DEST = pc120.emulab.net
CAP = 10M
SRC = pc158.emulab.net
SERVER = pc158.emulab.net
Trying to grab port number 48398
Succedded in grabbing port 48399
Executing command -- wget -O - "http://pc158.emulab.net:46000/cgi-bin/csi.cgi?COMMAND=SPRUCESND&PORT=48399&DEST=pc120.emulab.net&CAP=10M"
--14:04:08--  http://pc158.emulab.net:46000/cgi-bin/csi.cgi?COMMAND=SPRUCESND&PORT=48399&DEST=pc120.emulab.net&CAP=10M
           => `-'
Resolving pc158.emulab.net... done.
Connecting to pc158.emulab.net[155.98.36.158]:46000... connected.
HTTP request sent, awaiting response... Executing command -- wget -O - "http://pc120.emulab.net:46000/cgi-bin/csi.cgi?COMMAND=SPRUCERCV&PORT=48399&DEST=pc158.emulab.net"
--14:04:09--  http://pc120.emulab.net:46000/cgi-bin/csi.cgi?COMMAND=SPRUCERCV&PORT=48399&DEST=pc158.emulab.net
           => `-'
Resolving pc120.emulab.net... done.
Connecting to pc120.emulab.net[155.98.36.120]:46000... connected.
HTTP request sent, awaiting response... 200 OK
Length: unspecified [text/plain]
COMMAND = SPRUCESND
PORT = 48399
DEST = pc120.emulab.net
CAP = 10M
SERVER = pc158.emulab.net
Executing command -- /home/genis3monitor/csi/common/spruce/spruce_snd -p 48399 -h pc120.emulab.net -c 10M
preparation done
test started?
availalble bandwidth estimate: 150536127 Kbps
sender starting up
received port numbers 23877 23876
sender finished

    0K                                                         336.91 KB/s

14:04:30 (336.91 KB/s) - `-' saved [345]

200 OK
Length: unspecified [text/plain]
COMMAND = SPRUCERCV
PORT = 48399
DEST = pc158.emulab.net
SERVER = pc120.emulab.net
Executing command -- /home/genis3monitor/csi/common/spruce/spruce_rcv -c 48399 -h pc158.emulab.net

    0K                                                         177.73 KB/s

14:04:30 (177.73 KB/s) - `-' saved [182]
Scalable Monitoring How-to (August 10th version)
The scalable monitoring setup requires a Master node and at least 2 sliver nodes (aka sensor nodes) on which to collect measurements.
Setting up Scalable Monitoring on Master Node
Using the Readme file is available at the S3 web site to set up the Master Node:
S3 README

Note: Machine where you create the slice/sliver and Database will be called as Master Node.

Prerequisites

   Step 1: The Master Node must be installed with java version 1.6.0_20 or above Versions.

   Step 2: The Master Node must be installed with Apache Tomcat5.5.

   Step 3: The following environment variables must be set in the .bashrc

export JAVA_HOME=/usr/lib/jvm/java-6-sun-1.6.0.12
export DERBY_HOME=/opt/Apache/db-derby-10.6.1.0-bin
export DERBY_INSTALL=/opt/Apache/db-derby-10.6.1.0-bin
export PATH=$PATH:$JAVA_HOME/bin

export CLASSPATH=$DERBY_INSTALL/lib/derby.jar:$DERBY_INSTALL/lib/derbytools.jar:$DERBY_INSTALL/lib/derbynet.jar:$DERBY_INSTALL/lib/derbyrun.jar:$DERBY_INSTALL/lib/derbyclient.jar:.$DERBY_INSTALL/lib/derbyrun.jar:$DERBY_INSTALL/lib/derbyclient.jar:.

Note: The same steps also mentioned in the "Periodic Process" Readme

Contents of scube.tar.gz

1). cronDeploy4Nodes.sh
2). demo.tar
3). geniscripts.tar.gz
4). geni-scube-sensorpod.tar.gz
5). sliver.cgi

Steps to follow to install the Scalable Sensing Services

   Step 1: Copy the scube.tar.gz on to the Master Node (preferably on your home directory).

   Step 2: Create the ssh-key (rsa)
Command: - ssh-keygen rsa

   Step 3: Upload the ~/.ssh/id-rsa.pub on www.emulab.net

   Step 4: Generate the ssl key for your account on www.emulab.net. Select an passphrase ( you have to remember that passphrase. eg. genis3slice )

   Step 5: Download the ssl key and store it under ~/.ssl/encrypted.pem

   Step 6: Store the ssl passphrase in ~/.ssl/password file
Eg. echo genis3slice > ~/.ssl/password

   Step 7: Run the ssh agent
Command:- ssh-agent bash

   Step 8: To set the private key to the ssh-agent
Command: - ssh-add ~/.ssh/id_rsa ( Provide the passphrase when it prompts, this should be same as the passphrase in the above steps) br>
   Step 9: Do "echo $SSH_AGENT_PID" to verify for the ssh agent running.

   Step 10: Unzip and Untar the scube.tar.gz on your home directory.

   Step 11: Copy the cronDeploy4Nodes.sh and sliver.cgi into /usr/lib/cgi-bin directory

   Step 12: Untar the demo.tar under webapps directory of your apache-tomcat installations.

   Step 13: Untar the geniscripts.tar.gz under your home directory. This will create a directory called testscripts.

   Step 14: You need to update the createsliver.py, deleteslice.py, deletesliver.py, registerslice.py, sliverstatus.py, test-common.py and unregisterslice.py file for the testscripts path.

   Step 15: Untar the geni-scube-sensorpod.tar.gz under your home directory. This will create a directory called scube.

   Step 16: Go to ~/scube/csi/csi/common/cgi-bin and copy the csi.tar.gz files to /var/www directory

   Step 17: Go to ~scube/config.txt file and add the SrcDir, ArchiveDir etc of your choice as mentioned in the config.txt file.

   Step 18: Go to ~/scube/moveNode2MgmtNode.sh and update the script for SrcDir according to the previous steps.

   Step 19: Follow the "Installation Instructions for Periodic Measurements" Readme from the http://illusion.hpl.hp.com/genis3monitor/scube for the compilations of SIMModule and to start and stop the SIMModule process in the background.

   Step 20: Open the file /usr/lib/cgi-bin/sliver.cgi to update the followings

$TESTDIR - to your testscripts path,

$SCUBE - to scube directory,

$hostHomeDir - to your home directory

$user - to your user name,

$tomcatPath - to your tomcat webapps directory
- Scalable Monitoring software requires Java DK 1.6.0_20 or above and Apache Tomcat5.5. In this evaluation used a Fedora 8 system, where the following where installed:
 $ sudo yum install java-1.7.0-icedtea
 $ sudo yum install jpackage-utils
 $ sudo yum install tomcat*
Downloaded the binary distribution of derby-db and placed it on the master node.
- SSH key instruction for upload to Emulab had been previously executed, thus they were skipped for this evaluation.
- Downloaded the file S3 code and unpacked the file scube.tar.gz on the master node riva.gpolab.bbn.com. Copied files as instructed:
   $ sudo cp cronDeploy4Nodes.sh /usr/lib/cgi-bin/.
   $ sudo cp sliver.cgi /usr/lib/cgi-bin/.
   $ tar xvf demo.tar  # creates a geni directory
   $ sudo cp -r geni /var/lib/tomcat5/webapps/.
- Untared the geniscripts.tar.gz under your home directory. This will create a directory called testscripts. The files createsliver.py, deleteslice.py, deletesliver.py, registerslice.py, sliverstatus.py, test-common.py and unregisterslice.py files must be modified to define the installation directory of the tools.
5 Untared the geni-scube-sensorpod.tar.gz, this creates a directory called scube. Copy csi file:
 cd scube/csi/csi/common/cgi-bin;
 cp csi.tar.gz (or csi.cgi files to /var/www directory
- Edit scube/config.txt file and add the SrcDir, ArchiveDir, and BadFileDir to point to the installation path:
  SrcDir  /home/lnevers/scube/spod/geni/SrcDir
  ArchiveDir      /home/lnevers/scube/spod/geni/ArchiveDir
  ArchiveSuffix   _backup
  BadFileDir      /home/lnevers/scube/spod/geni/BadFileDir
to verify
Step 18: Go to ~/scube/moveNode2MgmtNode.sh and update the script for SrcDir according to the previous steps.
Step 19: Follow the "Installation Instructions for Periodic Measurements" Readme from the http://illusion.hpl.hp.com/genis3monitor/scube for the compilations of SIMModule and to start and stop the SIMModule process in the background.
Step 20: Open the file /usr/lib/cgi-bin/sliver.cgi to update the followings
$TESTDIR - to your testscripts path, $SCUBE - to scube directory, $hostHomeDir - to your home directory $user - to your user name, $tomcatPath - to your tomcat webapps directory
end of to verify
Setting up Scalable Monitoring on Sliver Nodes
- Register a slice:
 $ ./registerslice.py -n ln_scube_slice
 Got my SA credential
 No such slice registered here:Creating new slice called ln_scube_slice
 New slice created: urn:publicid:IDN+emulab.net+slice+ln_scube_slice
- Create the sliver nodes:
 $ ./createsliver.py -n ln_scube_slice ./twonode.xml
 Got my SA credential
 Asking for slice credential for ln_scube_slice
 Got the slice credential
 Creating the Sliver ...
 Created the sliver
 <rspec xmlns="http://protogeni.net/resources/rspec/0.1" valid_until="2010-08-25T20:03:13">
    <node virtual_id="geni1" virtualization_type="raw" exclusive="1" component_urn="urn:publicid:IDN+emulab.net+node+pc509" component_uuid="98b55439-27ea-11df-8633-001143e453fe" component_manager_urn="urn:publicid:IDN+emulab.net+authority+cm" component_manager_uuid="28a10955-aa00-11dd-ad1f-001143e453fe" sliver_uuid="98b55439-27ea-11df-8633-001143e453fe" hostname="pc509.emulab.net" sshdport="22" sliver_urn="urn:publicid:IDN+emulab.net+sliver+16135">
          <interface virtual_id="virt0" component_id="eth4"/>
    <services><login authentication="ssh-keys" hostname="pc509.emulab.net" port="22"/></services></node>
    <node virtual_id="geni2" virtualization_type="raw" exclusive="1" component_urn="urn:publicid:IDN+emulab.net+node+pc417" component_uuid="3bbd5e22-11ba-11df-8633-001143e453fe" component_manager_urn="urn:publicid:IDN+emulab.net+authority+cm" component_manager_uuid="28a10955-aa00-11dd-ad1f-001143e453fe" sliver_uuid="3bbd5e22-11ba-11df-8633-001143e453fe" hostname="pc417.emulab.net" sshdport="22" sliver_urn="urn:publicid:IDN+emulab.net+sliver+16136">
         <interface virtual_id="virt0" component_id="eth4"/>
    <services><login authentication="ssh-keys" hostname="pc417.emulab.net" port="22"/></services></node>
    <link virtual_id="link0" sliver_uuid="cddb6e9b-b052-11df-ad83-001143e453fe" sliver_urn="urn:publicid:IDN+emulab.net+sliver+16137" vlantag="929">
         <interface_ref virtual_interface_id="virt0" virtual_node_id="geni1" sliver_uuid="ce0c48cf-b052-11df-ad83-001143e453fe" component_urn="urn:publicid:IDN+emulab.net+interface+pc509:eth4" sliver_urn="urn:publicid:IDN+emulab.net+sliver+16138" MAC="00101856b088" IP="10.10.1.1"/>
         <interface_ref virtual_interface_id="virt0" virtual_node_id="geni2" sliver_uuid="ce66e11b-b052-11df-ad83-001143e453fe" component_urn="urn:publicid:IDN+emulab.net+interface+pc417:eth4" sliver_urn="urn:publicid:IDN+emulab.net+sliver+16139" MAC="001018569110" IP="10.10.1.2"/>
    </link>
 </rspec>
Where the rspec twonode.xml contains:
 <rspec xmlns="http://protogeni.net/resources/rspec/0.1" >
    <node virtual_id="geni1" virtualization_type="emulab-vnode" exclusive="1">
          <interface virtual_id="virt0" />
    </node>
    <node virtual_id="geni2" virtualization_type="emulab-vnode" exclusive="1">
         <interface virtual_id="virt0"/>
    </node>
    <link virtual_id="link0">
         <interface_ref virtual_interface_id="virt0" virtual_node_id="geni1"/>
         <interface_ref virtual_interface_id="virt0" virtual_node_id="geni2"/>
    </link>
 </rspec>
- Verify that the sliver is Ready:
 $ ./sliverstatus.py -n ln_scube_slice
 Got my SA credential. Looking for slice ...
 Found the slice, asking for a credential ...
 Got the slice credential, asking for a sliver credential ...
 Got the sliver credential, asking for sliver status
 {'status': 'ready', 'state': 'started', 'details': {'urn:publicid:IDN+emulab.net+sliver+16135': {'status': 'ready', 'state': 'started', 'component_urn': 'urn:publicid:IDN+emulab.net+node+pc509', 'error': ''}, 'urn:publicid:IDN+emulab.net+sliver+16136': {'status': 'ready', 'state': 'started', 'component_urn': 'urn:publicid:IDN+emulab.net+node+pc417', 'error': ''}}}
- Copy geni-scube-sensorpod.tar.gz to each of the nodes in the sliver:
 $ scp geni-scube-sensorpod.tar.gz pc417.emulab.net:.
 $ scp geni-scube-sensorpod.tar.gz pc509.emulab.net:.
- Login to each of the nodes in the sliver and unpack the geni-scube-sensorpod.tar.gz file.
$ tar xvzf geni-scube-sensorpod.tar.gz
- Download vxargs0.3.3.py from http://vxargs.sourceforge.net and place it in the scube/spod directory.
Attachments (9)
- 2010-07-28_ScalableMonitoring-1.jpg (42.6 KB) - added by 14 years ago.
- 2010-07-28_ScalableMonitoring-2.jpg (66.6 KB) - added by 14 years ago.
- 2010-07-28_ScalableMonitoring-3.jpg (69.7 KB) - added by 14 years ago.
- 2010-07-28_ScalableMonitoring-4.jpg (82.7 KB) - added by 14 years ago.
- 2010-07-28_ScalableMonitoring-5.jpg (79.6 KB) - added by 14 years ago.
- 2010-07-28_ScalableMonitoring-6.jpg (101.8 KB) - added by 14 years ago.
- 2010-07-28_ScalableMonitoring-7.jpg (76.5 KB) - added by 14 years ago.
- 2010-07-28_ScalableMonitoring-8.jpg (91.0 KB) - added by 14 years ago.
- 2010-07-28_ScalableMonitoring-9.jpg (280.9 KB) - added by 14 years ago.
Download all attachments as: .zip