
| Version 47 (modified by , 9 years ago) (diff) |
|---|
Hadoop in a Slice
We are actively updating this tutorial. If you need help with this tutorial please contact: help@geni.net
Part I: Obtain Resources: create a slice and reserve resources

1. Establish the Environment
1.1 Ensure SSH keys are setup
Verify that you have at least one public key associated with your account. To do that, after you login to the portal check under your Profile, under the SSH keys tab. If you do not have SSH keys associated yet, please follow the instructions on that tab of the Portal.
1.2 Configure Omni
If you have not installed and configured omni yet, please follow these instructions.
2. Obtain Resources
2.1 Create a slice Slice
Create a slice using omni and the slice name of your choice. From now on that slice name will be referred to as SLICENAME.
$ omni createslice SLICENAME
2.2 Create your RSpec
We are going to use the graphical interface of the portal (Jacks) to create the RSpec file for this tutorial but we are going to use Omni for reserving the resources.
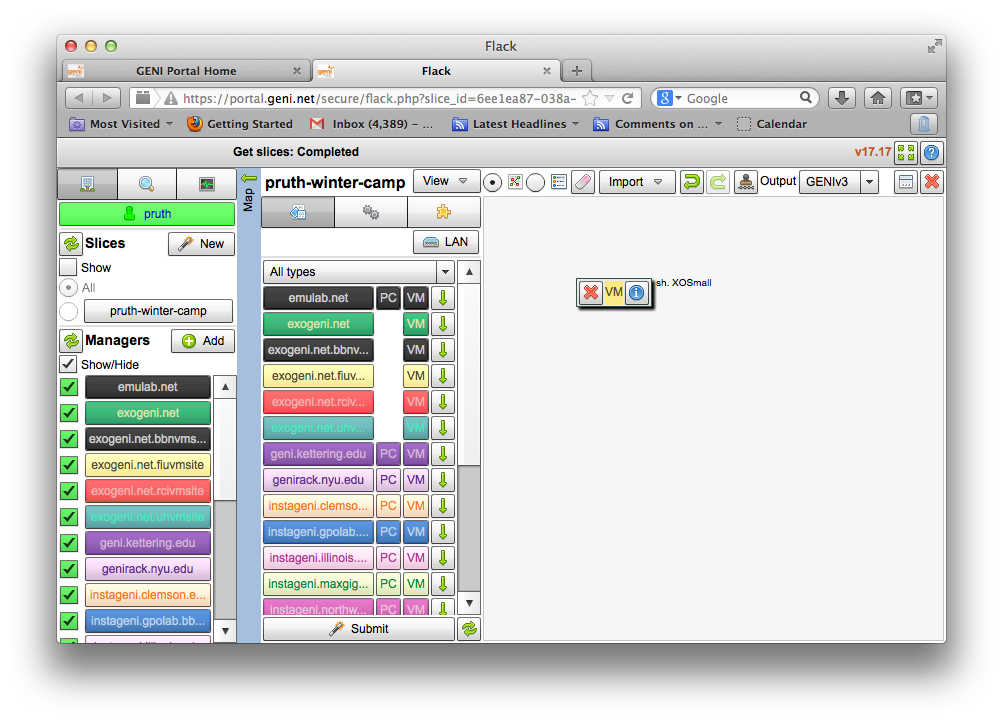
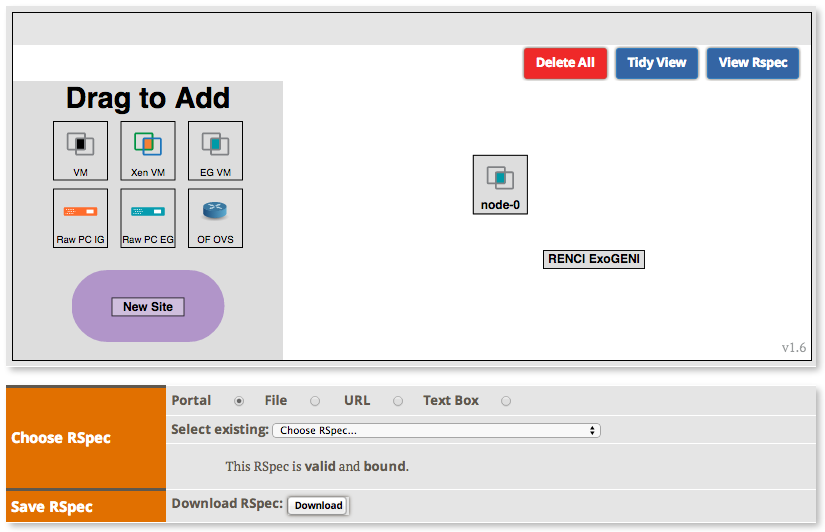
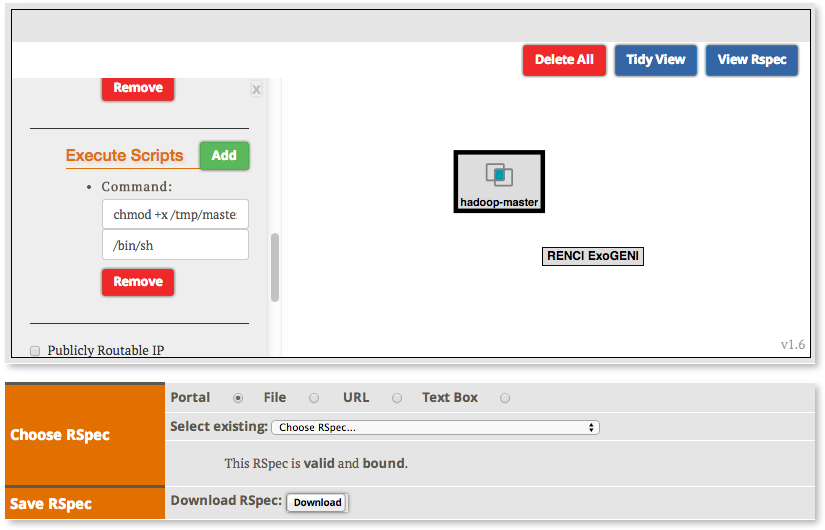
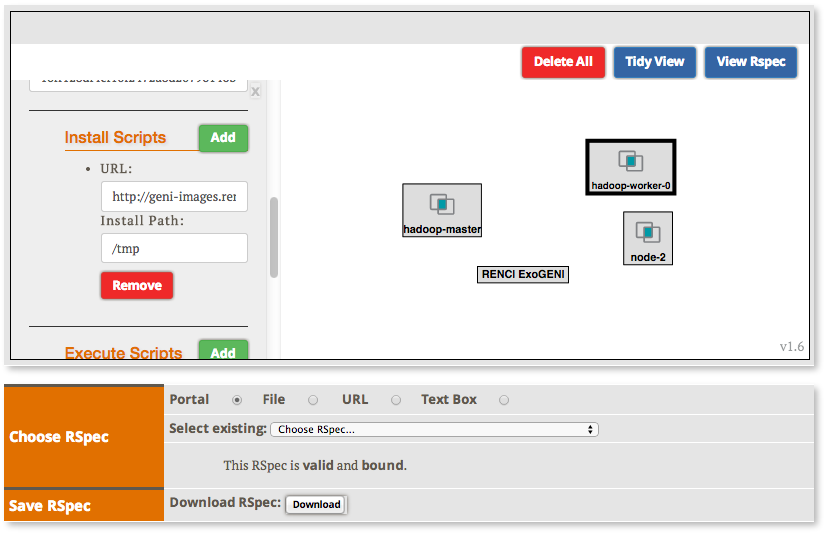
2.2.1 Load a simple topology in Jacks
|
The topology you loaded has two node-types: master and worker. Let's see what each node-type is comprised of:
|
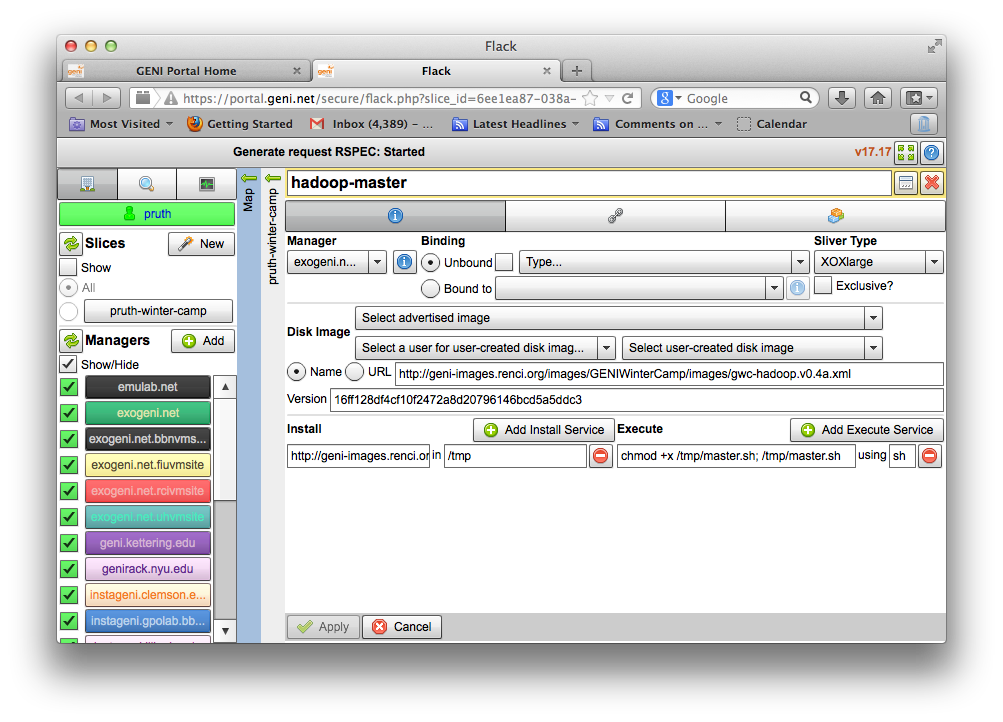
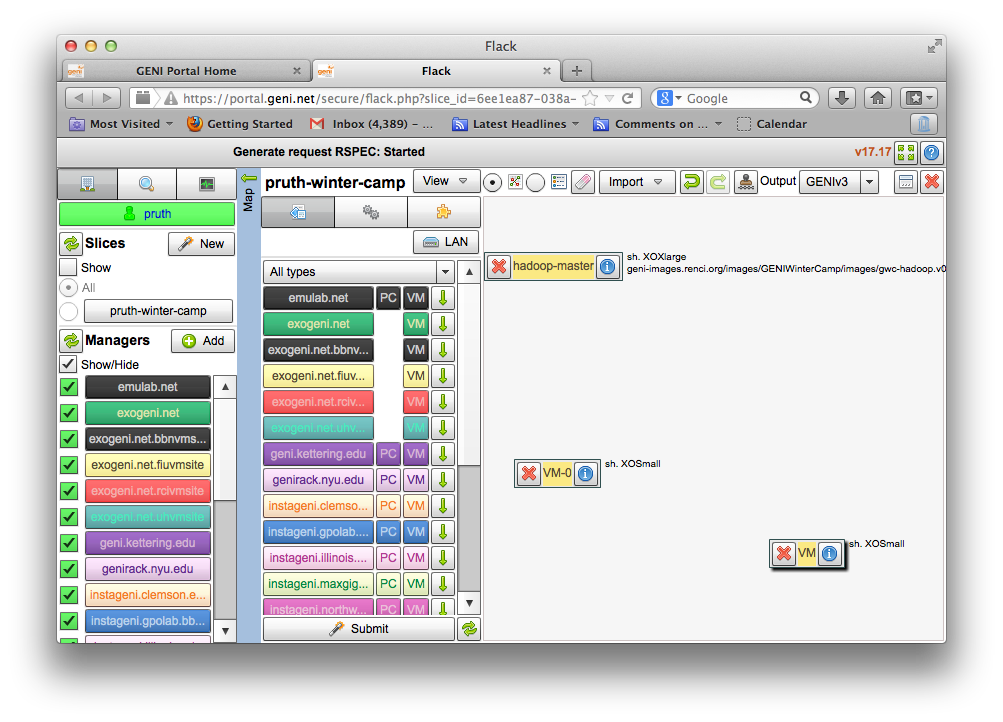
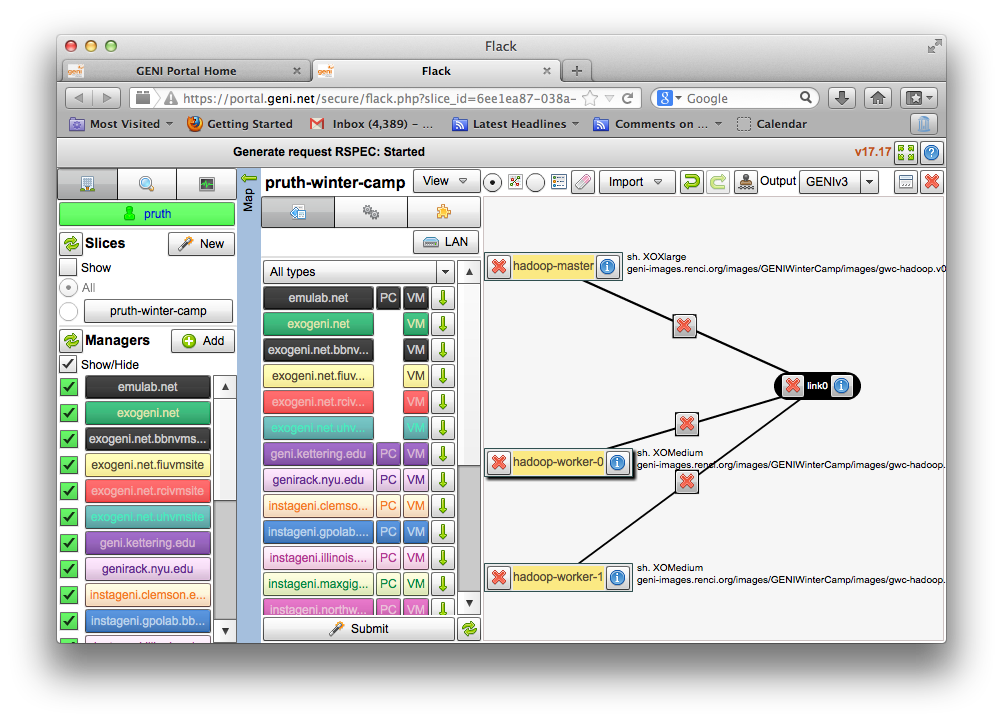
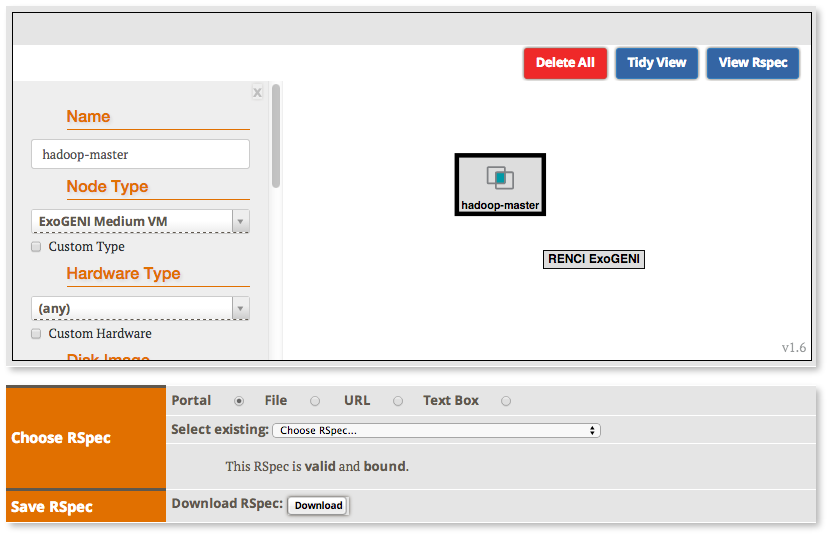
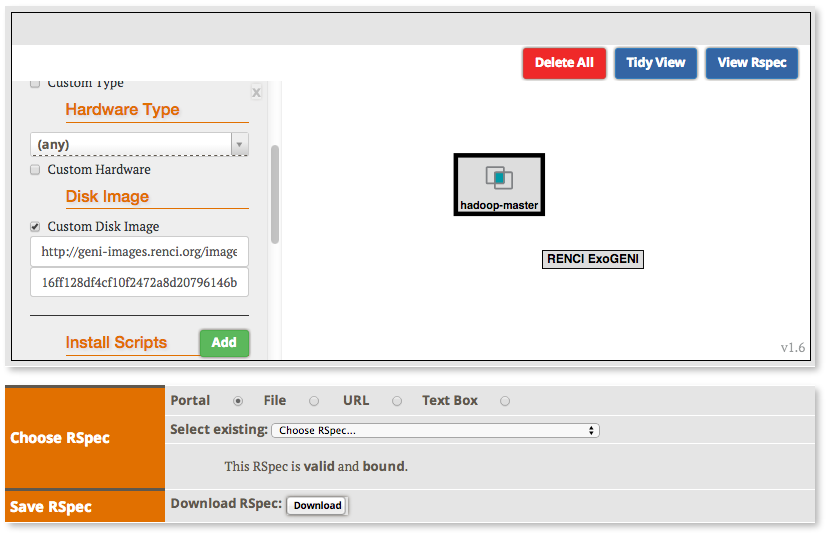
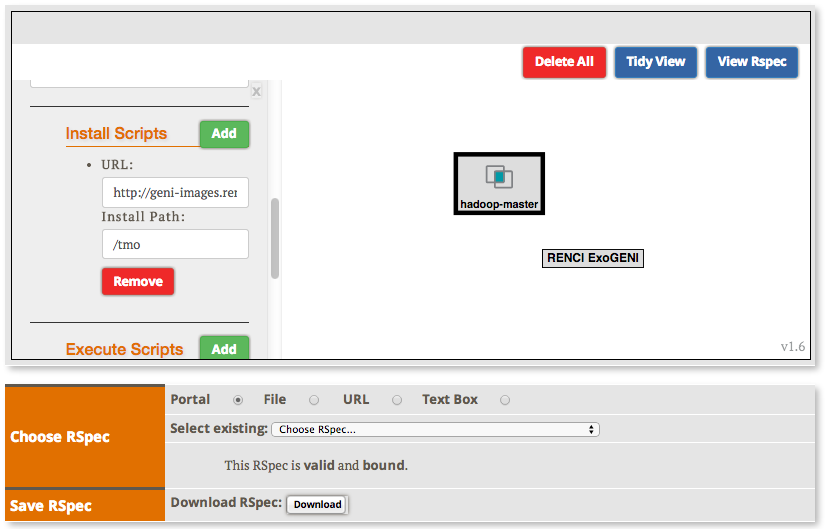
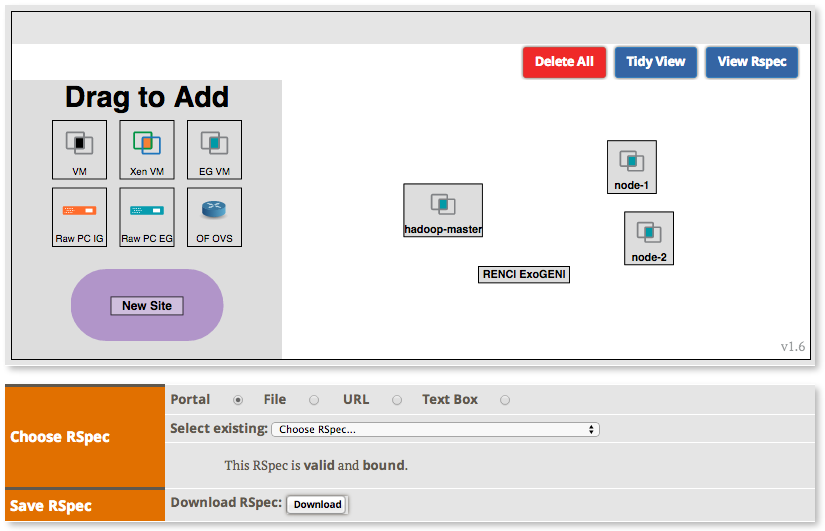
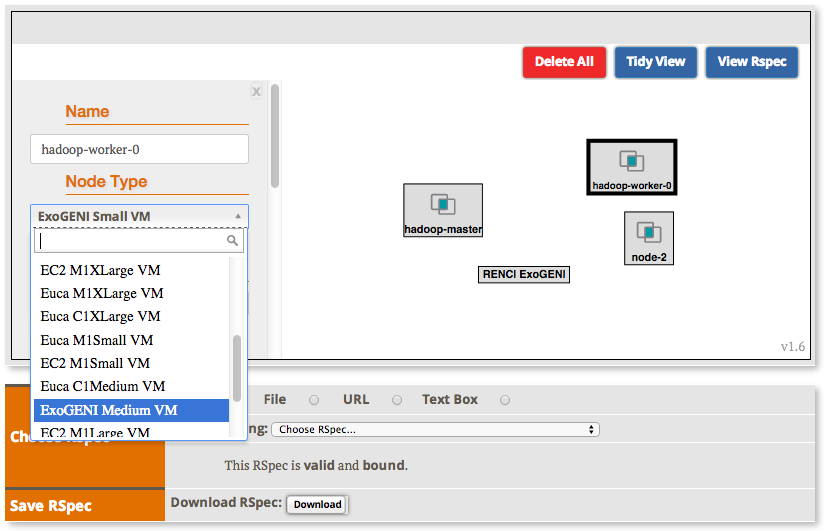
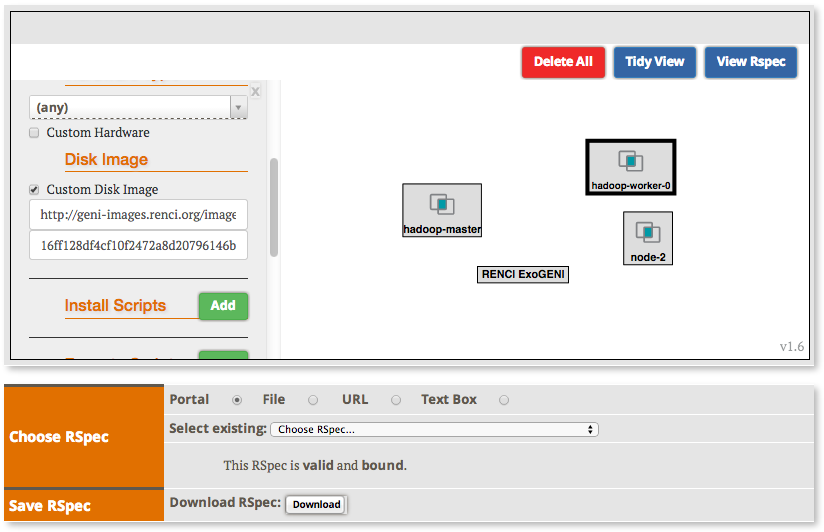
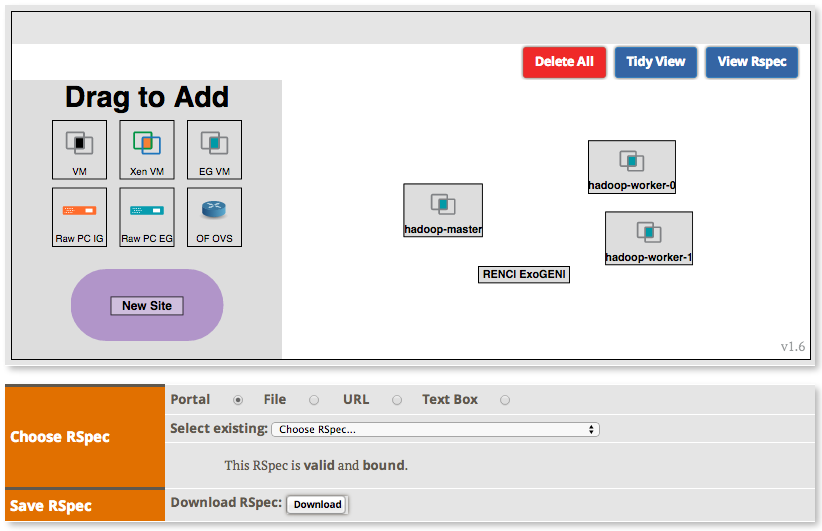
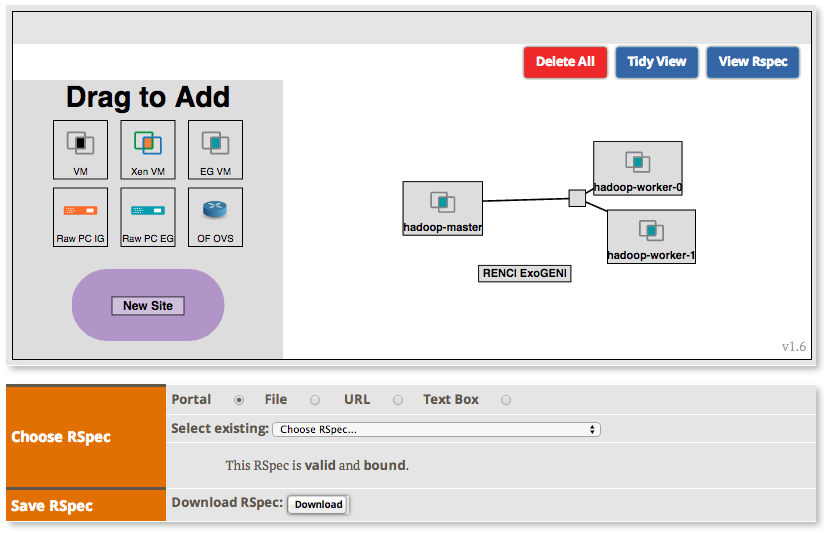
2.2.2 Create the topology(RSpec) for the experiment
Now we will create our Hadoop cluster. For the cluster we need:
- 1 hadoop master
- 2 or more workers
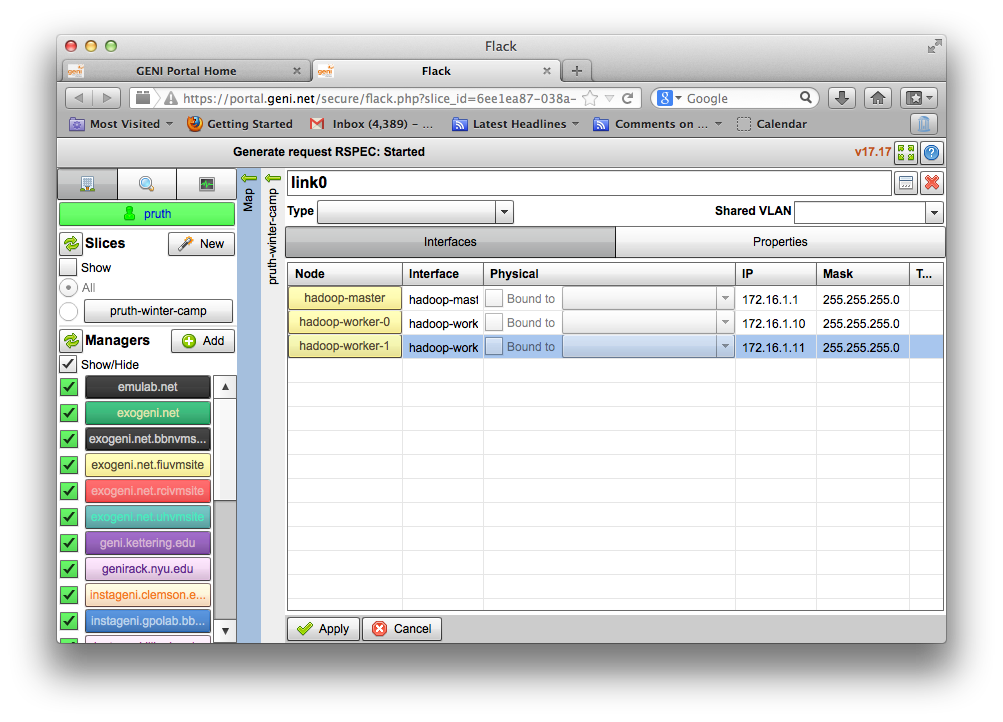
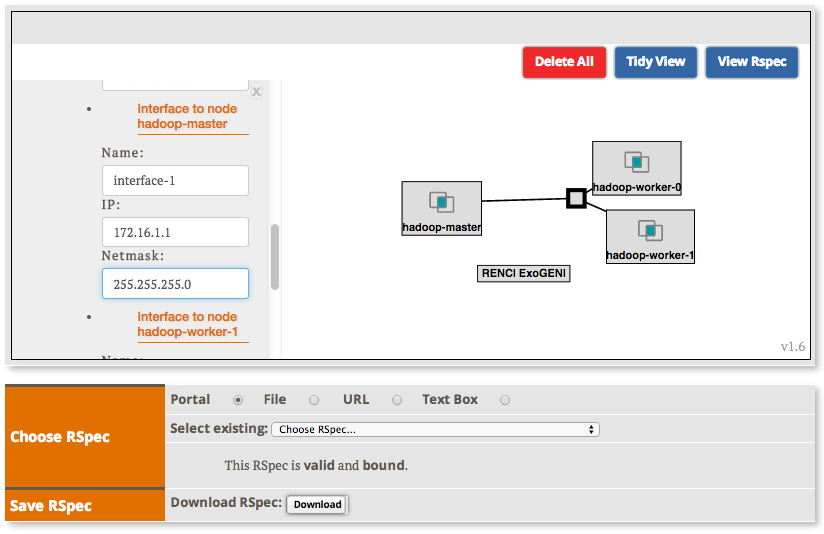
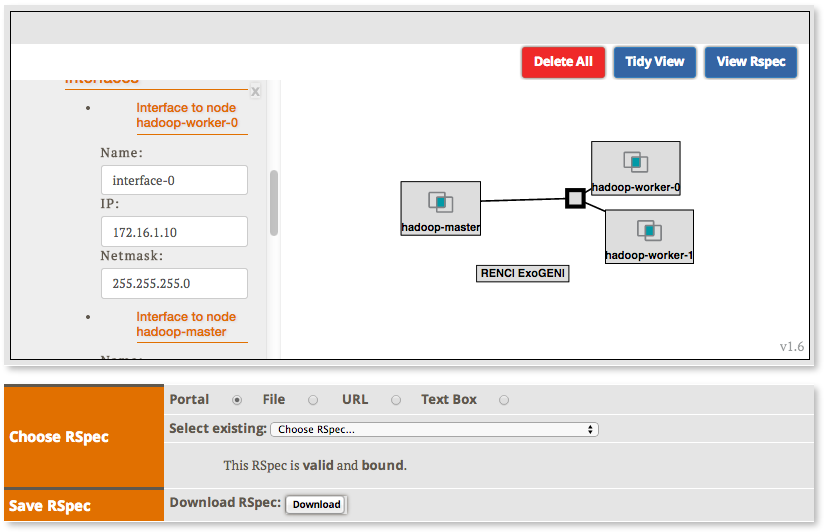
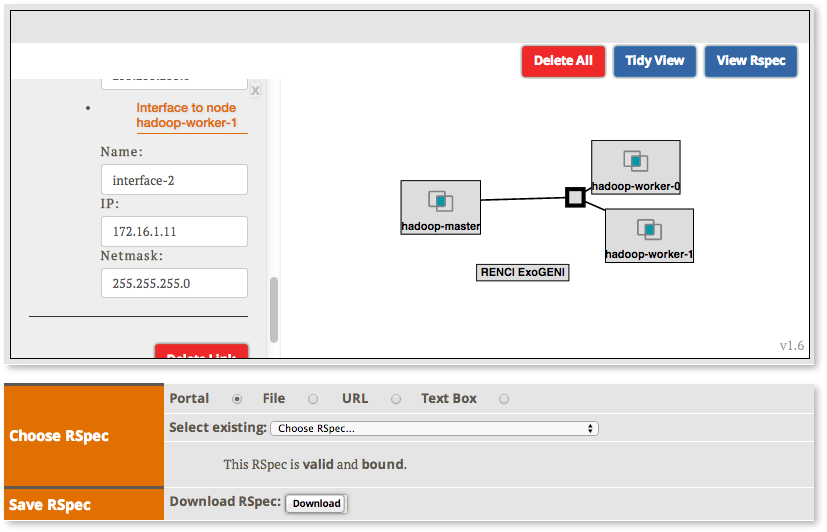
- all the nodes need to be on the same Layer 2 Domain and IP Subnet (172.16.1.0/24)
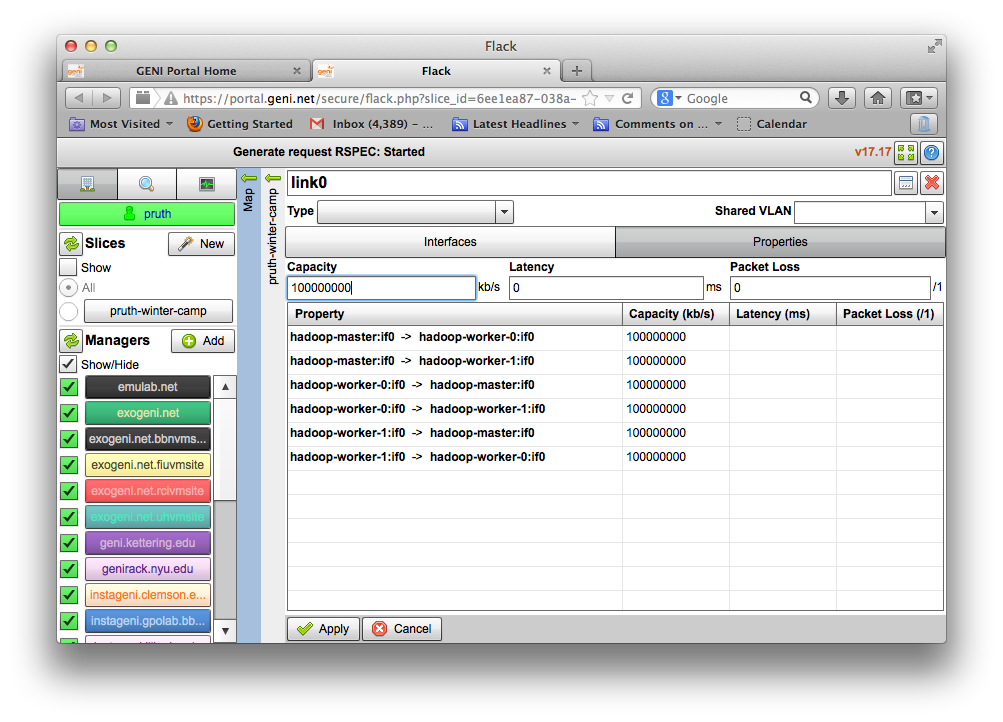
|


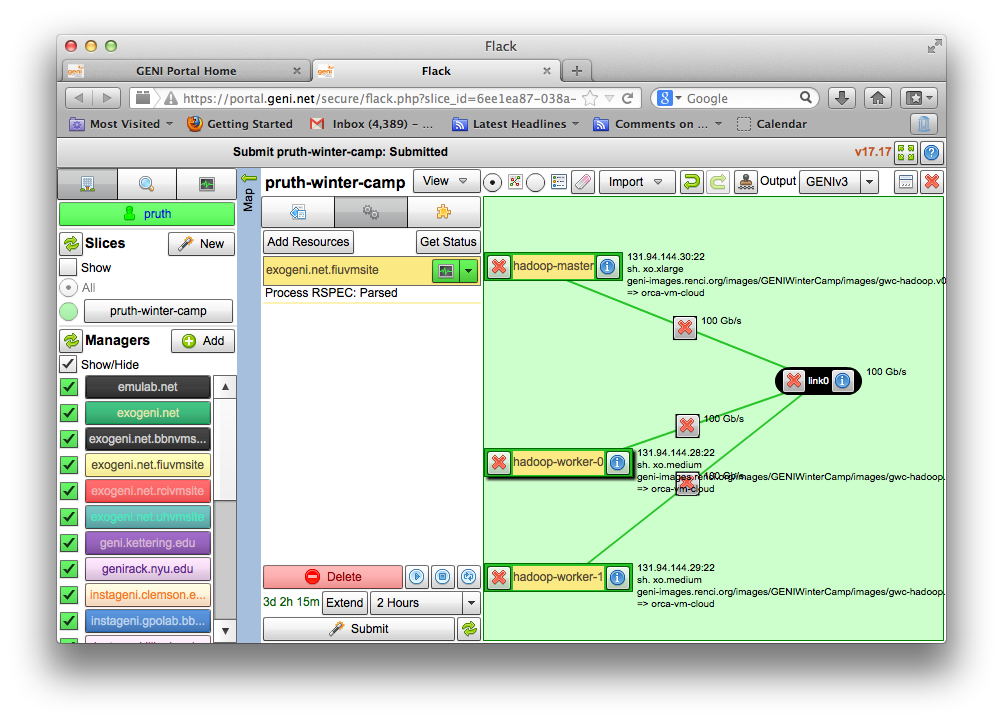
2.3. Reserve your resources
You can use any tool to reserve this topology, today we are going to use Omni. To do that you will need to:
|
2.5 Wait for resources to be ready
You can tell whether your nodes are ready by using a script built on omni called readyToLogin.
-
Please use the command:
readyToLogin slicename --useSliceAggregates

where  slicename is your slice name
- If it reports that the sliver is not yet ready (for example, it might say that the status is "changing"), then wait a minute
or two and try again. Once everything is complete, readyToLogin
will give output that should look something like this:
...
rschr's geni_status is: ready (am_status:ready)
User example logs in to rschr using:
        ssh  -p 32768 -i /Users/example/.ssh/geni_key_portal example@pc1.utah.geniracks.net
User example logs in to collar using:
        ssh -p 32769 -i /Users/example/.ssh/geni_key_portal example@pc1.utah.geniracks.net
...
Introduction
Next: Execute the Hadoop Experiment
Attachments (24)
-
add-master.png (228.0 KB) - added by 10 years ago.
HadoopInASlice - add-master.png
-
edit-master.png (216.1 KB) - added by 10 years ago.
HadoopInASlice - edit-master.png
-
add-workers.png (243.2 KB) - added by 10 years ago.
HadoopInASlice - add-workers.png
-
edit-workers.png (219.9 KB) - added by 10 years ago.
HadoopInASlice - edit-workers.png
-
add-link.png (266.8 KB) - added by 10 years ago.
HadoopInASlice - add-link.png
-
edit-link-interfaces.png (193.5 KB) - added by 10 years ago.
HadoopInASlice - edit-link-interfaces.png
-
edit-link-properties.png (201.2 KB) - added by 10 years ago.
HadoopInASlice - edit-link-properties.png
-
slice-up.png (240.5 KB) - added by 10 years ago.
HadoopInASlice - slice-up.png
-
Bind-Slice.png (59.4 KB) - added by 9 years ago.
Bind-Slice
- Add-Master.png (49.2 KB) - added by 9 years ago.
- Set-Master-Name.png (57.2 KB) - added by 9 years ago.
- Set-Master-Disk-Image.png (63.4 KB) - added by 9 years ago.
- Set-Master-Install-Script.png (54.2 KB) - added by 9 years ago.
- Set-Master-Execute-Script.png (53.6 KB) - added by 9 years ago.
- Add-Workers.png (51.8 KB) - added by 9 years ago.
- Set-Worker-Name.png (65.5 KB) - added by 9 years ago.
- Set-Worker-Disk-Image.png (62.7 KB) - added by 9 years ago.
- Set-Worker-Install-Script.png (57.5 KB) - added by 9 years ago.
- Set-Worker-Execute-Script.png (56.0 KB) - added by 9 years ago.
- Setup-Worker2.png (53.2 KB) - added by 9 years ago.
- Add-Link.png (54.4 KB) - added by 9 years ago.
- Set-Master-IP.png (60.5 KB) - added by 9 years ago.
- Set-Worker0-IP.png (60.5 KB) - added by 9 years ago.
- Set-Worker1-IP.png (56.3 KB) - added by 9 years ago.