
| Version 22 (modified by , 9 years ago) (diff) |
|---|
Hadoop in a Slice
We are actively updating this tutorial. If you need help with this tutorial please contact: help@geni.net
Part I: Obtain Resources: create a slice and reserve resources

Instructions
1. Create a slice
|
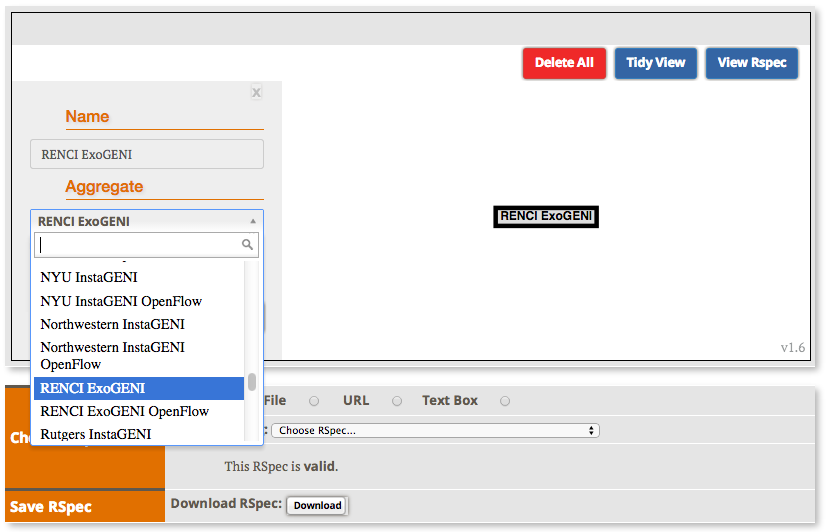
2. Bind the Slice
|

|
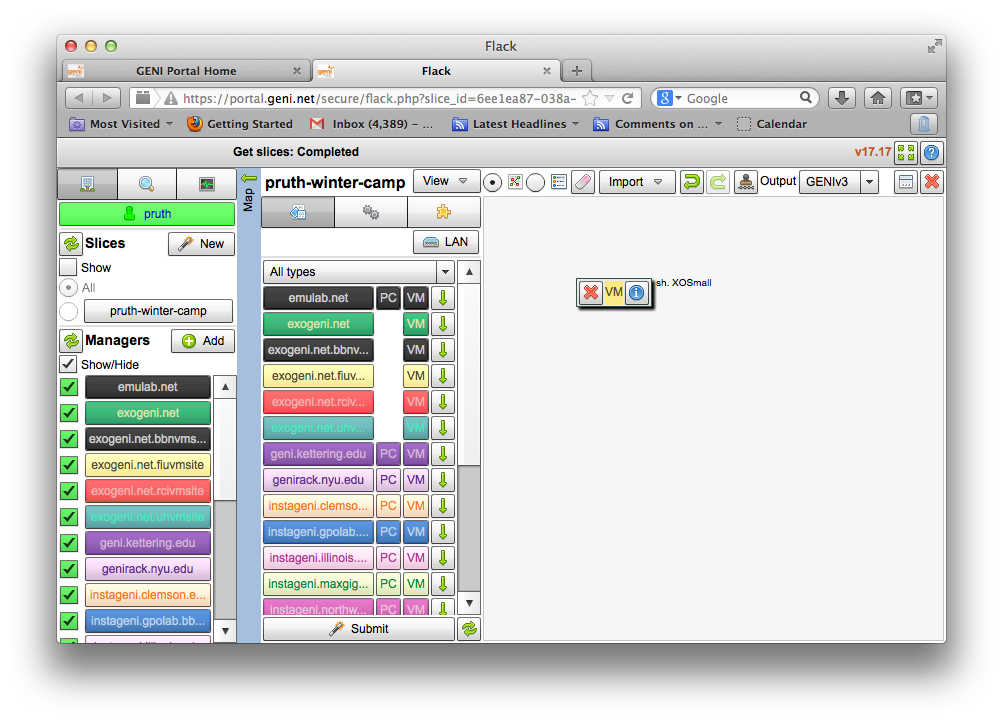
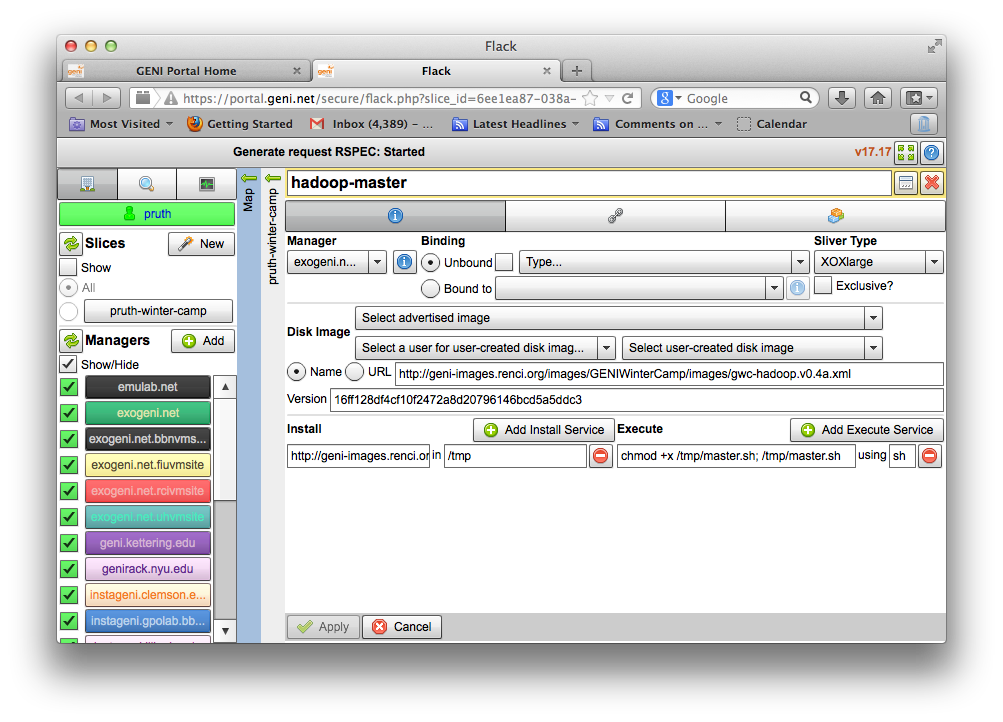
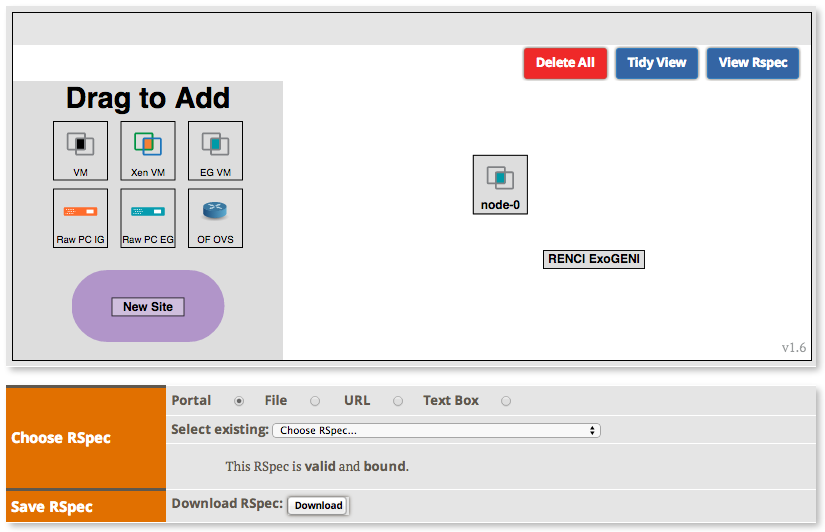
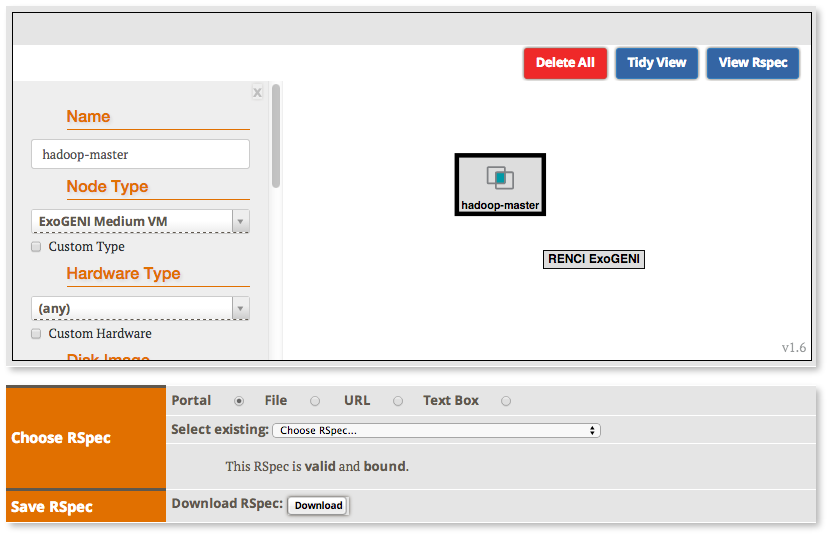
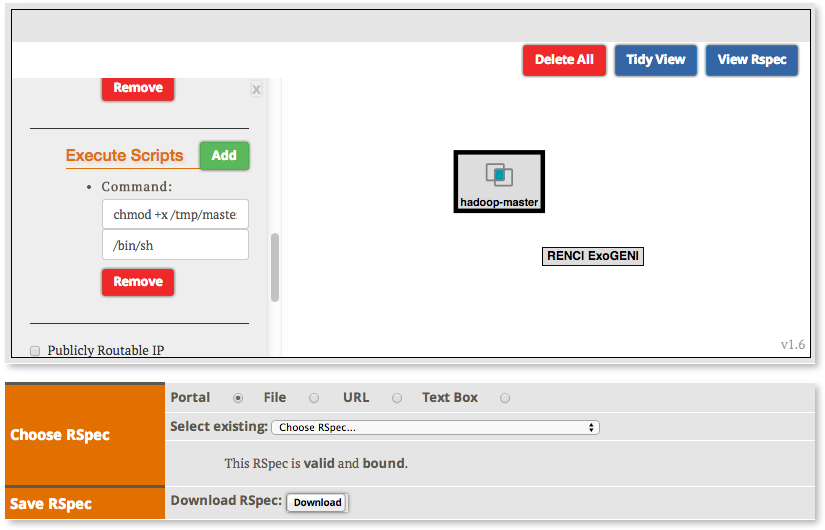
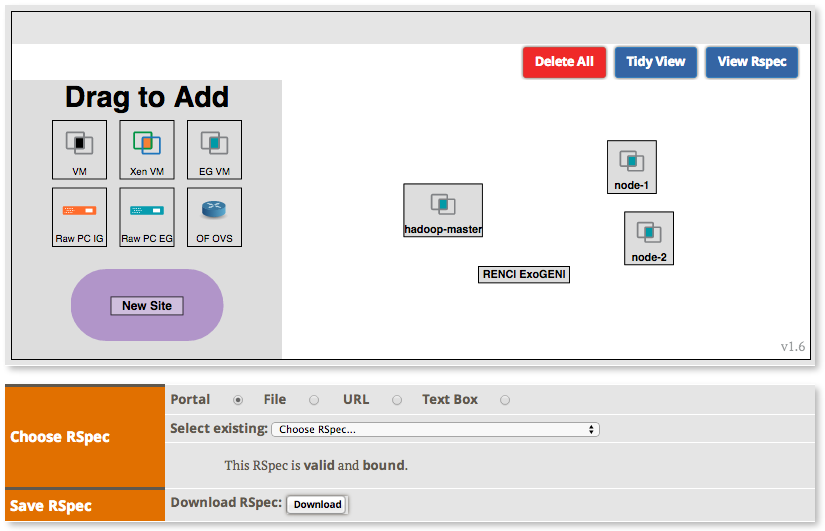
3. Create the Hadoop Master

|


|
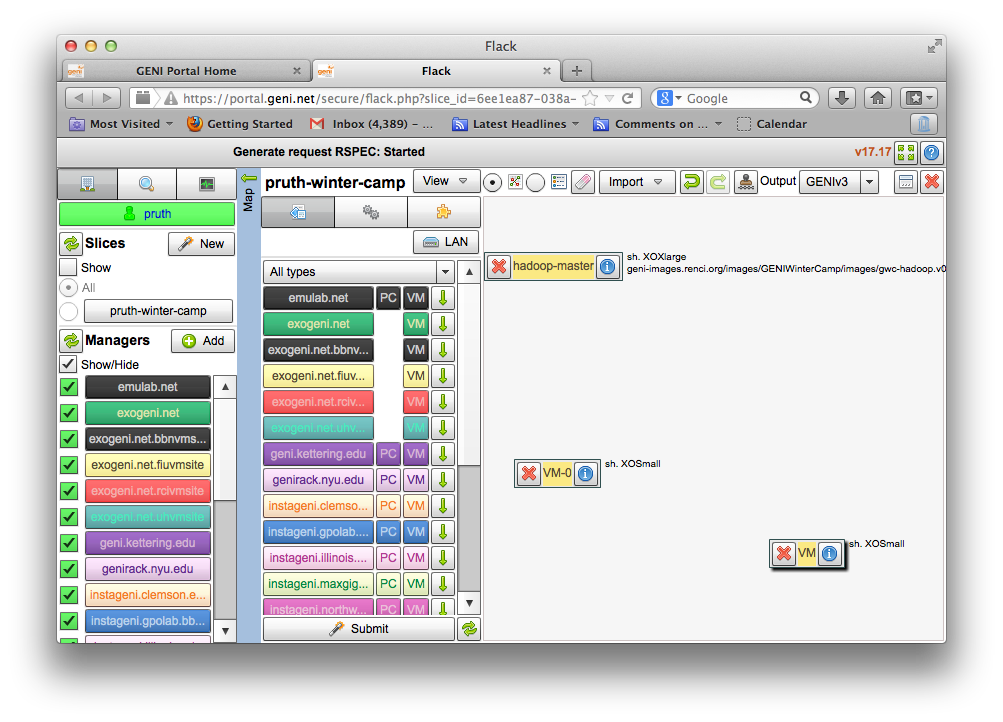
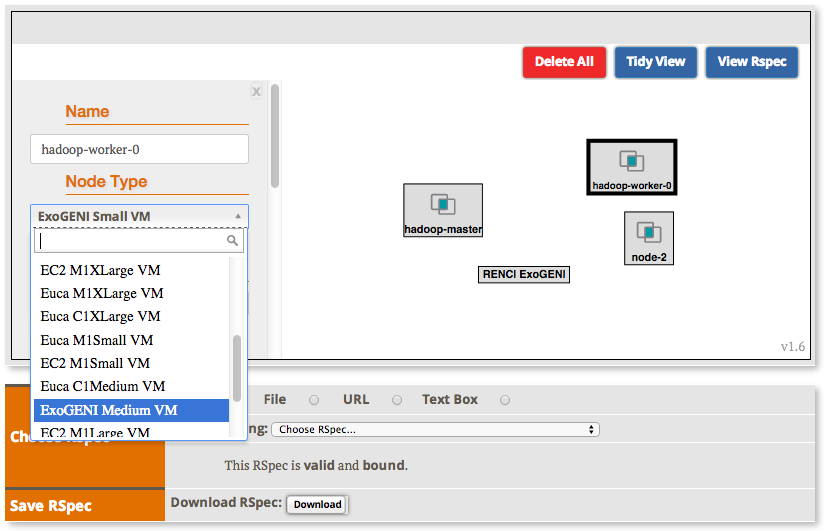
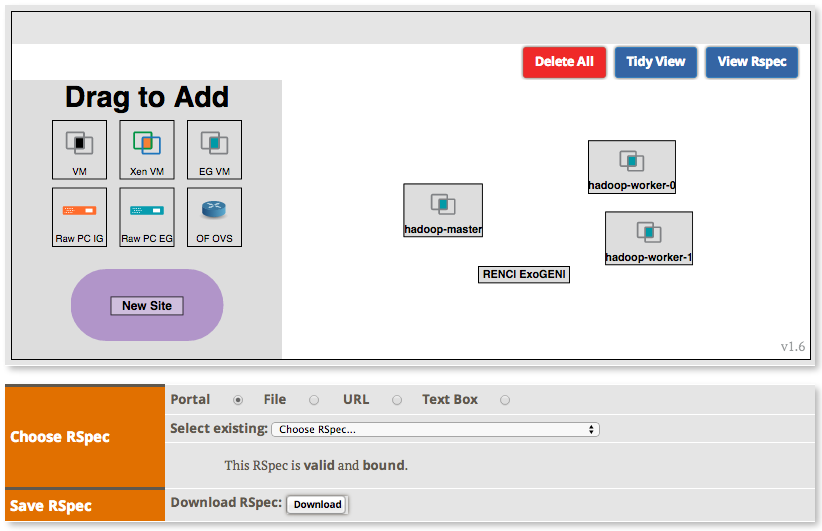
3. Create the Hadoop Workers
|

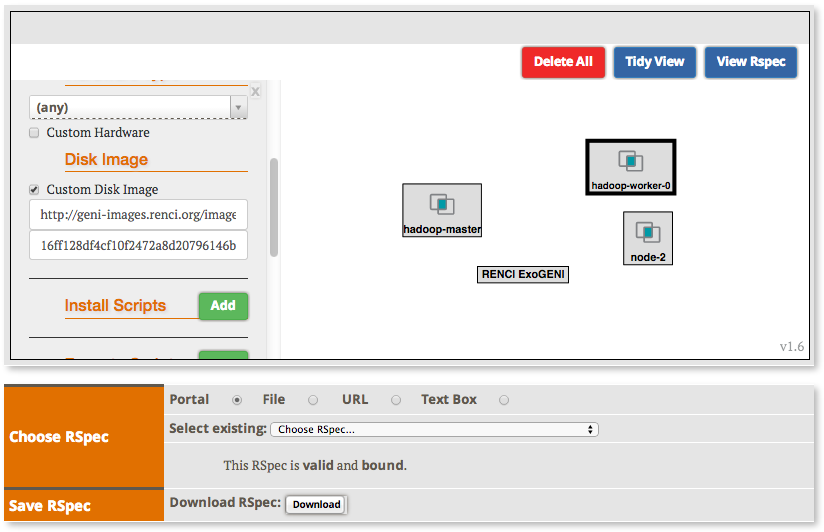
- Edit each worker’s attributes
- Names: hadoop-worker-0 and hadoop-worker-1
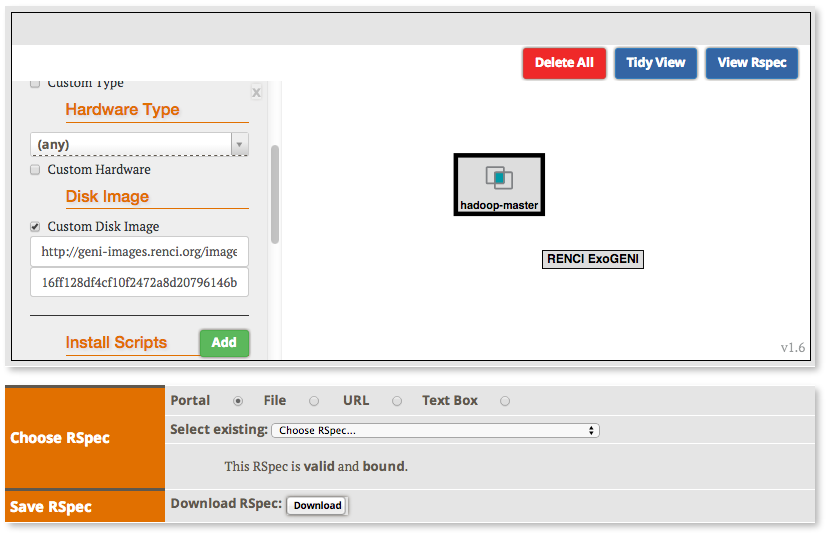
- Node Type: ExoGENI Medium
- Disk Image Name: http://geni-images.renci.org/images/GENIWinterCamp/images/gwc-hadoop.v0.4a.xml
- Disk Image Version: 16ff128df4cf10f2472a8d20796146bcd5a5ddc3
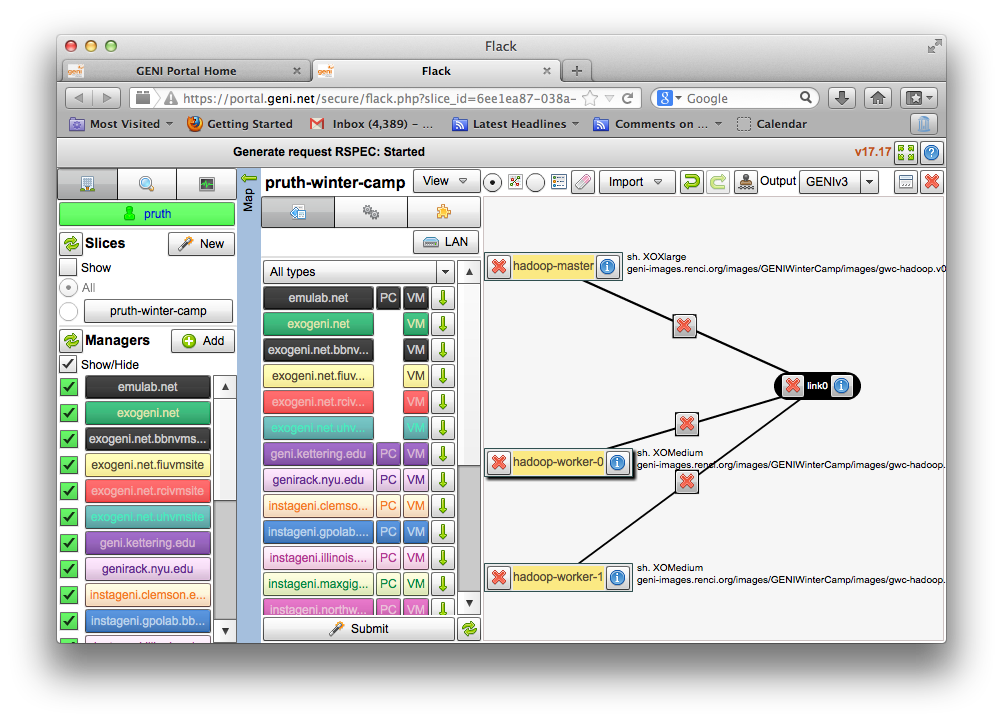
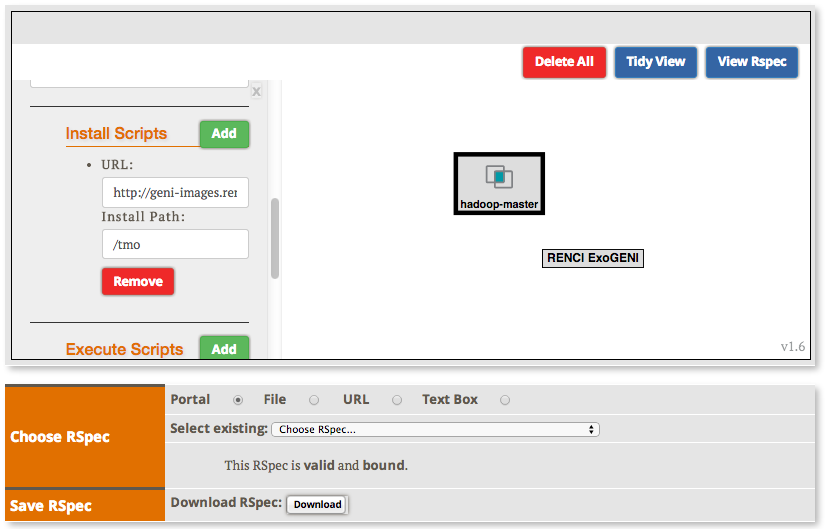
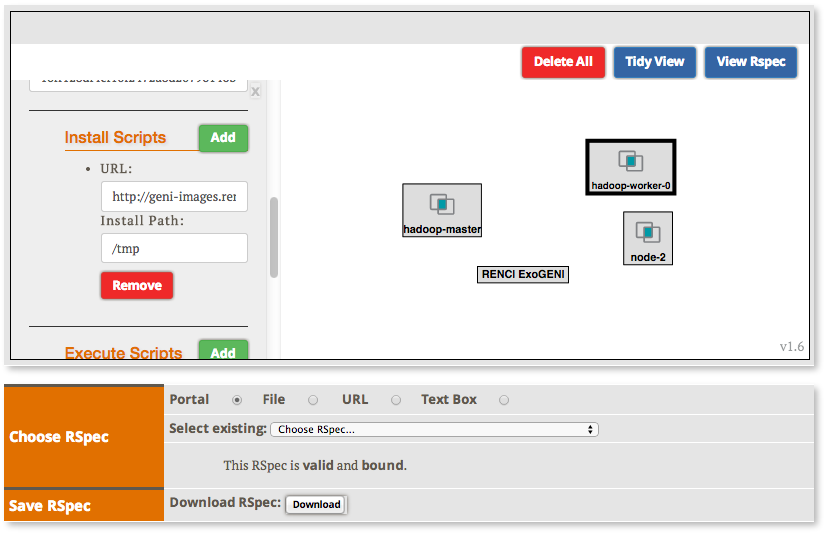
- Add an Install Script:
URL:http://geni-images.renci.org/images/GENIWinterCamp/worker.sh
Path:/tmp - Add an execute service to execute the script at boot time. For each VM, substitute
the VM’s name for where the following uses “hadoop-worker-0”. (Note: the following
should be placed on one line)
chmod +x /tmp/worker.sh; /tmp/worker.sh $hadoop-master.Name() $hadoop-master.IP("link-0") $hadoop-worker-0.Name() $hadoop-worker-0.IP("link-0") - Repeat for worker 1


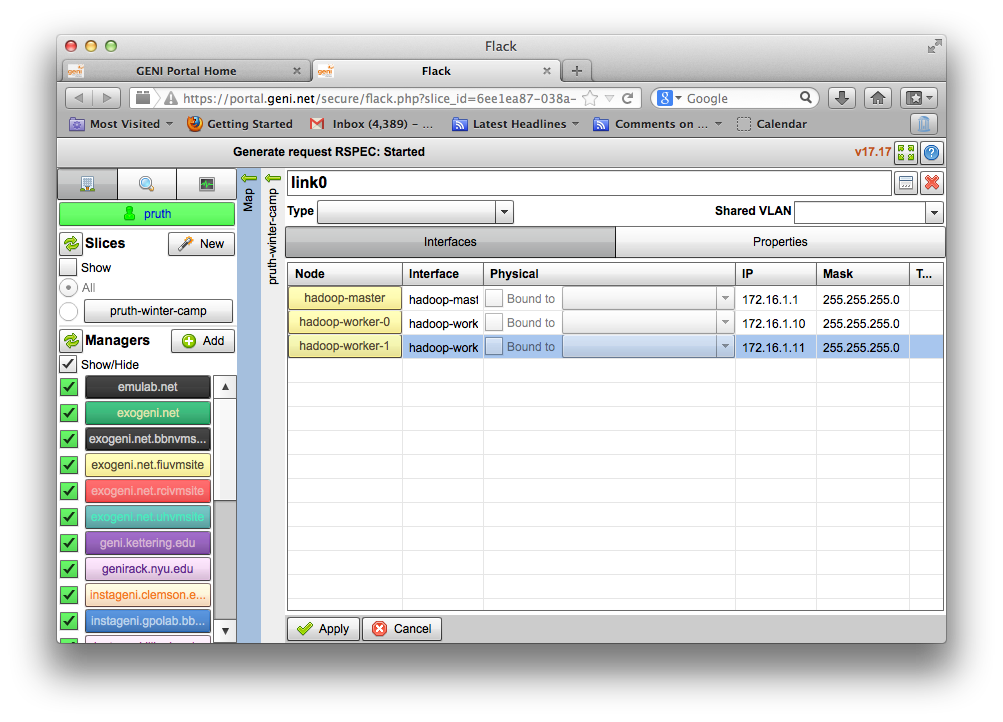
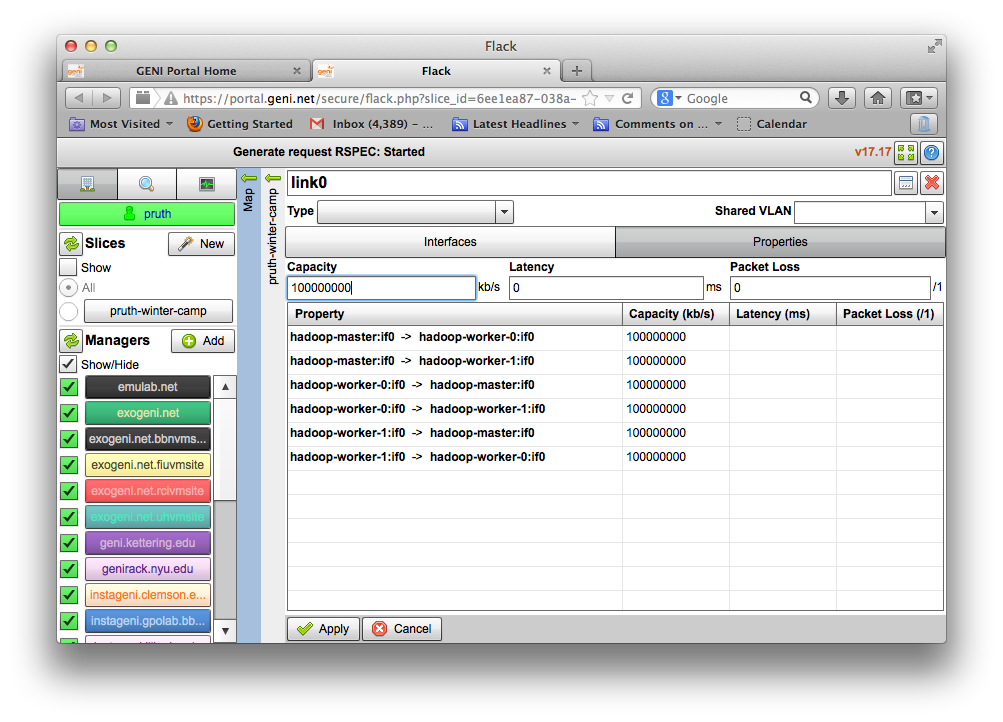
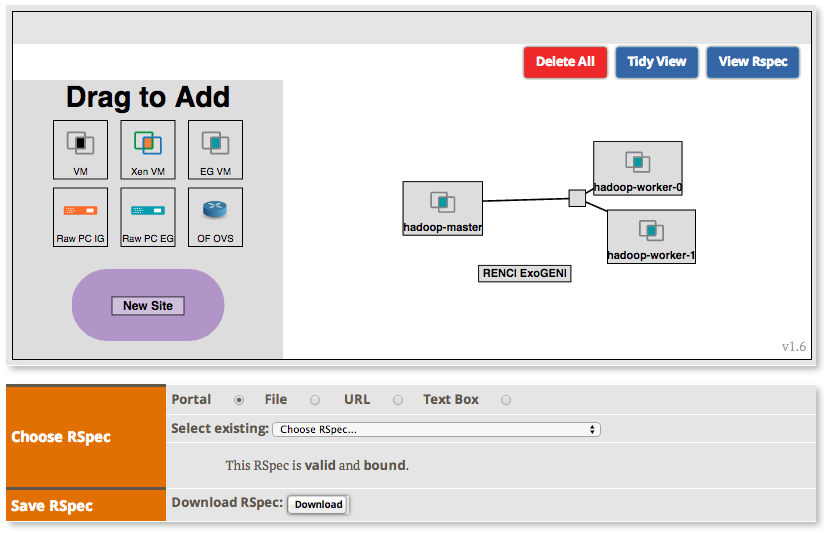
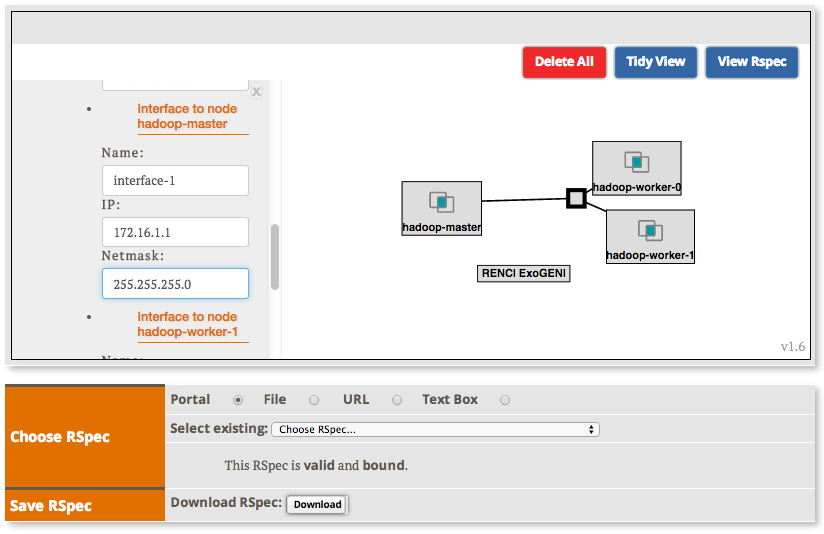
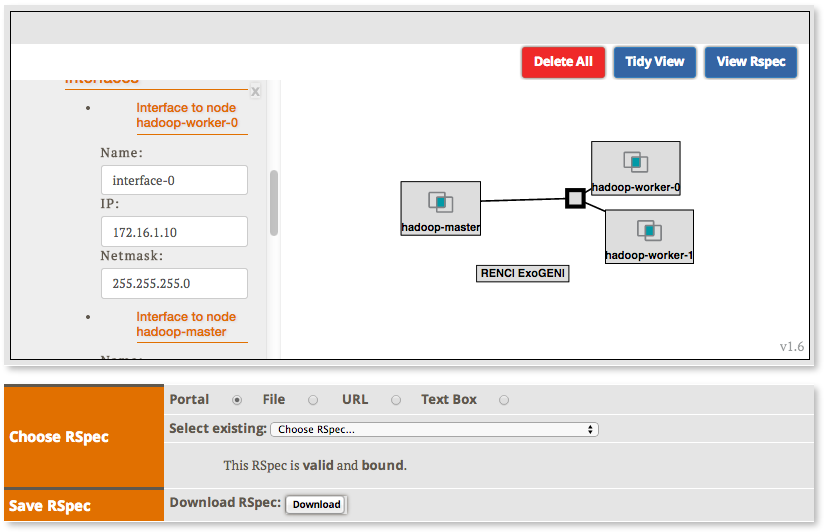
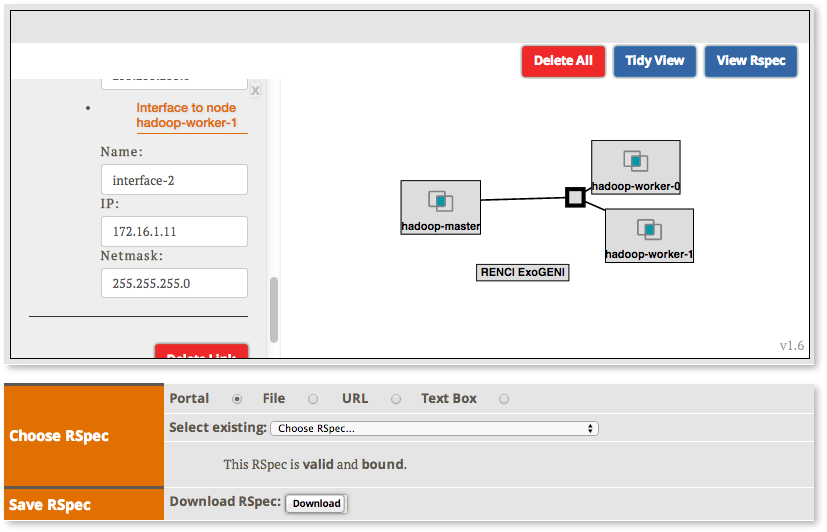
4. Create the Network


|
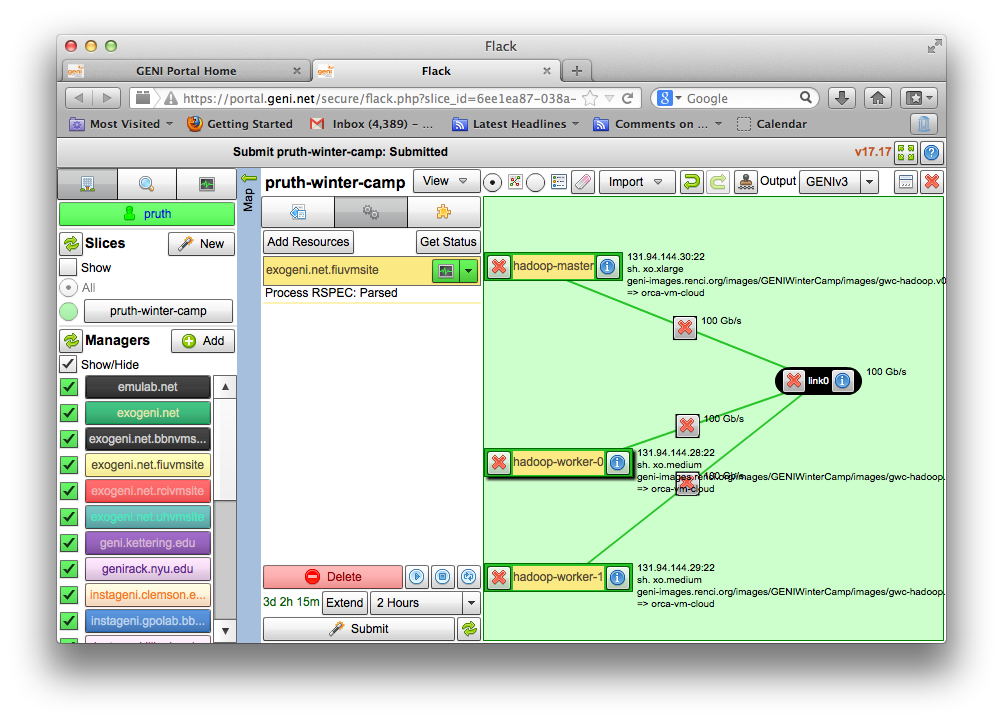
5. Instantiate the Slice
You can use any tool to reserve this topology, today we are going to use Omni. To do that you will need to:
|
Introduction
Next: Execute the Hadoop Experiment
Attachments (24)
-
add-master.png (228.0 KB) - added by 10 years ago.
HadoopInASlice - add-master.png
-
edit-master.png (216.1 KB) - added by 10 years ago.
HadoopInASlice - edit-master.png
-
add-workers.png (243.2 KB) - added by 10 years ago.
HadoopInASlice - add-workers.png
-
edit-workers.png (219.9 KB) - added by 10 years ago.
HadoopInASlice - edit-workers.png
-
add-link.png (266.8 KB) - added by 10 years ago.
HadoopInASlice - add-link.png
-
edit-link-interfaces.png (193.5 KB) - added by 10 years ago.
HadoopInASlice - edit-link-interfaces.png
-
edit-link-properties.png (201.2 KB) - added by 10 years ago.
HadoopInASlice - edit-link-properties.png
-
slice-up.png (240.5 KB) - added by 10 years ago.
HadoopInASlice - slice-up.png
-
Bind-Slice.png (59.4 KB) - added by 9 years ago.
Bind-Slice
- Add-Master.png (49.2 KB) - added by 9 years ago.
- Set-Master-Name.png (57.2 KB) - added by 9 years ago.
- Set-Master-Disk-Image.png (63.4 KB) - added by 9 years ago.
- Set-Master-Install-Script.png (54.2 KB) - added by 9 years ago.
- Set-Master-Execute-Script.png (53.6 KB) - added by 9 years ago.
- Add-Workers.png (51.8 KB) - added by 9 years ago.
- Set-Worker-Name.png (65.5 KB) - added by 9 years ago.
- Set-Worker-Disk-Image.png (62.7 KB) - added by 9 years ago.
- Set-Worker-Install-Script.png (57.5 KB) - added by 9 years ago.
- Set-Worker-Execute-Script.png (56.0 KB) - added by 9 years ago.
- Setup-Worker2.png (53.2 KB) - added by 9 years ago.
- Add-Link.png (54.4 KB) - added by 9 years ago.
- Set-Master-IP.png (60.5 KB) - added by 9 years ago.
- Set-Worker0-IP.png (60.5 KB) - added by 9 years ago.
- Set-Worker1-IP.png (56.3 KB) - added by 9 years ago.