
| Version 9 (modified by , 10 years ago) (diff) |
|---|
Understanding the AM API using Content Centric Networking

1. Design the Experiment
|
2. Establish the Environment
2.1 Set up ssh keys and configure Omni
If your account is from the GENI Portal follow the instructions in the Section 2 of this exercise.
If your account is from the iMinds member authority (https://www.wall2.ilabt.iminds.be) follow the instructions at http://trac.gpolab.bbn.com/gcf/wiki/OmniConfigure/AutomaticProtoGENI.
3. Obtain Resources
3.2. Load the experiment topology
For this exercise, we will edit an existing RSpec file. Start by loading this predefined topology into jFed.
|

Figure 3-1 Import an RSpec into jFed. |
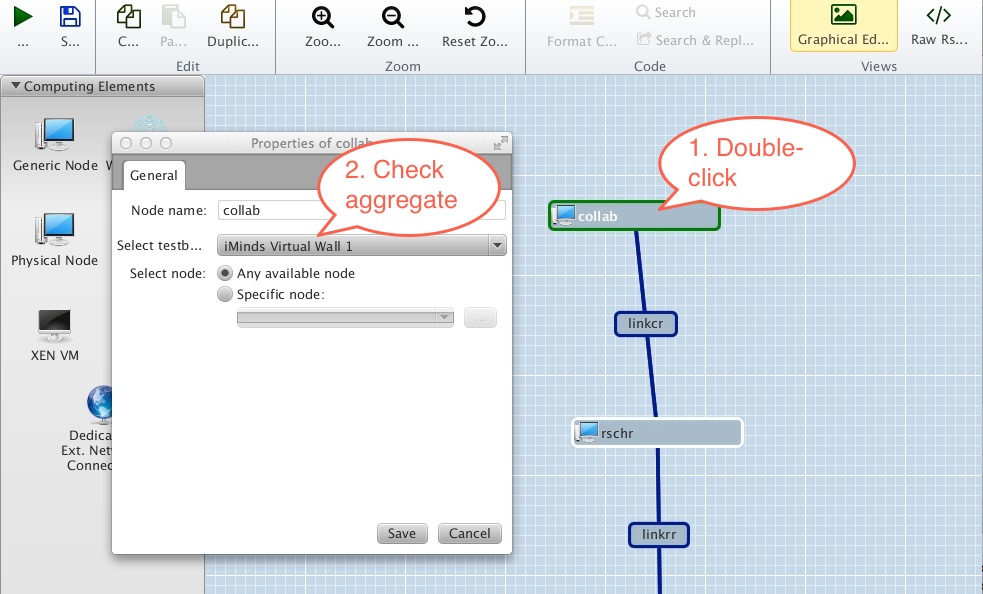
|

Figure 3-2 Make sure resource is being requested from the correct aggregate. |
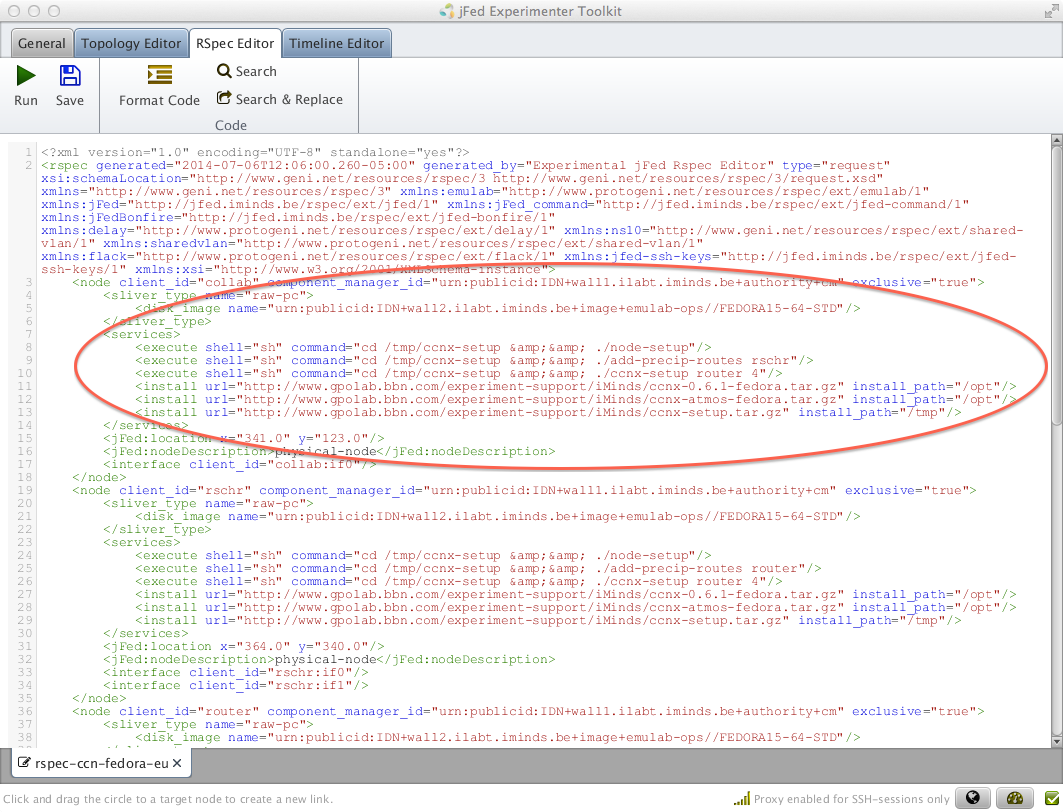
3.3. Modify the RSpec to automatically install and execute CCNX software
For this experiment, we need to install the following software on the nodes:
- The CCNX software (ccnx-0.6.1-F15-x64.tar.gz)
- Scripts that set up the CCNX software (ccnx-setup.tar.gz)
- Scripts used to pull atmospheric precipitation data using the CCNX protocol (ccnx-atmos-F15-x64.tar.gz)
When the nodes start up, we need the following scripts to be executed:
- Script that sets up the node (node-setup)
- Script that sets up the ccnx protocol (ccnx-setup)
- Script that setup up ccnx protocol routes (add-precip-routes)
We automate the installation and running of the software using install and execute scripts in the RSpec. Let's view the RSpec we uploaded.
|

Figure 3-3 View and edit an RSpec in jFed. |
|
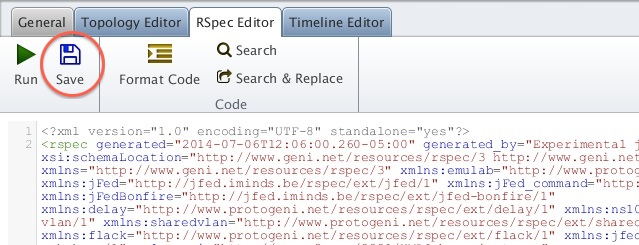
3.5. Save the request RSpec in a Local File
For this tutorial we will use the Omni tool to create a slice and add resources to the slice.
|

Figure 3-4 Saving a Request RSpec from jFed. |
|
3.6. Instantiate the new experiment using Omni
For this step, we'll change the approach a bit and switch to a new client tool, the command line Omni client.
From a terminal, please enter the command:
$ omni -a AM_URL createsliver SLICENAME RSPEC_FILE
where AM_URL is the URL for your assigned aggregate, SLICENAME is the name of your slice and RSPEC_FILE is then name of file with your RSpec.
For wall1, use the AM_URL https://www.wall1.ilabt.iminds.be:12369/protogeni/xmlrpc/am/2.0
For wall2, use the AM_URL https://www.wall2.ilabt.iminds.be:12369/protogeni/xmlrpc/am/2.0
If all is well, the output from Omni will end with something like:
Result Summary: Got Reserved resources RSpec from www-wall1-ilabt-iminds-be-protogeniv2}}}
and your resource reservation is complete!
Introduction
Next: Execute
Attachments (4)
- jFed-openURL.jpg (47.7 KB) - added by 10 years ago.
- checkAggregate.jpg (163.2 KB) - added by 10 years ago.
- viewRspec.png (302.9 KB) - added by 10 years ago.
- saveRSpec.jpg (77.6 KB) - added by 10 years ago.
Download all attachments as: .zip