
| Version 18 (modified by , 10 years ago) (diff) |
|---|
VLC DASH Tutorial

2. Implement VLC DASH Client on ExoGENI VLAN
2.1 Setup OpenFlow Controllers
- 2.1.1 Check that all interfaces on the
switchand on theaggregatorare configured: Issue/sbin/ifconfigand make sure eth1, eth2, eth3 are up and assigned with valid IP addresses.
![]() You may not be able to see all interfaces up immediately when node "Switch" is ready; wait for some more time (about 1 min) then try "ifconfig" again.
You may not be able to see all interfaces up immediately when node "Switch" is ready; wait for some more time (about 1 min) then try "ifconfig" again.
- 2.1.2 Setup the
switchand theaggregator
On the Aggregator Node run
    sudo bash
    source  /etc/profile.d/rvm.sh
    trema run /tmp/aggregator/aggregator.rb >& /tmp/trema.run &
On the Switch Node run
    sudo bash
    source  /etc/profile.d/rvm.sh
We have already installed and configured the OVS switch, if you want to take a look at the configuration and understand more look at the output of these commands
ovs-vsctl list-br
ovs-vsctl list-ports br0
ovs-vsctl show br0
ovs-ofctl show br0

2.2 Setup the Apache Server and host DASH Video
In this section, you will be able to install the Apache server on ExoGENI node (VM-3) by logging in and executing the following script.
The first 4 lines of this script install and setup the Apache server. The rest of the script downloads a sample DASH video from emmy9.casa.umass.edu and hosts it on the server that you just set up.
#!/bin/bash

apt-get update
apt-get -y install apache2
apt-get -y install apache2-threaded-dev

apache2ctl restart

mkdir /root/DASH_BuckBunny

curl http://emmy9.casa.umass.edu/wget_download.sh -o /root/wget_download.sh

chmod +x /root/wget_download.sh

sh /root/wget_download.sh
2.3 Install VLC Client
The actual VLC Client which requests the video can be set up using this script. For streaming this video from the Apache server and in order to instrumentize and measure the DASH bit-rate using LabWiki we need to execute the following commands.
This script needs to be executed manually to monitor the progress of VLC Client installation
#!/bin/bash

apt-get install -y --force-yes subversion
echo 'deb http://download.opensuse.org/repositories/home:cdwertmann:oml/xUbuntu_12.04/ /' >> /etc/apt/sources.list.d/oml2.list
curl http://download.opensuse.org/repositories/home:cdwertmann:oml/xUbuntu_12.04/Release.key -o /root/Release.key
apt-key add - < /root/Release.key

apt-get -y --force-yes update
apt-get -y --force-yes -f install
apt-get -y --force-yes install oml2

apt-get build-dep -y --force-yes vlc
cd /root/
svn co http://witestlab.poly.edu/repos/omlapps/vlc/vlc-2.1.0-git/
cd /root/vlc-2.1.0-git
apt-get install -y --force-yes liboml2-dev checkinstall build-essential cmake libtool automake autoconf git-core ffmpeg libxcb-shm0-dev libxcb-xv0-dev libx11-xcb-dev libcdparanoia-dev libcdio-paranoia-dev libcdio-cdda-dev libqt4-dev qt4-dev-tools qt4-qmake nasm yasm libasm-dev lua5.1

apt-get autoremove

./configure LIBS="-loml2" --enable-run-as-root
make
make install
2.4 Instrumentize and Measure DASH Bit-Rate using LabWiki
2.4.1 Start the Controller on Switch
- 3.1.1 Start the controller on switch.
An example OpenFlow Controller that assigns incoming TCP connections to alternating paths based on total number of flows (round robin) is already downloaded for you. You can find it (load-balancer.rb) in the home directory on node "Switch".
trema run /root/load-balancer.rb
After you started your Load Balancer, you should be able to see the following (Switch id may vary):OpenFlow Load Balancer Conltroller Started! Switch is Ready! Switch id: 196242264273477
2.4.2 OML Script
defApplication('vlc') do |app|

   app.binary_path = "/usr/local/bin/vlc"
#   app.path = "/home/cong/work/vlc-2.1.0-git/bin/vlc-static"
   #app.version(2, 1, 0)
   #app.shortDescription = "VLC"
   app.description = "VLC multimedia player and streamer"

   app.defProperty("input", "Stream input (e.g. file or network address)", "",
                   {:type => :string, :dynamic => false})
#   app.defProperty("sout", "Stream output", "--sout",
#                   {:type => :string, :dynamic => false})
   app.defProperty("intf", "Main interface module", "--intf",
                   {:type => :string, :dynamic => false})
#   app.defProperty("extraintf", "Extra interface module(s). Use --extraintf omlstats to enable OML", "--extraintf",
#                   {:type => :string, :dynamic => false})
 #  app.defProperty("mtu", "Specifies the MTU of the network interface", "--mtu",
#                   {:type => :string, :dynamic => false})
#   app.defProperty("quiet", " Deactivates all console messages", "--quiet",
#                   {:type => :boolean, :dynamic => false})
 #  app.defProperty("play-and-exit", "Exit VLC after playing all the items in the input stream list", "--play-and-exit",
 #                  {:type => :boolean, :dynamic => false})

   app.defMeasurement('dashRateAdaptation') do |mp|
     mp.defMetric('chosenRate_bps',:int)
     mp.defMetric('empiricalRate_bps',:int)
     mp.defMetric('decisionRate_bps',:int)
     mp.defMetric('buffer_percent',:int)
   end

   app.defMeasurement('dashDlSession') do |mp|
     mp.defMetric('chunkCount',:int)
     mp.defMetric('readSession_B',:int)
     mp.defMetric('readChunk_B',:int)
     mp.defMetric('timeSession_s',:float)
     mp.defMetric('timeChunk_s',:float)
   end
end

defProperty('theOne','inside-vlctest','ID sender node')

#defProperty('packetsize', 128, "Packet size (byte) from the sender node")
#defProperty('bitrate', 2048, "Bitrate (bit/s) from the sender node")
#defProperty('runtime', 40, "Time in second for the experiment is to run")
defProperty('duration', 100, "Duration of experiment")

defGroup('Sender',property.theOne) do |node|
  node.addApplication("vlc") do |app|
#    app.setProperty('quiet', true)
#    app.setProperty('play-and-exit', false)
    #app.setProperty('intf', 'dummy')
#    app.setProperty('extraintf', 'omlstats')
    app.setProperty('input', 'http://10.10.10.1/www-itec.uni-klu.ac.at/ftp/datasets/mmsys12/BigBuckBunny/bunny_2s_480p_only/bunny_Desktop.mpd')
#    app.setProperty('mtu', '1200')
    app.measure('dashDlSession', :samples =>1)
    app.measure('dashRateAdaptation', :samples =>1)
  end
end


onEvent(:ALL_UP_AND_INSTALLED) do |event|
    info "starting"
  after 2 do
    allGroups.startApplications
    info "All applications started..."
    end
  after 100 do
    allGroups.stopApplications
    info "All applications stopped."
    Experiment.done
  end
end

defGraph 'DashRate1' do |g|
  g.ms('dashRateAdaptation').select {[:oml_seq, :decisionRate_bps]}
  g.caption "Decision Rate"
  g.type 'line_chart3'
  g.mapping :x_axis => :oml_seq, :y_axis => :decisionRate_bps
  g.xaxis :legend => 'time [s]'
  g.yaxis :legend => 'Decision Rate', :ticks => {:format => 's'}
end

defGraph 'DashRate2' do |g|
  g.ms('dashRateAdaptation').select {[:oml_seq, :empiricalRate_bps]}
  g.caption "Empirical Rate."
  g.type 'line_chart3'
  g.mapping :x_axis => :oml_seq, :y_axis => :empiricalRate_bps
  g.xaxis :legend => 'time [s]'
  g.yaxis :legend => 'Empirical Rate', :ticks => {:format => 's'}
end
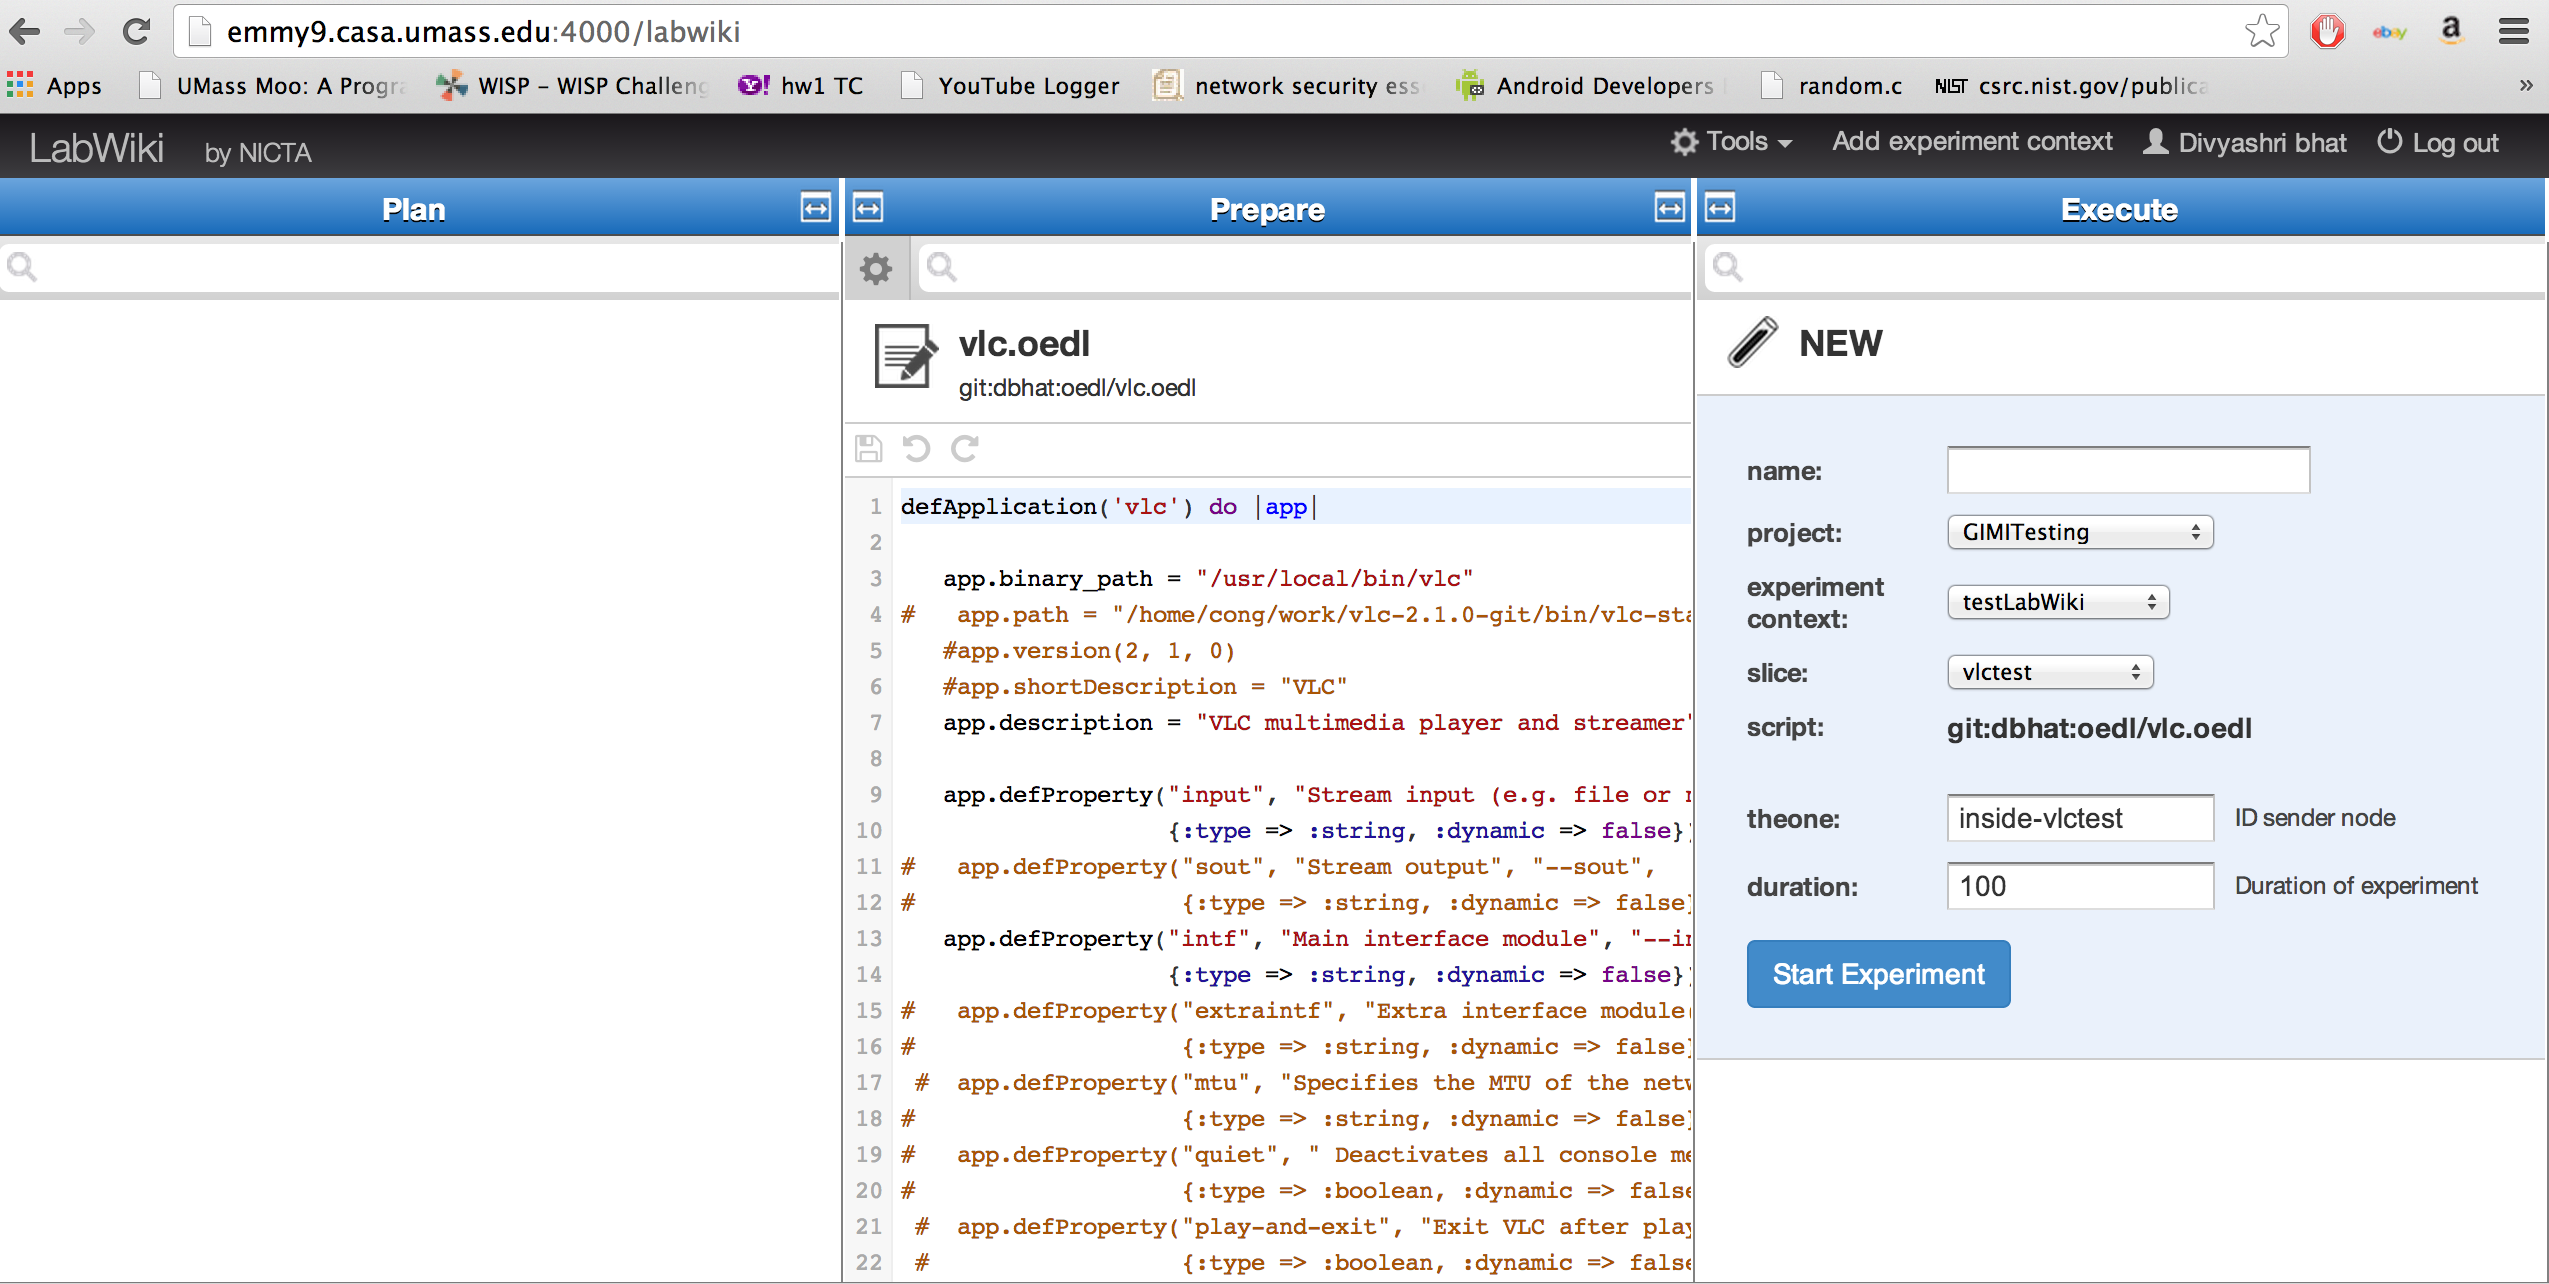
2.4.3 Execute Script
Load the script vlc.oedl from the Prepare window.

Click and Drag the script Icon over to the Execute panel
Change the property to reflect your slicename, inside-<slicename>

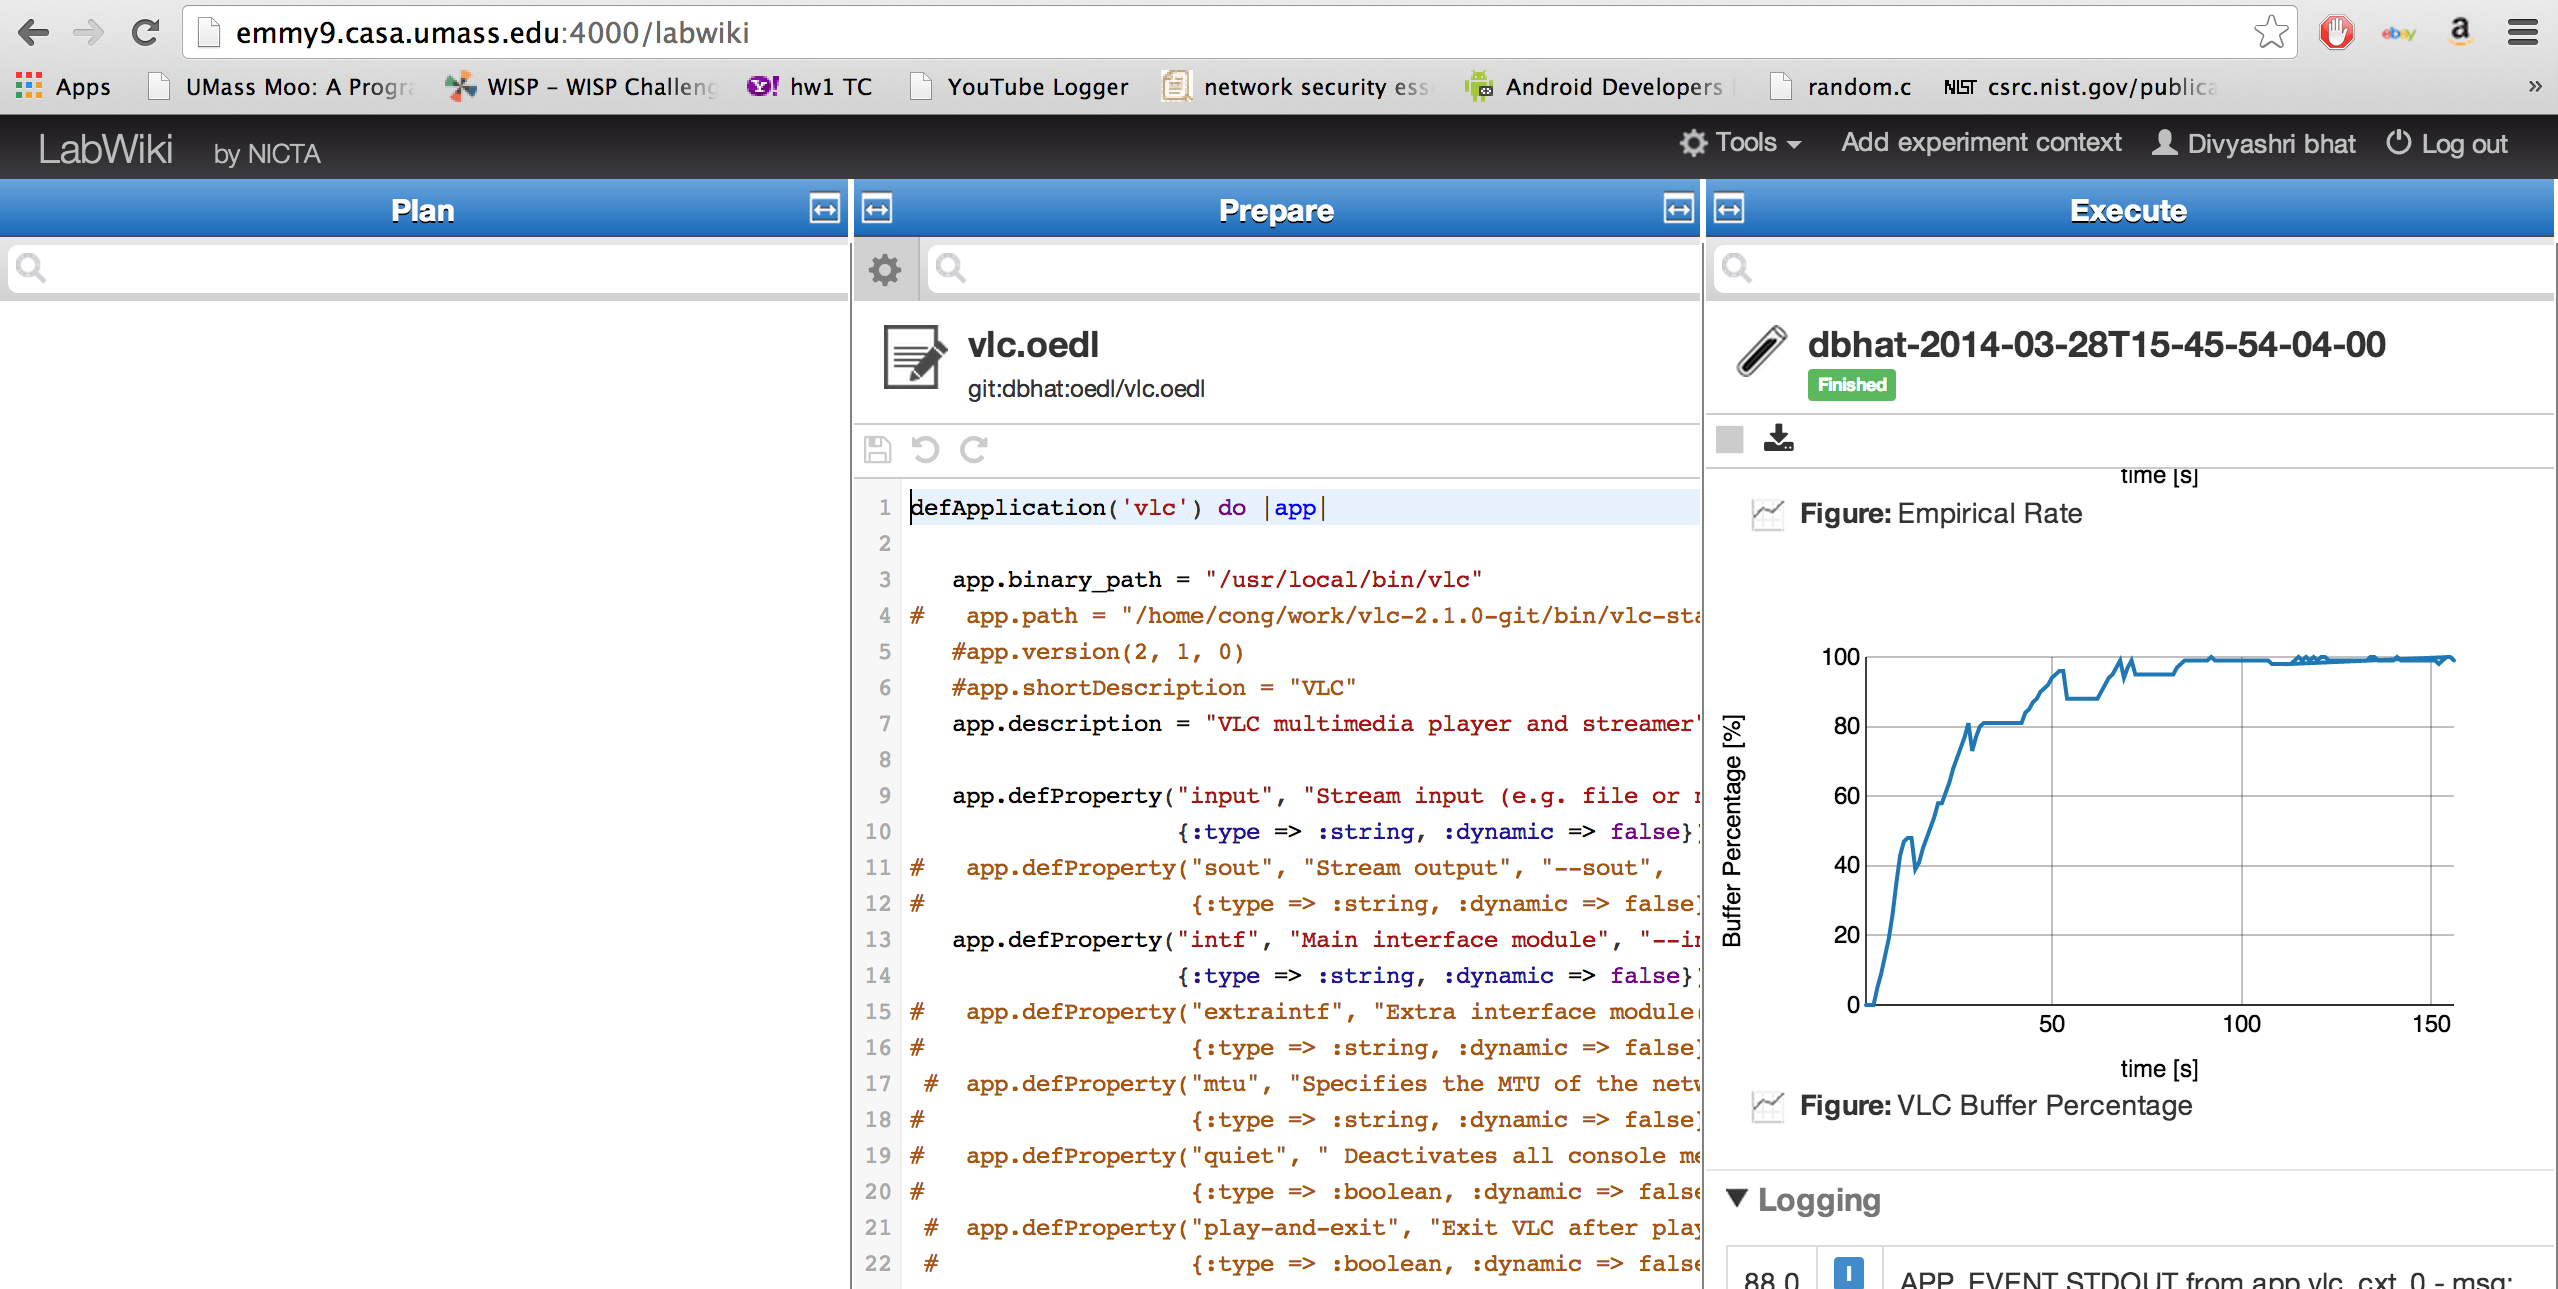
You will see graphs similar to the ones below:
Decision Rate

Empirical Rate

DASH Session read chunk

Attachments (6)
- vlcscr1.png (402.4 KB) - added by 10 years ago.
- vlcscr2.png (491.2 KB) - added by 10 years ago.
- vlcscr3.png (474.6 KB) - added by 10 years ago.
- vlcscr4.png (492.0 KB) - added by 10 years ago.
- vlcscr5.png (479.7 KB) - added by 10 years ago.
- vlcscr6.png (501.4 KB) - added by 10 years ago.