
| Version 33 (modified by , 11 years ago) (diff) |
|---|
<-- Back to Main Tutorial Page | Next to Experiment 1 -->
Introduction to LabWiki & OEDL
This section presents the tools which we will use for all experiments in this tutorial.
- LabWiki is a web-based interface developed at NICTA within the GIMI project. You can use this interface to design, describe and run an experiment using GENI Resources. It was first introduced at GEC17 as part of the GIMI Tutorial. LabWiki's is available on our git repository. In this tutorial, we will all use the instance of LabWiki running at http://labwiki.casa.umass.edu:4601
- OEDL is a domain-specific language used to describe the orchestration of experiments.
LabWiki
Login in LabWiki
- The following instructions were adapted from a previous GIMI Tutorial.
- We strongly recommend to use the Chrome browser to access Labwiki. Other browsers may have issues with the Javascript used in Labwiki and may not display the editor or the graphs correctly.
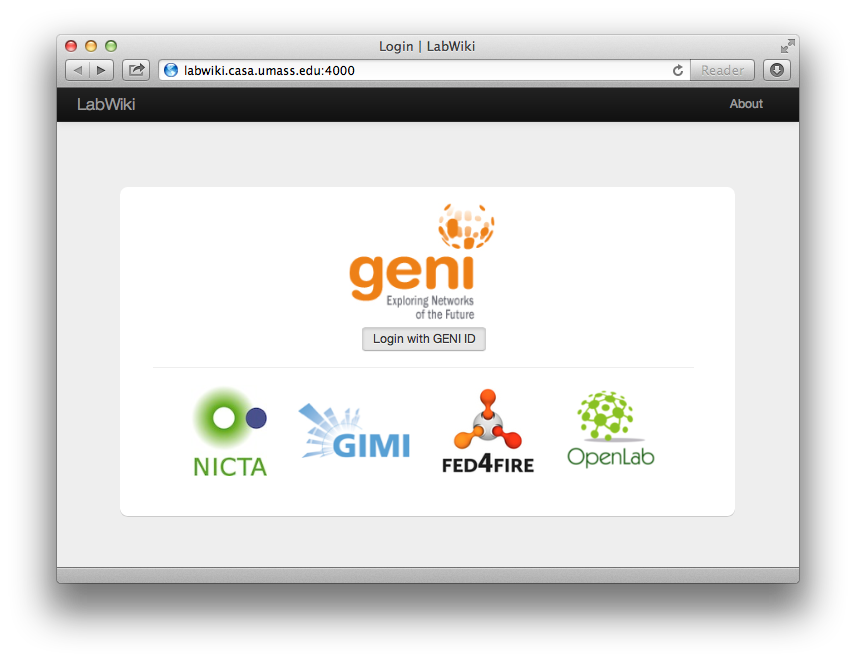
- Direct your browser to the LabWiki webpage at http://labwiki.casa.umass.edu:4601 and click on "Login with GENI ID"

- If you have already logged in to the GENI Portal, you will be automatically logged in to LabWiki
- Otherwise, please use your GENI Portal username and password to login
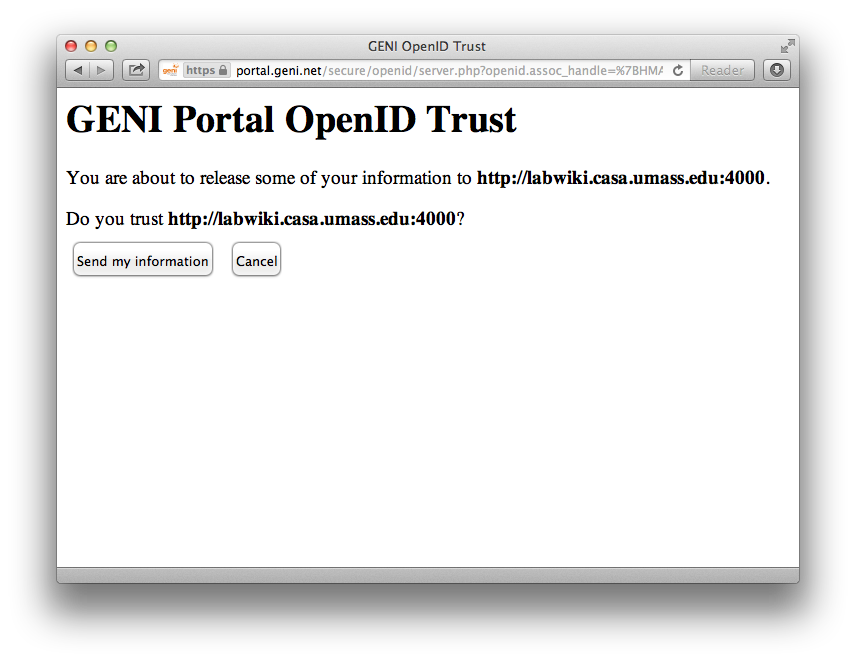
- You will be asked to agree on sending your GENI Portal information to LabWiki. LabWiki will only use your GENI ID to log you in, so please click on "Send my information"

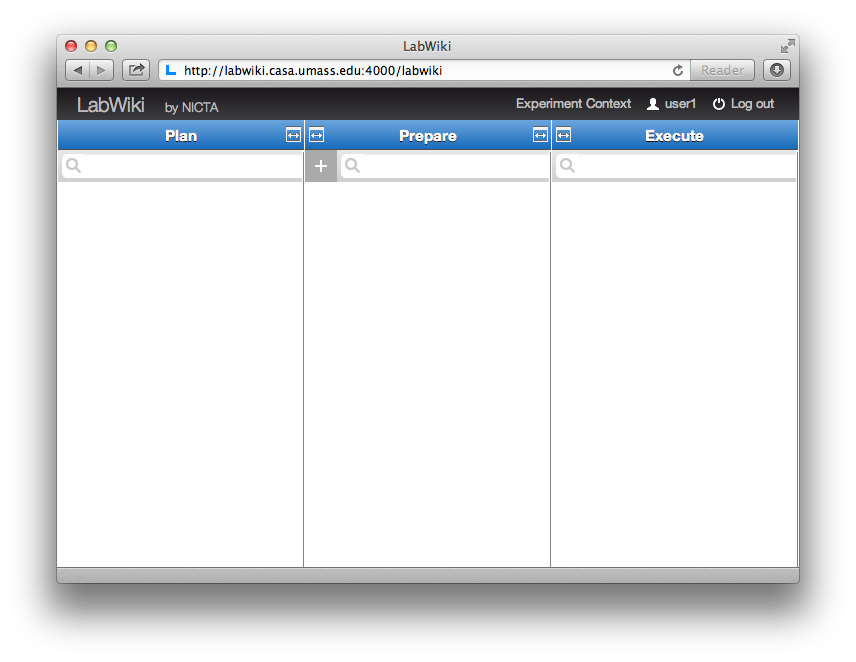
- Once logged in you should arrive on LabWiki's main page

Using LabWiki
By default, LabWiki's main page is composed of 3 columns: "Plan", "Prepare", and "Execute"
Plan
The purpose of the Plan column is to provide some documentation on the experiment at hand. This is where you would describe for example the goals of this experiment, the hypotheses that it tests, its design, any background information to help understand it, etc... Once you ran your experiment, collected, plotted and/or analysed its generated measurements, this is column is also where you would report and discuss results and conclusions. The document displayed in this Plan column are written using the Markdown syntax.
To display a previously saved document, just start typing its name in the search field below the column's title. A drop-down list of matching documents should appear, and you may then click on the desired one.

Prepare
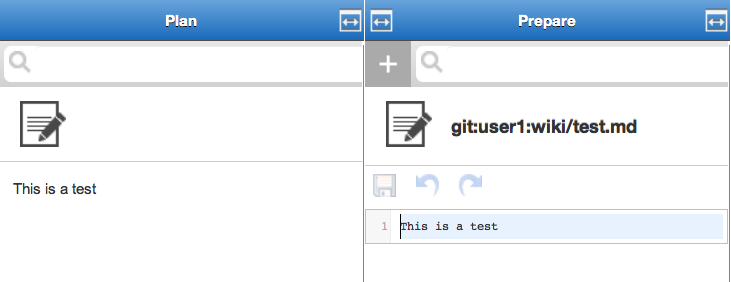
This column is where you create and/or edit either a) the documents that will be displayed in the Plan column or b) the experiment descriptions that will be executed.
- To edit an existing document, which is currently displayed in the Plan column, just drag-and-drop the document icon
 from the Plan column to the Prepare one. Once you are done editing, click the save icon
  . Once that document is save, you can refresh its view in the Plan column by searching for it again in the search field and loading as previously.

- To edit an existing document, which is not currently displayed, just use the search field in the Prepare column to type the name of that document. Matching results should appear in a drop-down list. You may see 2 types of file, some with a .md extension, which are Plan documents and others with a .rb extension, which are experiment file descriptions. You may then click on the desired document (with a .md extension), which will be loaded in the Prepare column and ready to be edited.

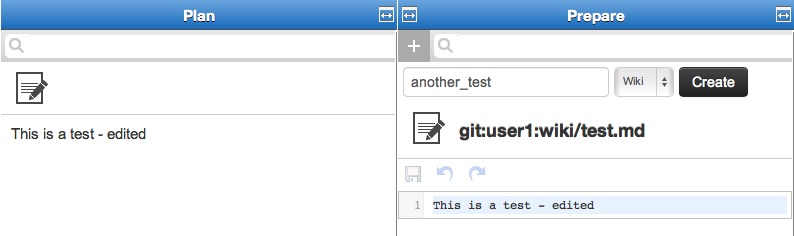
- To create a new document, click on the icon
 on the left of the search field of the Prepare column. You should see a new menu, where you can enter the name for the new document (e.g. another_test). You have to select "Wiki" as the document type in the pull down menu next to the new document's name. Finally, you should click the Create button. To edit the newly created document, you have to first load it in the Prepare column as described previously.

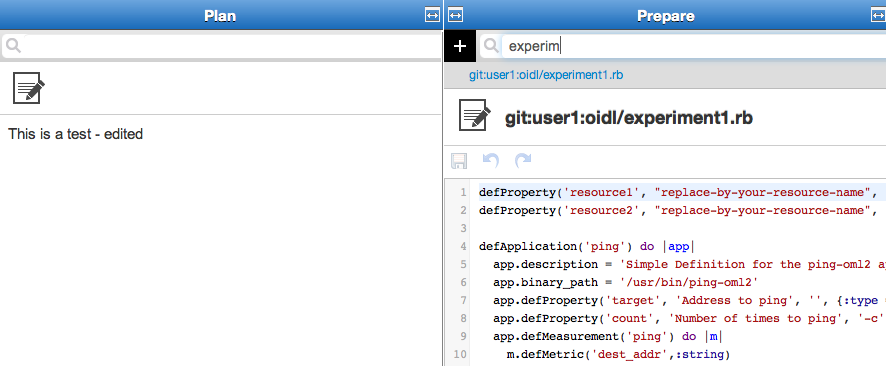
- To load and edit an existing experiment file description, just follow the same steps as above for loading/editing a document, but this time make sure to select an experiment file which have a .rb extension in the pull-down list.

- To create a new experiment file description, just follow the same steps as above for creating a new document, but make sure to select "Ruby" as the document type in the pull down menu next to the new experiment file name.

Execute
This column allows you to start a new instance of an experiment, and to monitor the execution of that instance.
- To start a new instance of an experiment, select and load the experiment in the Prepare column as described above. If required you may want to edit and save that experiment (still from the Prepare column as described above.

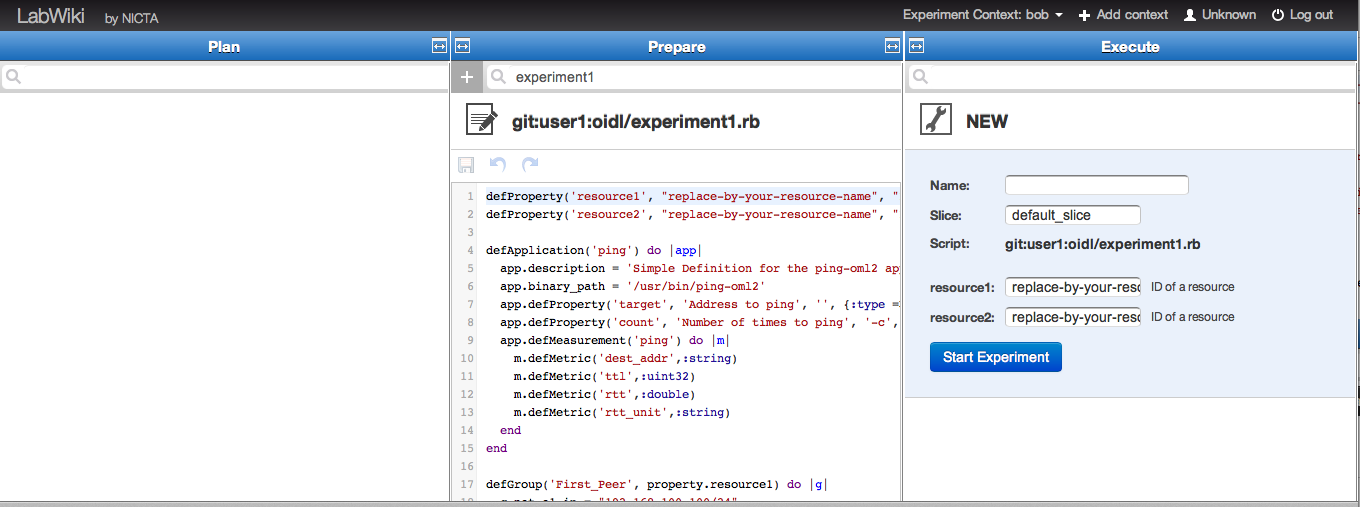
- Then drag the icon next to the experiment's name from the Prepare column, and drop it in the Execute column. You should now see in the Execute column some information about this new experiment instance.
- In addition to standard experiment parameters (e.g. Name, Slice, Scripts), all configurable experiment properties are displayed in the Execute column (e.g. resource1 in the example below), where you can change their default values.
- You may want to give a name to this experiment instance in the Name field within the Execute column, or leave that field blank to let LabWiki pick a unique name for you.
- You can start this new experiment instance by clicking on the "Start Experiment" button.

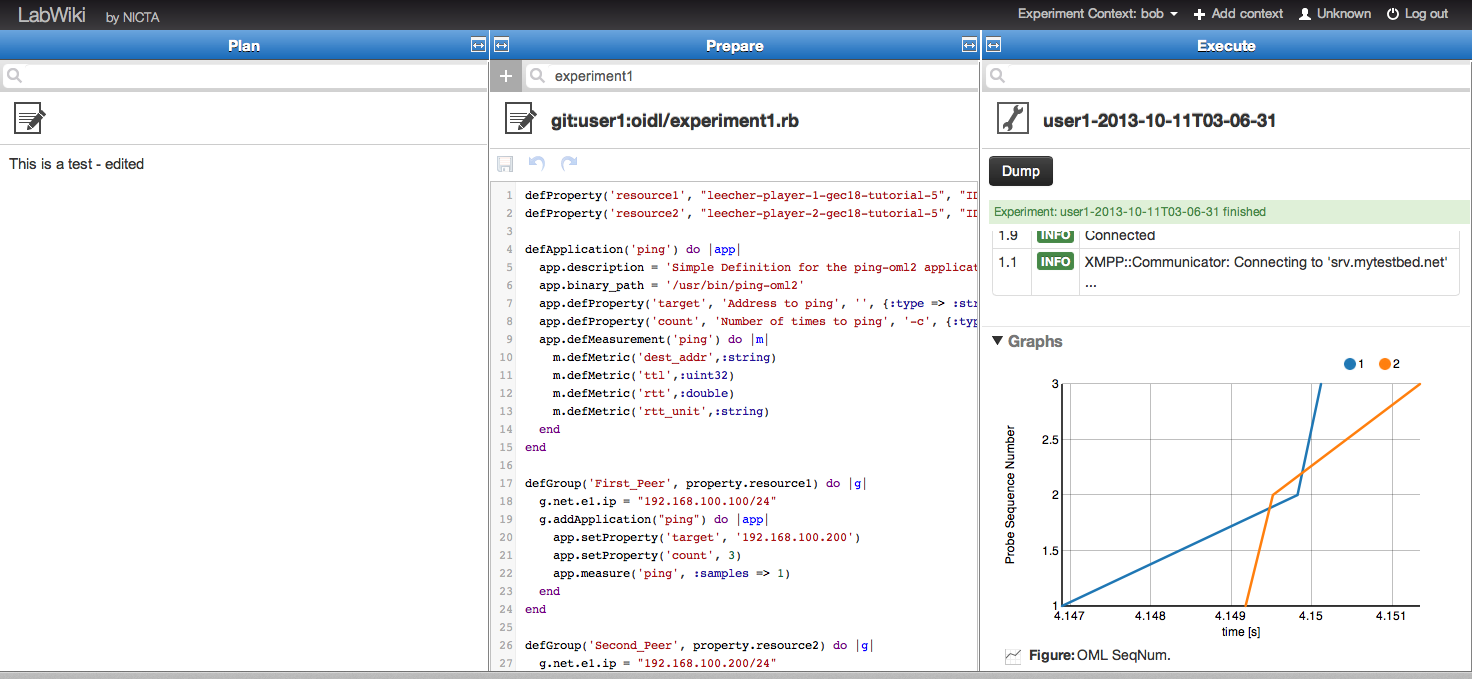
- Once you start this new experiment instance, the Execute column will show information about the running experiment, such as detailed logs and any defined graphs (you may have to scroll down to the bottom of the Execute column to see these graphs).


- When the experiment instance has finished running, you may copy a plotted graph from the Execute column back to the Plan column, in order to include it to your report or written records. To do so, drag the icon
 located below the graph (next to its title) and drop it just after the line of text of your choice in the Plan column

OEDL
OEDL is a domain-specific language for the description of an experiment's execution. OEDL is based on the Ruby language, but provides its own set of experiment-oriented commands and statements. As a new OEDL user you do not need to know Ruby to write experiment description. You can get started with only a few OEDL commands and syntax, as shown in the next steps in this tutorial. However, some general entry-level programming knowledge would be a plus.
An OEDL experiment description is composed of 2 main parts:
- a first part where we declare the resources that we will use in the experiment, such as applications or computing nodes, and some configurations that we would like to apply to these resources.
- a second part where we define the events that we would like to re-act to during the experiment's execution, and the associated tasks we would like to execute when these events occur.
A very simplistic OEDL experiment would look like this:
# Comment: This is the 1st section, where we declare resources and configurations
#
defProperty('my_resource', "leecher-player-1-gec18-tutorial-5", "ID of a resource")
defGroup('Actor', property.my_resource)

# This is the 2nd part, where we define events and associated tasks
#
onEvent(:ALL_NODES_UP) do |event|
  info "This is my first OEDL experiment"
  group('Actor').exec('/bin/hostname')
  after 5.seconds do
    Experiment.done
  end
end
The list and description of all OEDL commands are available on the OEDL Documentation Page for OMF6.
<-- Back to Main Tutorial Page | Next to Experiment 1 -->
Help & Additional Resources
Attachments (20)
- labwiki_login_1.png (126.8 KB) - added by 11 years ago.
- labwiki_login_2.png (92.3 KB) - added by 11 years ago.
- labwiki_login_3.png (70.5 KB) - added by 11 years ago.
- labwiki_using_1.png (22.0 KB) - added by 11 years ago.
- labwiki_using_2.png (25.4 KB) - added by 11 years ago.
- labwiki_icon_1.png (6.5 KB) - added by 11 years ago.
- labwiki_icon_2.png (7.4 KB) - added by 11 years ago.
- labwiki_using_3.png (21.9 KB) - added by 11 years ago.
- labwiki_using_4.png (26.8 KB) - added by 11 years ago.
- labwiki_icon_3.png (6.3 KB) - added by 11 years ago.
- labwiki_using_5.png (62.7 KB) - added by 11 years ago.
- labwiki_using_6.2.png (35.0 KB) - added by 11 years ago.
- labwiki_using_6.png (35.0 KB) - added by 11 years ago.
- labwiki_using_7.png (68.4 KB) - added by 11 years ago.
- labwiki_using_8.png (116.5 KB) - added by 11 years ago.
- labwiki_icon_4.png (7.0 KB) - added by 11 years ago.
- labwiki_using_9.png (195.2 KB) - added by 11 years ago.
- labwiki_using_10.png (166.5 KB) - added by 11 years ago.
- labwiki_using_11.png (185.4 KB) - added by 11 years ago.
- LW-OEDL-Scope.pdf (115.0 KB) - added by 11 years ago.
Download all attachments as: .zip