
| Version 15 (modified by , 10 years ago) (diff) |
|---|
ExoGENI/GIMI Tutorial
Design/Setup

In this part of the tutorial we give a brief overview on the experiment workflow.
GIMI is providing experimenters with a set of tools that will aid them in allocating GENI
resources, executing experiments, and performing
measurements while these experiments are running. In addition, the GIMI tools will allow
experimenters to analyze and visualize measurement data. Finally, a federated set of iRODS
servers provides an archival service.
The figure below illustrate what we describe as the experiment workflow.
During the tutorial we will walk through the single steps of this workflow with the goal to
have experimenters apply this workflow to their own experiments.
Topology
The image below illustrates the ExoGENI topology that we will create within the scope of this tutorial. The experiment described above will be executed on the basis of this topology.
In Section 1.Reserving Resources, we will go through the process of setting up and obtaining a slice that represents this topology.

The routing in this topology is set up as follows:
| Origin Node | Destination Net | Via IP | Node |
| A | 192.168.1.0/24 | 192.168.4.10 | B |
| 192.168.2.0/24 | 192.168.4.10 | B | |
| 192.168.3.0/24 | 192.168.5.12 | C | |
| 192.168.4.0/24 | 192.168.4.11 | A | |
| 192.168.5.0/24 | 192.168.5.11 | A | |
| 192.168.6.0/24 | 192.168.5.12 | C | |
| B | 192.168.1.0/24 | 192.168.1.10 | B |
| 192.168.2.0/24 | 192.168.2.10 | B | |
| 192.168.3.0/24 | 192.168.1.13 | D | |
| 192.168.4.0/24 | 192.168.4.10 | B | |
| 192.168.5.0/24 | 192.168.4.11 | A | |
| 192.168.6.0/24 | 192.168.2.12 | C | |
| C | 192.168.1.0/24 | 192.168.3.13 | D |
| 192.168.2.0/24 | 192.168.2.12 | C | |
| 192.168.3.0/24 | 192.168.3.12 | C | |
| 192.168.4.0/24 | 192.168.5.11 | A | |
| 192.168.5.0/24 | 192.168.5.12 | C | |
| 192.168.6.0/24 | 192.168.6.12 | C | |
| D | 192.168.1.0/24 | 192.168.1.13 | D |
| 192.168.2.0/24 | 192.168.3.12 | C | |
| 192.168.3.0/24 | 192.168.3.13 | D | |
| 192.168.4.0/24 | 192.168.1.10 | B | |
| 192.168.5.0/24 | 192.168.3.12 | C | |
| 192.168.6.0/24 | 192.168.3.12 | C | |
| E | 192.168.1.0/24 | 192.168.6.12 | C |
| 192.168.2.0/24 | 192.168.6.12 | C | |
| 192.168.3.0/24 | 192.168.6.12 | C | |
| 192.168.4.0/24 | 192.168.6.12 | C | |
| 192.168.5.0/24 | 192.168.6.12 | C | |
| 192.168.6.0/24 | 192.168.6.14 | E |
1. Reserve Resources
1.1 Login to the GENI Portal
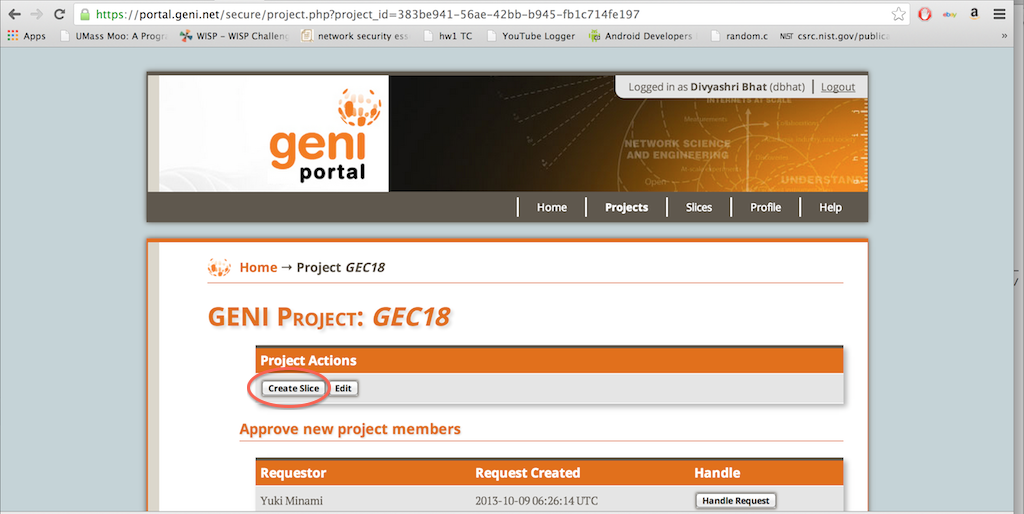
1.2 Select Project and Create Slice
Create Slice

Give the slice a unique name. Preferably something with your username in it. e.g dbhatlabwiki
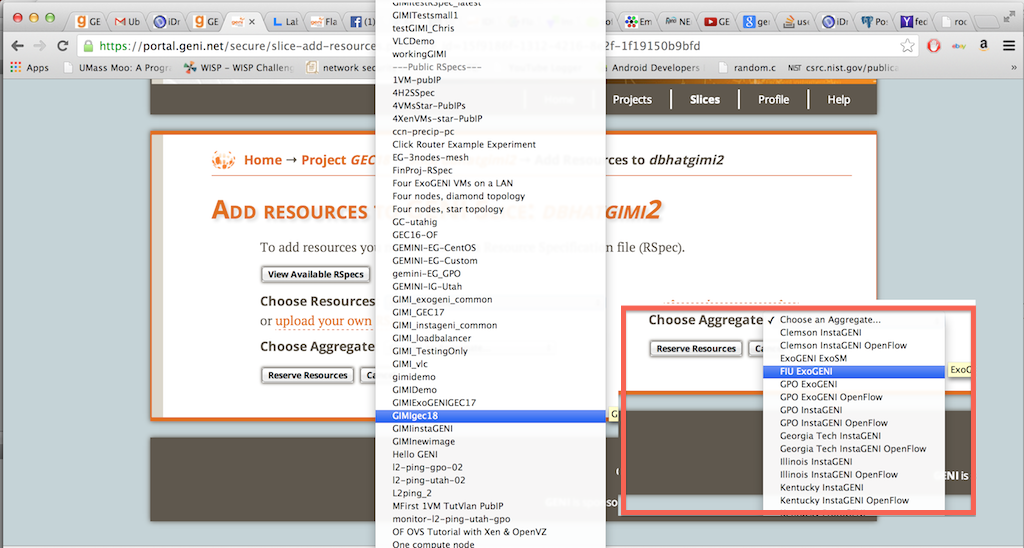
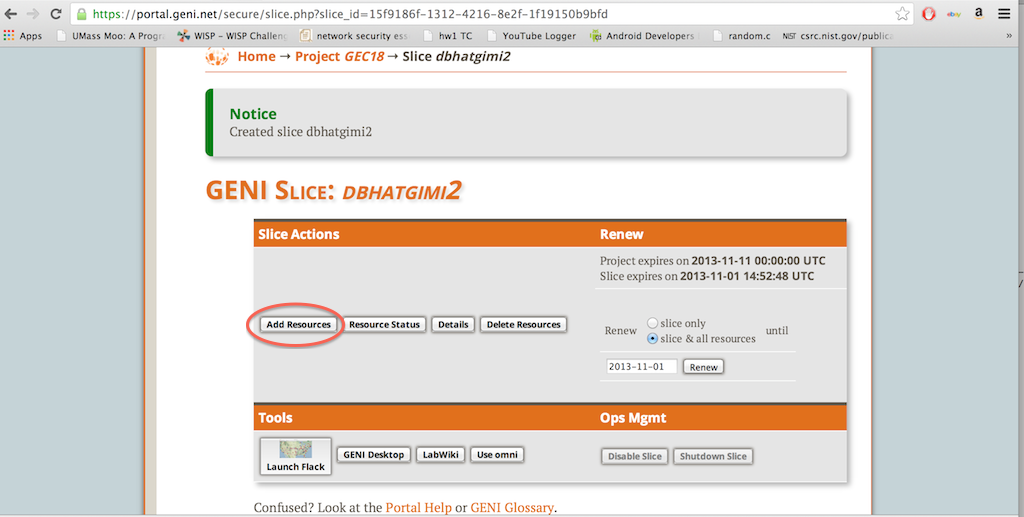
1.3 Click on Add Resources and select RSpec
Select RSpec from drop down list under Choose Resources. For this tutorial we already have an RSpec created for you. Here, select GIMIgec18.
You can upload your own RSpec.
Here you will need to select the ExoGENI racks assigned to you for the tutorial. This assignment is only done so that we can distribute VMs across different ExoGENI racks. Outside of this tutorial, you can use any of the following racks:
- FIU ExoGENI
- GPO ExoGENI
- ExoGENI ExoSM
- UH ExoGENI
- RENCI ExoGENI
Click on Reserve Resources
1.4 Query for resources
Click on your slice name at the top and click on Resource Status. Once you see a READY on your resources, your slice is ready for experiments. You can refresh the page until you see READY.
Wait until ready

2. Configure iRODs
The iRODs or Integrated Rule-Oriented Datasystem is a directory structure used to archive all experiment related data such as scripts, manifest RSpecs, experiment results and so on.
Please click on this link to learn more iRODs.
2.1 Create iRODs account
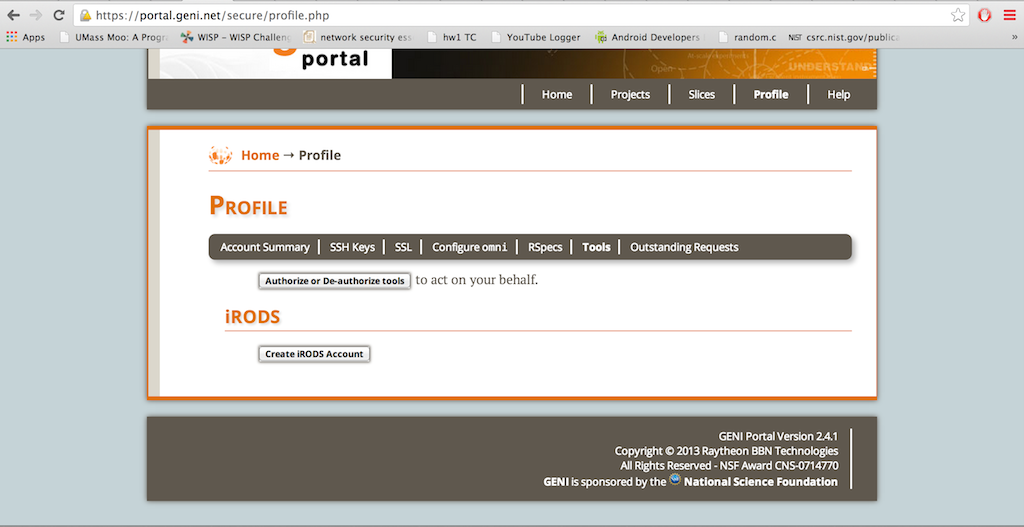
Login to your GENI Portal account and Click on the Profile tab on the top right corner of the page. Click on Tools.
At the bottom of the page, click on the Create iRODs button
.

You will be redirected to another page with your iRODs Environment and also your temporary iRODs account password.
Important: Make sure you record your iRODS password. How to chnage your password is explained here.
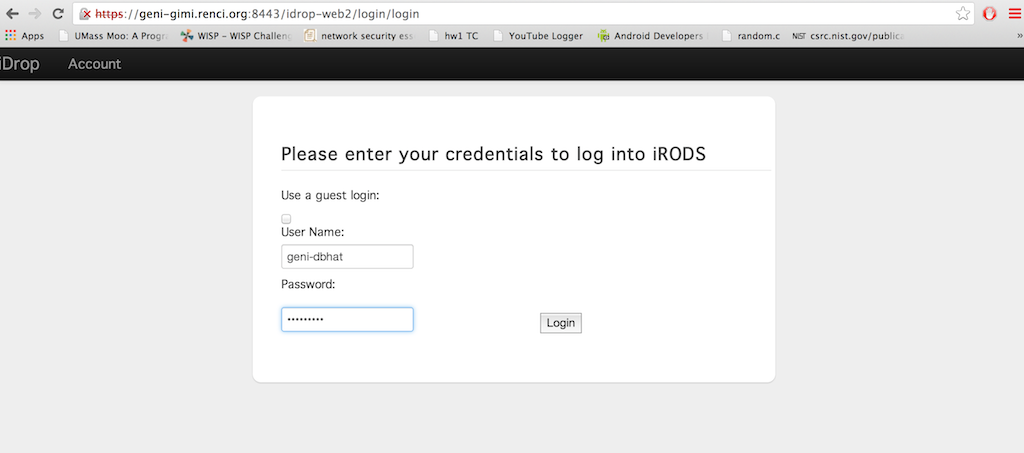
2.2 Using iDrop
iDrop is the Web-interface provided for you to view your iRODs directory structure and files. You can view, upload and download files through iDrop. For LabWiki experiments, iDrop will have all your measurement related data and experiment Scripts in your folders.

If you are ready to run the Experiment go to Next Step: Execute Experiment
Attachments (8)
- Portal5.png (287.5 KB) - added by 10 years ago.
- Portal6.png (200.1 KB) - added by 10 years ago.
- Portal7.png (245.1 KB) - added by 10 years ago.
- idrop1.png (100.4 KB) - added by 10 years ago.
- Portalgec18.png (264.8 KB) - added by 10 years ago.
- Portalgec18_3.png (374.9 KB) - added by 10 years ago.
- Portalgec18_5.png (334.1 KB) - added by 10 years ago.
- Portalgec18_4.png (196.2 KB) - added by 10 years ago.
Download all attachments as: .zip