
| Version 12 (modified by , 10 years ago) (diff) |
|---|
OpenFlow Load Balancer Tutorial

1. Obtain resources
For this experiment we are going to use ExoGENI resources, we will need:
- 6 VM (KVM): 2 (inside, outside) act as regular hosts; 2 (left, right) as regular switches; 2 (aggregator, switch) as OpenFlow switches (we will only program one: switch)
If you are attending a Tutorial, the resources might have already been reserved for you, check with your instructor and skip this step.

The various parts of the diagram are as follows:
- Inside and Outside Nodes: These nodes can be any ExoGENI Virtual Nodes.
- Switch: This node is a Linux host running Open vSwitch. Your Load Balancing OpenFlow Controller will be running on this node as well. This is the main node that you will be working on.
- Traffic Shaping Nodes (Left and Right): These are Linux hosts with two network interfaces. You can configure netem on the two traffic shaping nodes to have differing characteristics; the specific values don’t matter, as long as they are reasonable. Use several different delay/loss combinations as you test your load balancer.
- Aggregator: This node is a Linux host running Open vSwitch with a switch controller that will cause TCP connections to “follow” the decisions made by your OpenFlow controller on the Switch node. You will not need to change anything on this node, you only need to implement the OpenFlow controller on node "Switch".
You can use any reservation tool you want to reserve this topology:
- For Omni or Flack you can use the RSpec that is published at: http://emmy9.casa.umass.edu/GEC-19/openflow-loadbalancer-kvm.rspec and any ExoGENI AM
- At the GENI Experimenter Portal there is a public RSpec called "GEC19LoadBal" that you can use, and either of the ExoGENI AMs
Look at the Prerequisites for Tutorials about reserving resources.
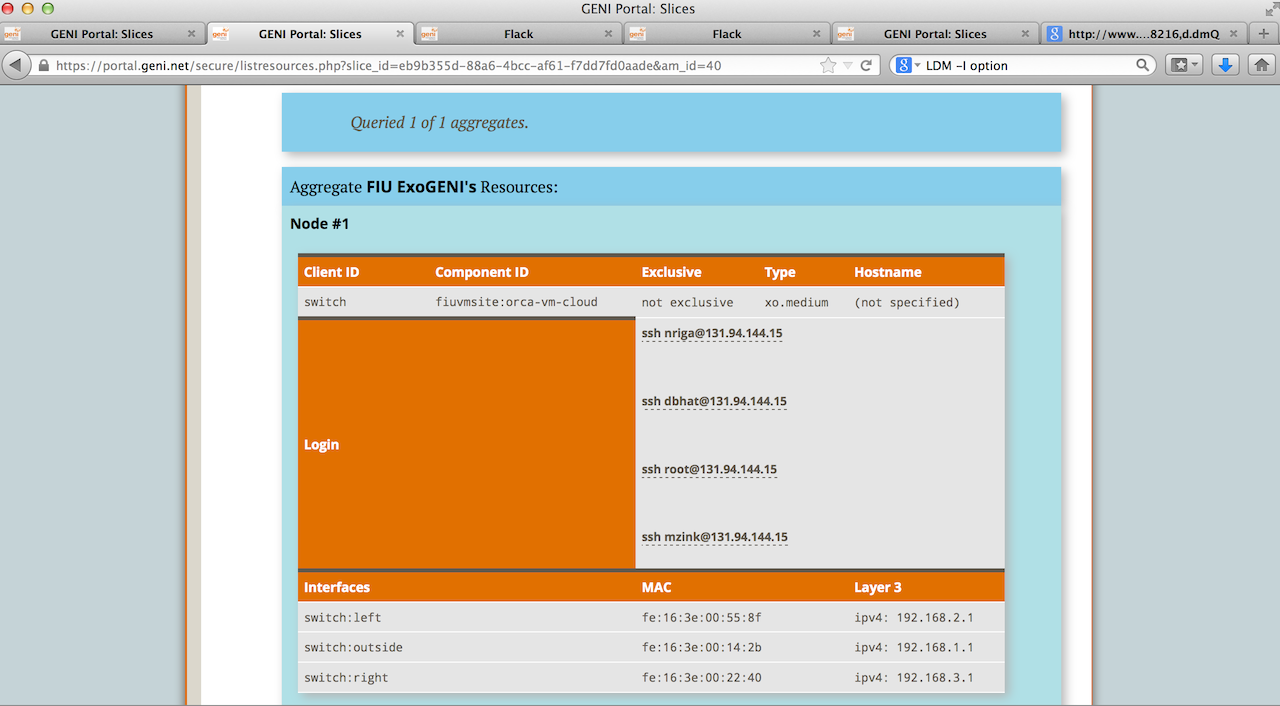
1.1 login to Nodes Switch and Aggregator
2. Configure iRODs
The iRODs or Integrated Rule-Oriented Datasystem is a directory structure used to archive all experiment related data such as scripts, manifest RSpecs, experiment results and so on.
Please click on this link to learn more about iRODs.
2.1 Create iRODs account
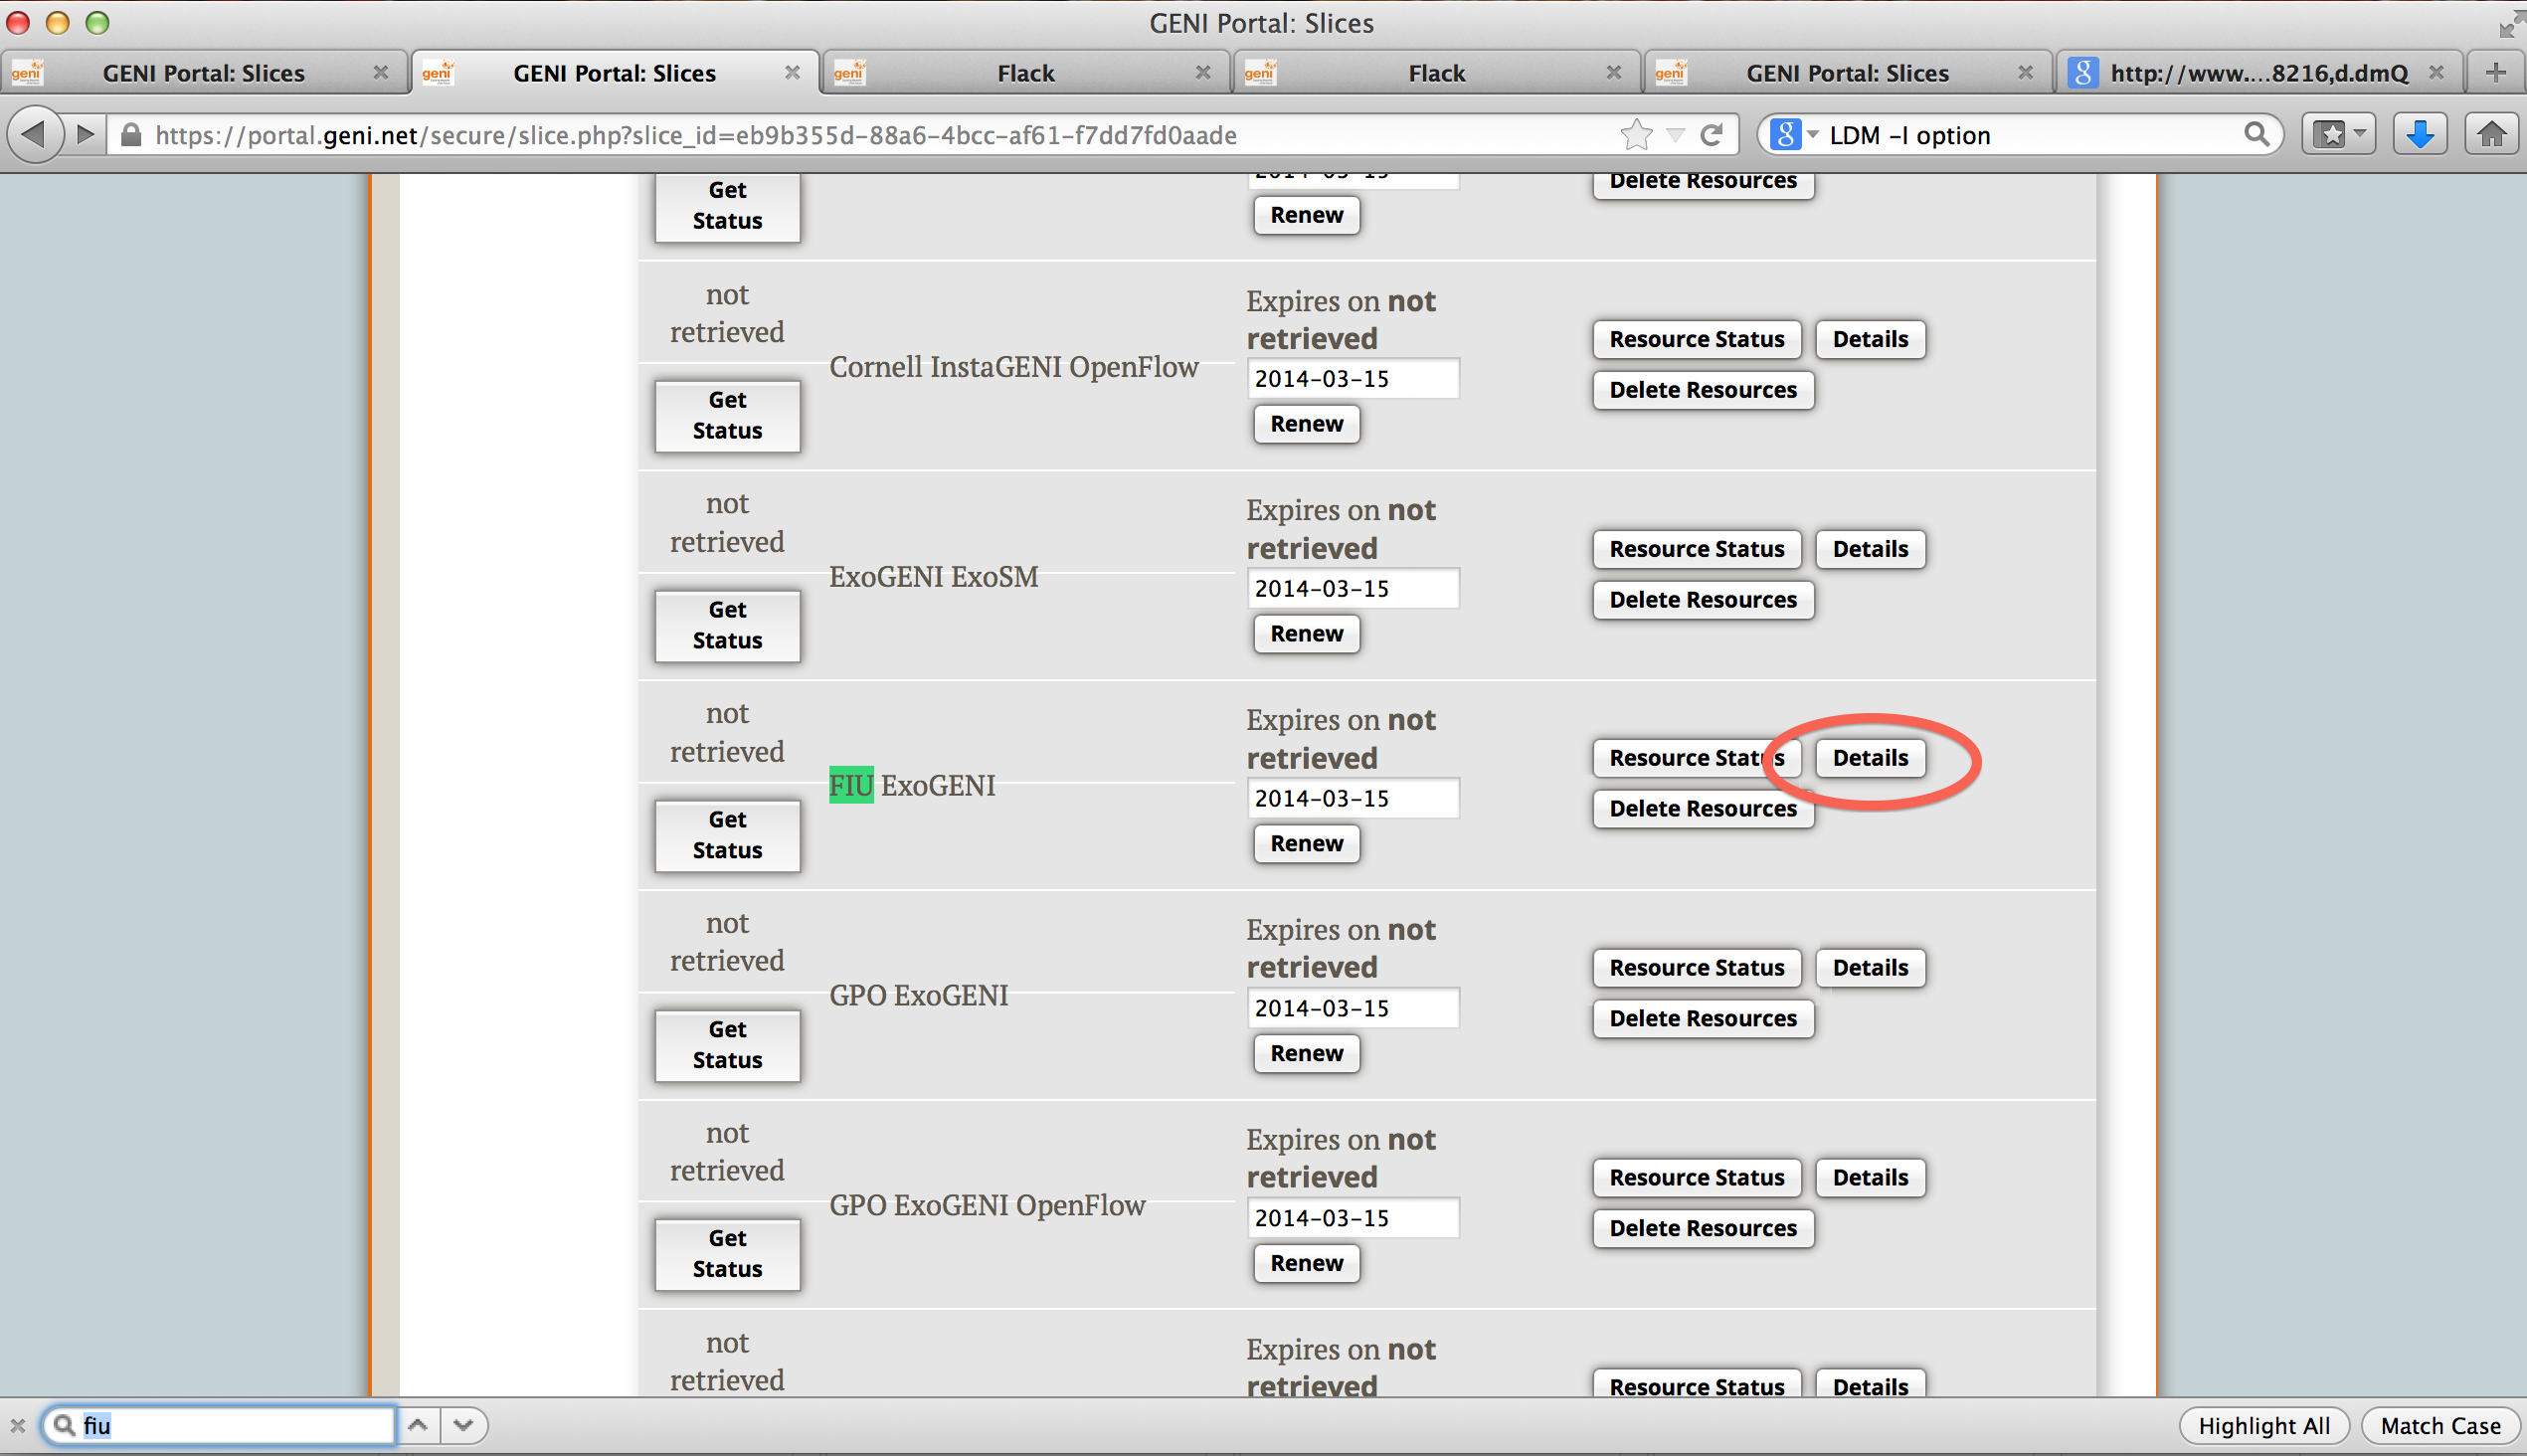
Login to your GENI Portal account and Click on the Profile tab on the top right corner of the page. Click on Tools.
At the bottom of the page, click on the Create iRODs button.

You will be redirected to another page with your iRODs Environment and also your temporary iRODs account password.

Important: Make sure you record your iRODS password. How to change your password is explained here.
2.2 Using iDrop
iDrop is the Web-interface provided for you to view your iRODs directory structure and files. You can view, upload and download files through iDrop. For LabWiki experiments, iDrop will have all your measurement related data and experiment Scripts in your folders.
Introduction
Next: Run Experiment
Attachments (3)
- OpenFlowLBExo.png (63.8 KB) - added by 11 years ago.
- FindAM.png (666.0 KB) - added by 10 years ago.
- LoginAM.png (257.6 KB) - added by 10 years ago.
Download all attachments as: .zip