- Login to the GENI Portal
- Click on the `Profile tab` link on the top of your
screen. Then click on the `Configure omni` tab under
`PROFILE`.
|

Figure 2-1 Click on the Configure omni tab under
Profile.
|
- Click on the `Download your omni data` button under step 2.
|

Figure 2-2 Download your omni data under step 2.
|
- If this is the first time you try to access your GENI
certificate you will have to generate one. Click on the
`generate a certificate` link.
|

Figure 2-3 Click on Generate a certificate.
|
- Unless you really understand how SSL certificates
work, choose the simple option. Click on the `Generate
Combined Certificate and Key File` button and then click on
`Close`. You will be taken back to the download page with
the warning. Reload the page to enable the download
button.
|

Figure 2-4 Click on Generate Combined Certificate and Key File.
|
- If you are a member of more than one project, select
which project you would like to be the default one for
running experiments in GENI. You can always change the
project that is used by the `-r` command line option of
Omni. Then click on `Download your omni data`.
|

Figure 2-5 Click on Download your omni data.
|
- The bundle will be saved at
~/Downloads/omni-bundle.zip
- Open a terminal window and type:
omni-configure The cert and key files you need will
be installed in the appropriate folders.
|
}}}
== 3. Obtain Resources ==
=== 3.1 Create a slice ===
Create a slice using `omni` and the slice name of your choice. From now on that slice name will be referred to as `SLICENAME`.
{{{
$ omni createslice SLICENAME
}}}
=== 3.2. Load a simple topology in Flack ===
For this exercise, we will edit an existing RSpec file. Start by loading this predefined topology into Flack.
{{{
#!html
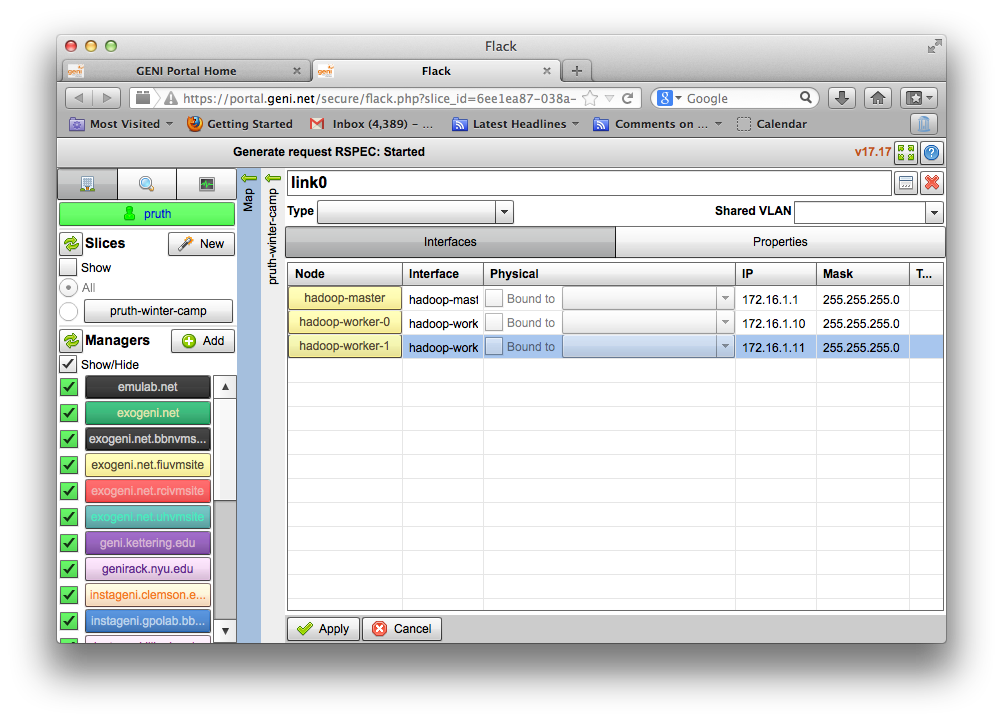
- Click on the the i button on each node (see figure) to manipulate details of the node configuration.

|
When you open the node information, you should see options like those
in the figure. The controls available to you will vary depending on the
types of the aggregate manager and the component, but many features are
widely available throughout GENI.
|
|
Figure 3-3 Edit the nodes
|
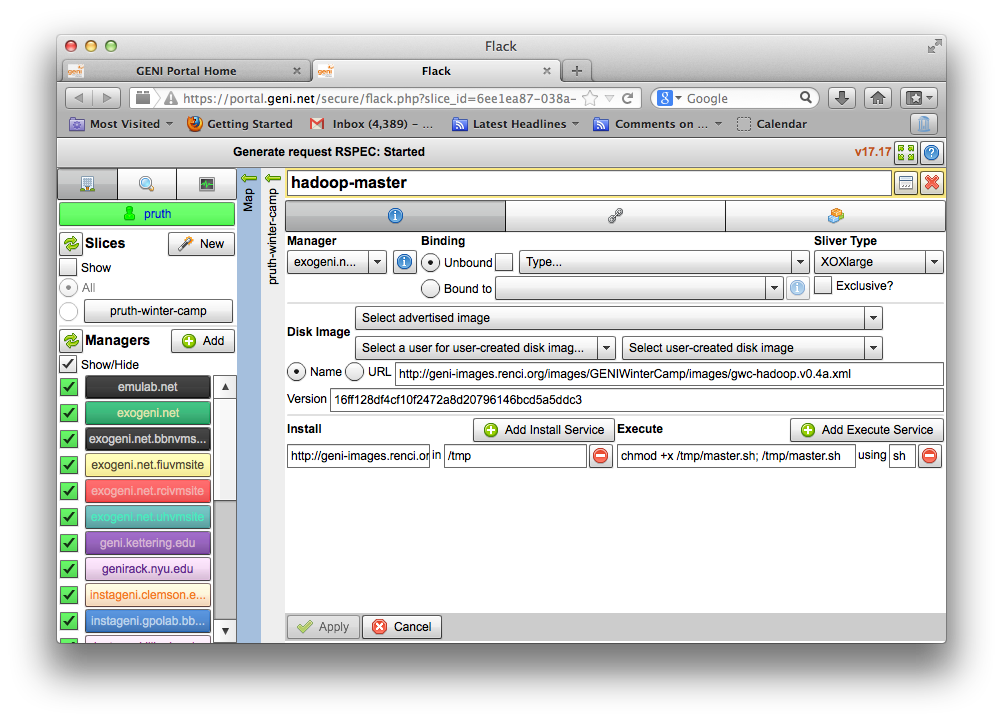
- The way we will request installation of the proper software and execution
of our experiment is to specify a custom image and then add install and execute services to run on that image.
|
- For each node, fill in the following fields using the values specified in the tables below:
- specify a "Disk Image Name" and "Disk Image Version",
- click "+ Add Install Service" and fill in the location to download from and the location on the node to install it,
- click "+ Add Execute Service" button to request that the appropriate command be executed at boot time.
- Complete the various fields using the appropriate information from the tables below.
- When you are done, please choose Apply.
- Repeat for each of the three nodes and the link.
 | Be very careful when entering this information -- these commands will not
be executed yet, so it will be some time before you will see any relevant
error messages if there is a mistake here. |
|
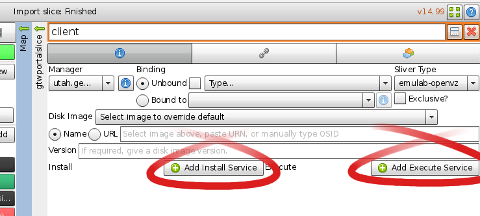
Figure 3-4 Add the install and execute services
|
|
|